O4 Lite Compatibility and Installation Issues with F405 AIO
Default Installation Instructions
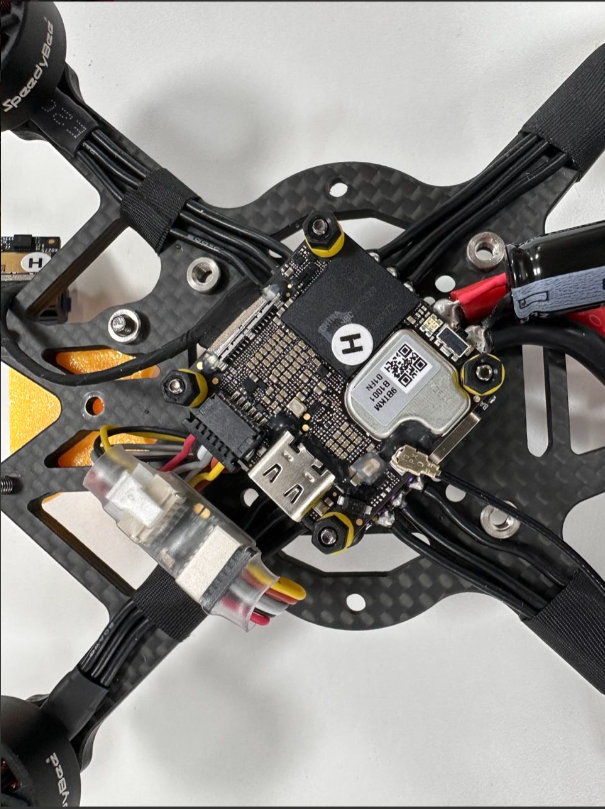
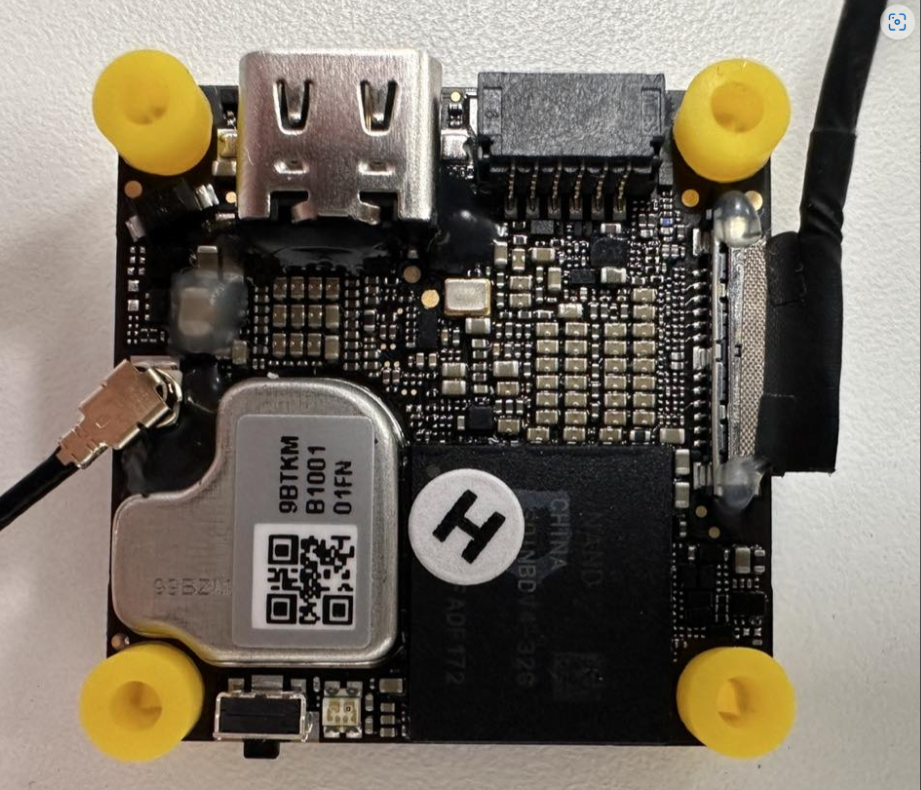
By default, the F405 AIO is secured using M2 12mm screws. If you need to install an O4 video transmitter, you can use the included M2×20mm screws for a tower-style mount. The package also includes four M2×6.6mm silicone dampers, which can be used to replace the O4 transmitter’s original black dampers with yellow ones.
Installation Steps
Replacing the Mounting Screws
Replace the original M2×12mm screws of the AIO with the included M2×20mm screws from the package.

- Installing the Silicone Dampers
Thread the included M2 silicone dampers from the package onto the screws used to secure the AIO.
Securing the O4 Video Transmitter
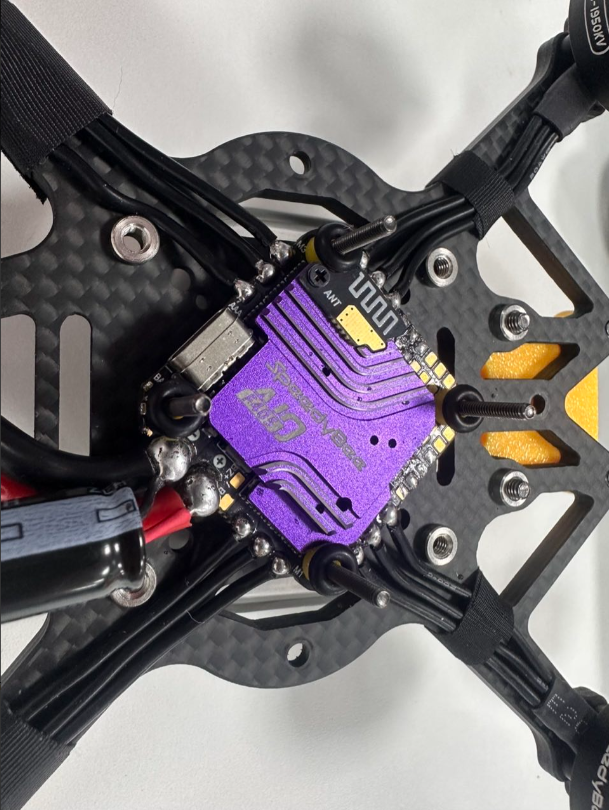
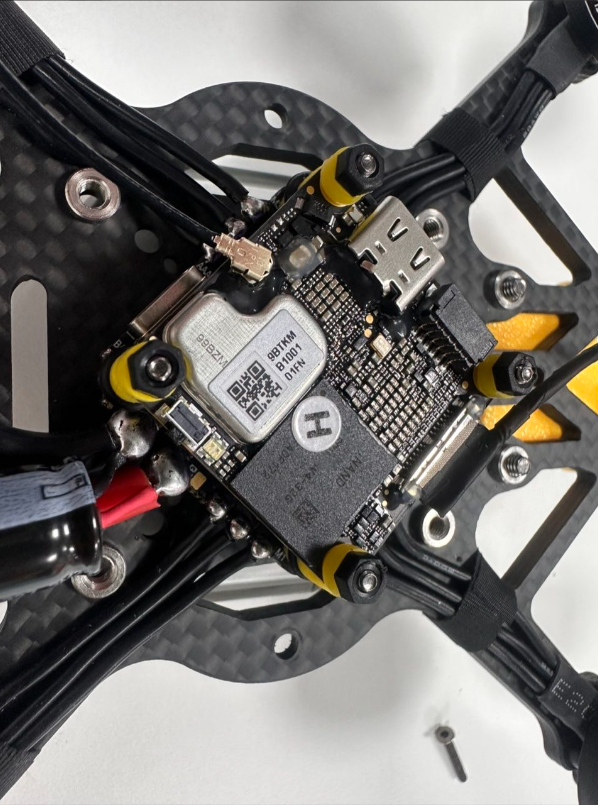
Mount the O4 video transmitter on top of the AIO and secure it using the included M2 nuts from the package.
Note: Ensure that the 6-pin connector of the O4 video transmitter aligns with the 6-pin connector on the F405 AIO to facilitate proper wiring connections.
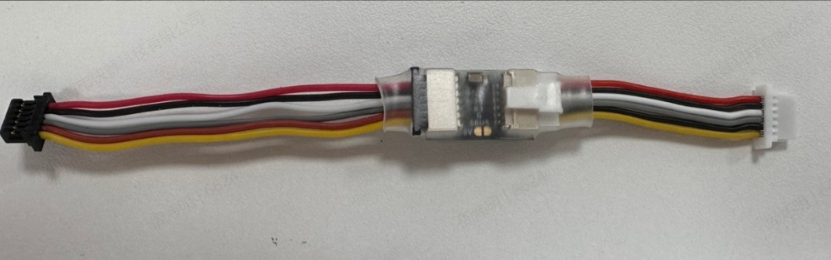
- Installing the BEC Module
- Take out the BEC module and the 6-pin cable included in the package.
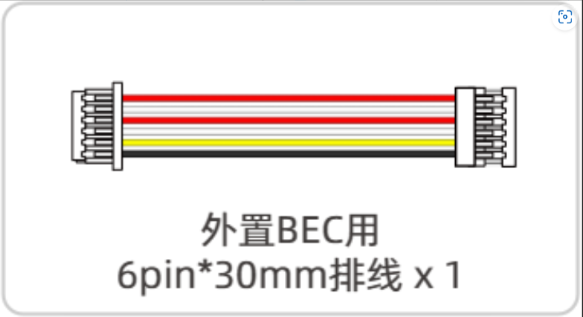
- Insert the end of the 6-pin cable with the latch into the slot on the BEC module, and connect the 6-pin cable from the O4 video transmitter to the other end of the BEC module.
- Connecting the AIO and O4 Video Transmitter
- Insert the white 6-pin connector into the 6-pin port on the F405 AIO.
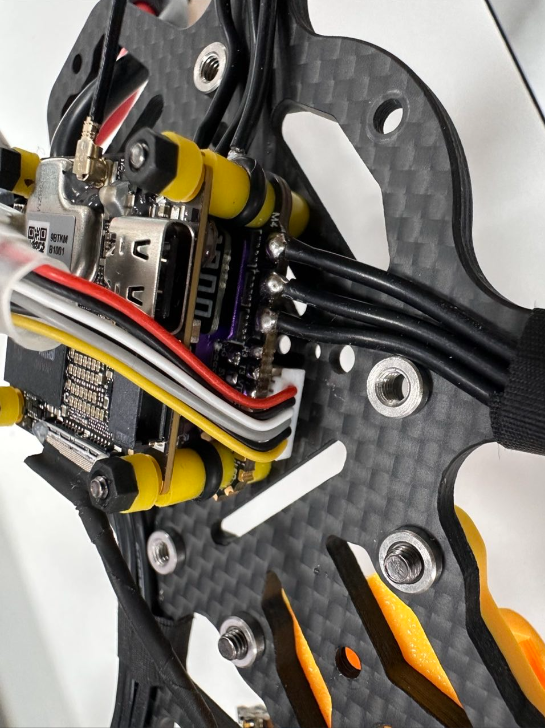
- Insert the black 6-pin connector into the 6-pin port on the O4 video transmitter.
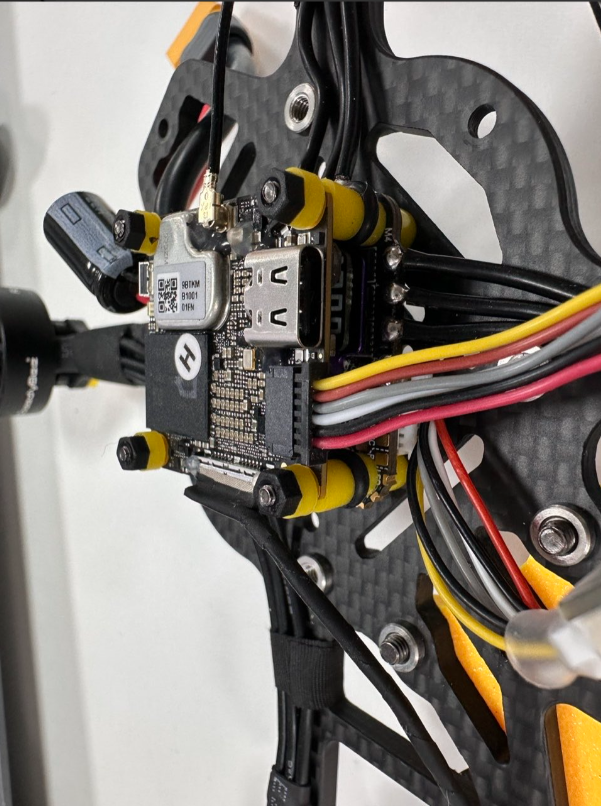
Installation Complete
After completing the above steps, the installation of the O4 video transmitter is complete.O4 Lite Compatibility and Installation Issues with F405 AIO