BEE35 Firmware Flashing and Configuration File Import Tutorial
The following tutorial explains how to restore the BEE35 to the most stable factory firmware version and reset it to factory settings:
Flashing Firmware with Betaflight (BF)
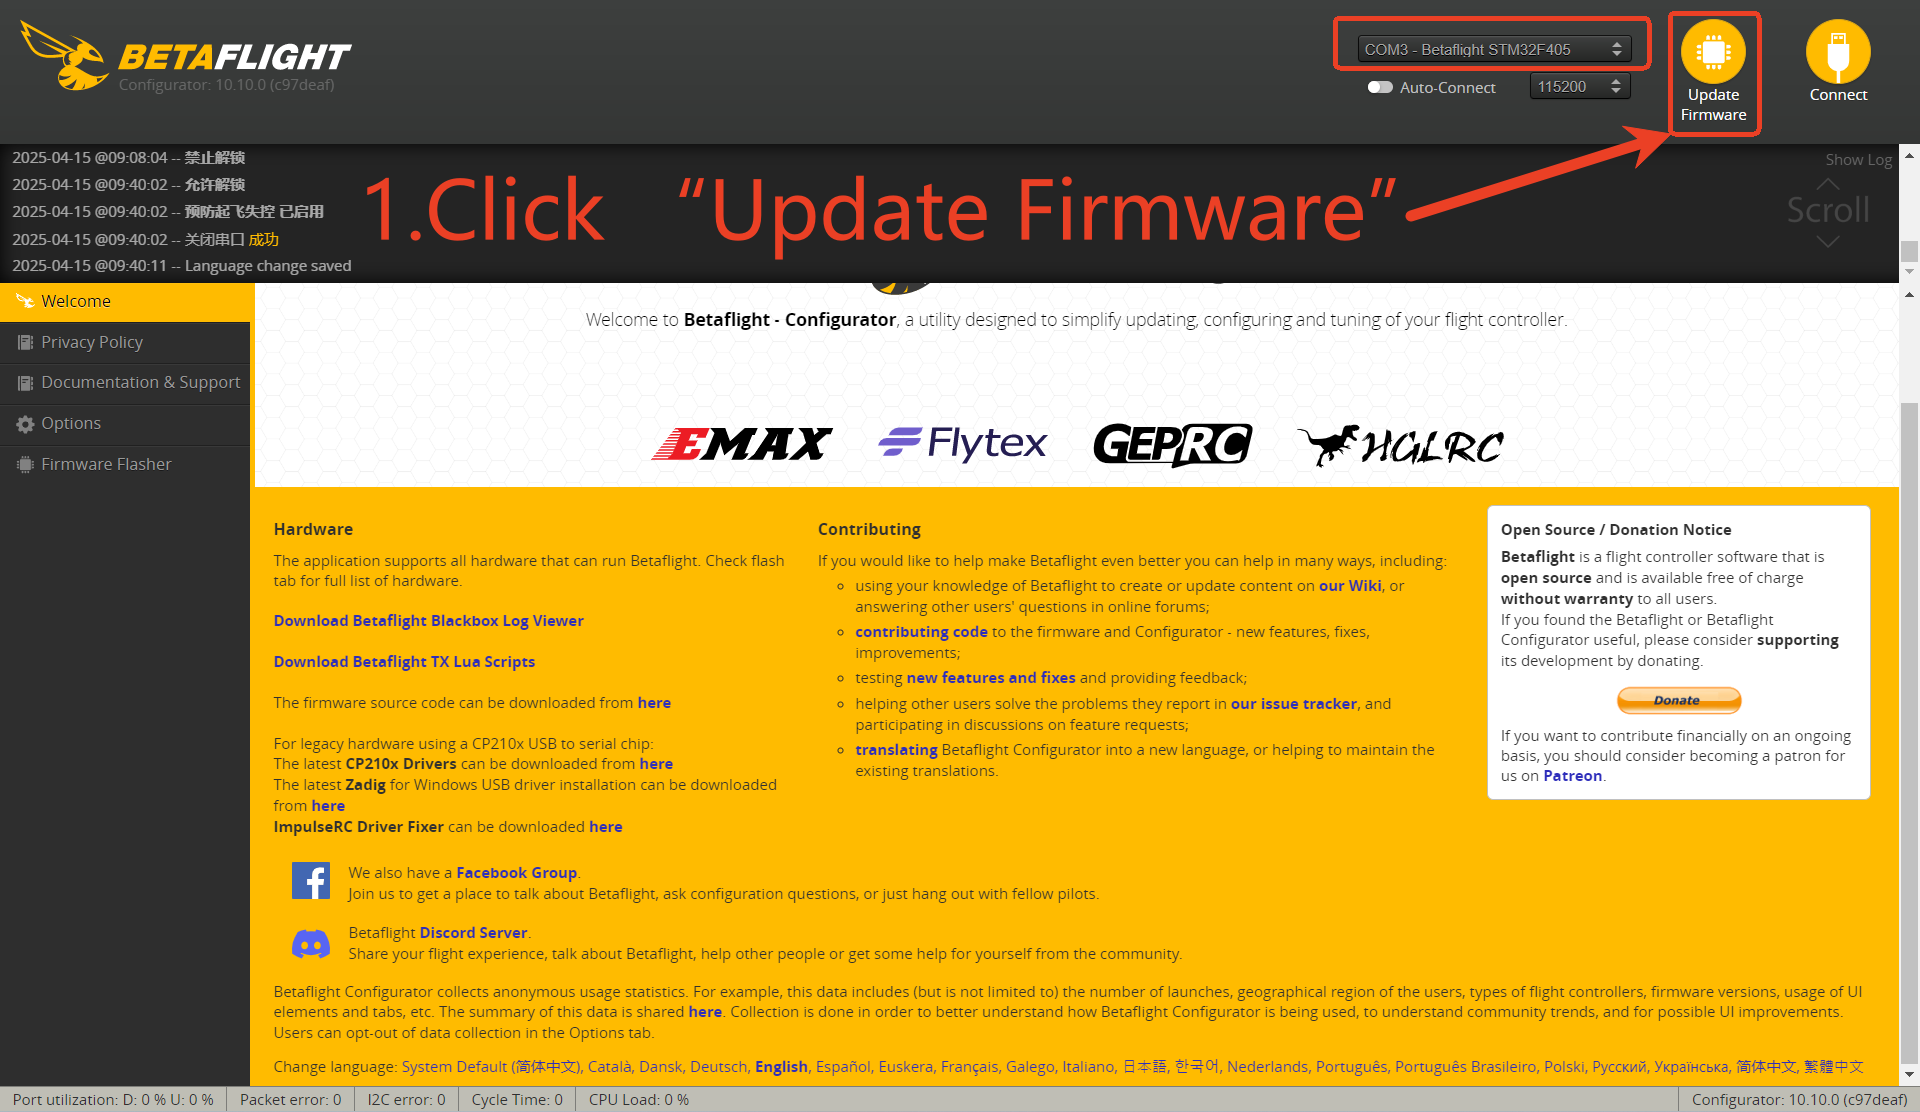
- Connect the drone to your computer and open the Betaflight Configurator. Once the configurator detects the flight controller, click on “Update Firmware.” The tool will then automatically switch to the firmware flashing interface.
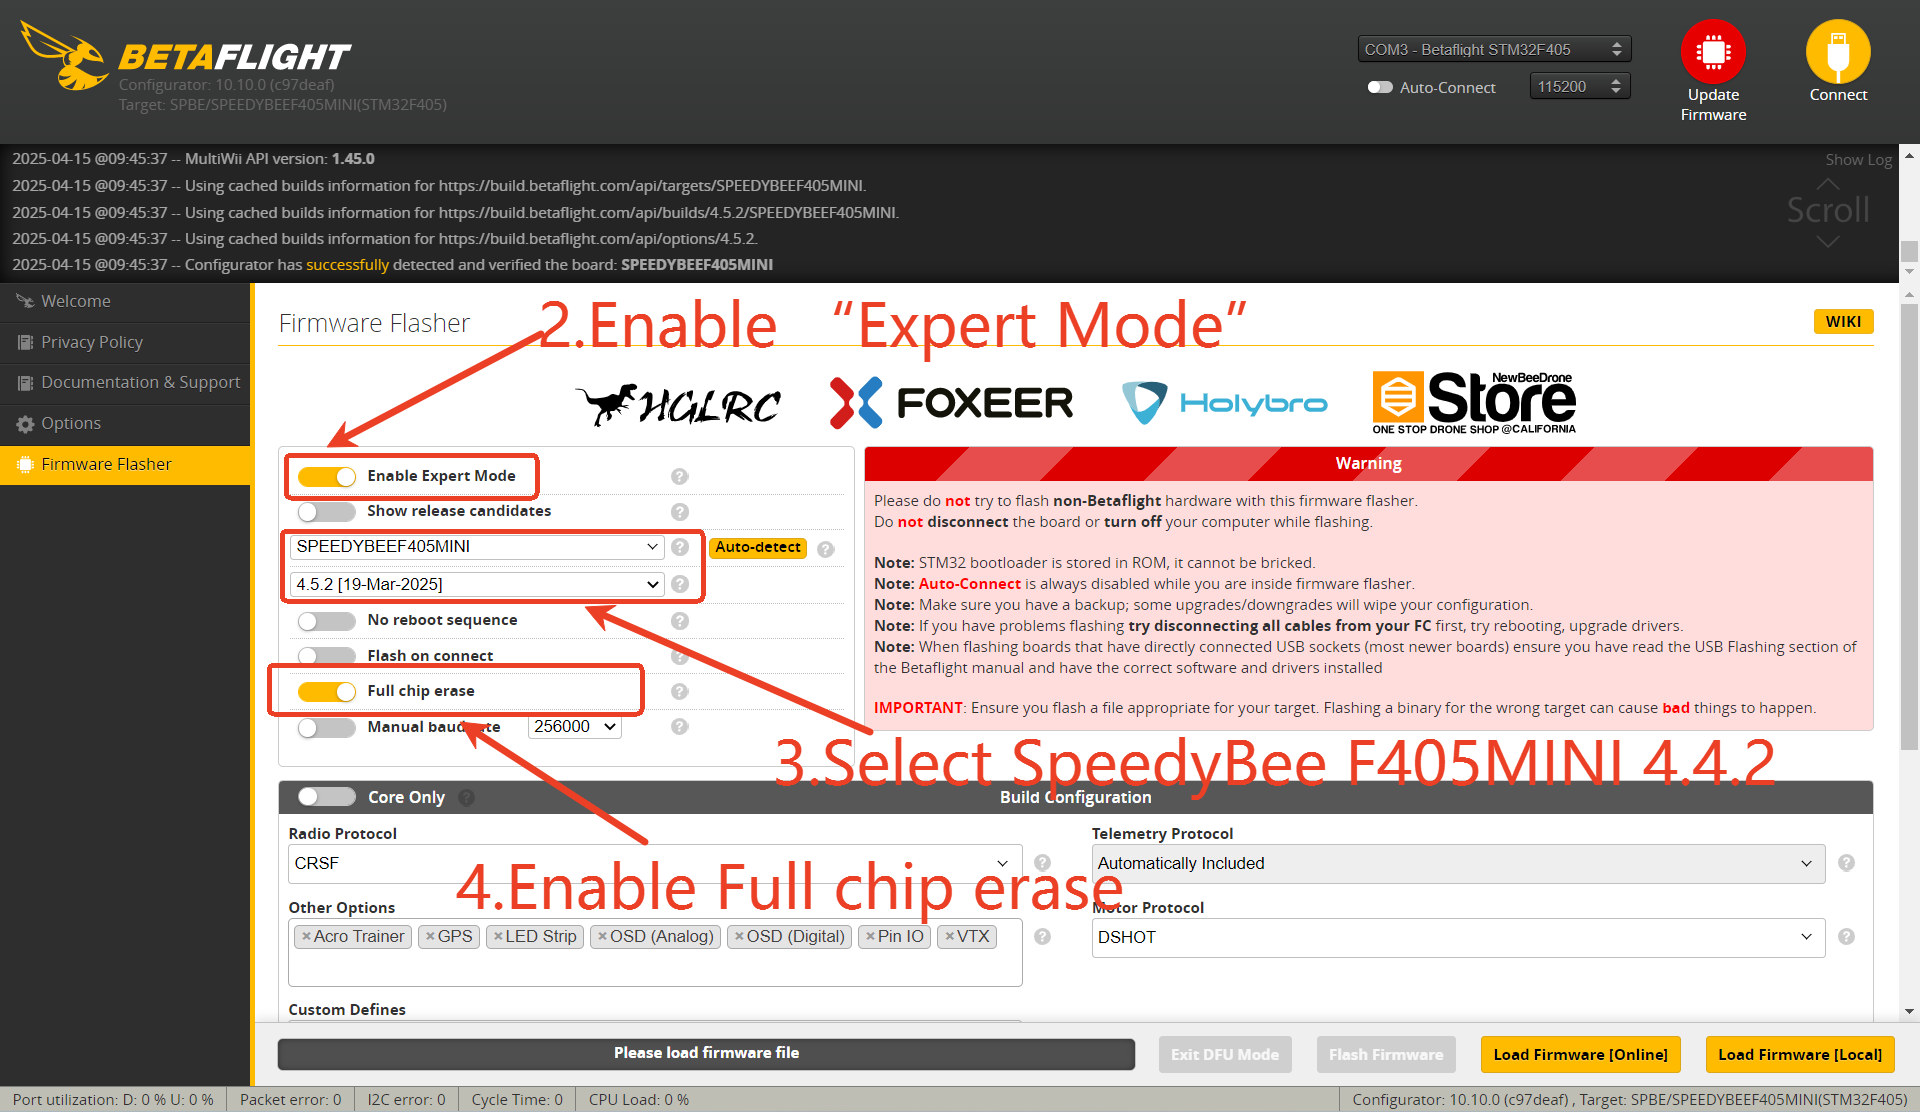
- Enable “Expert Mode.”
- Select SpeedyBee F405MINI and choose firmware version 4.4.2 (The configuration file provided later is specifically for version 4.4.2, so it is essential to choose this version.)
- Enable Full Chip Erase (This option will erase all previous settings.)
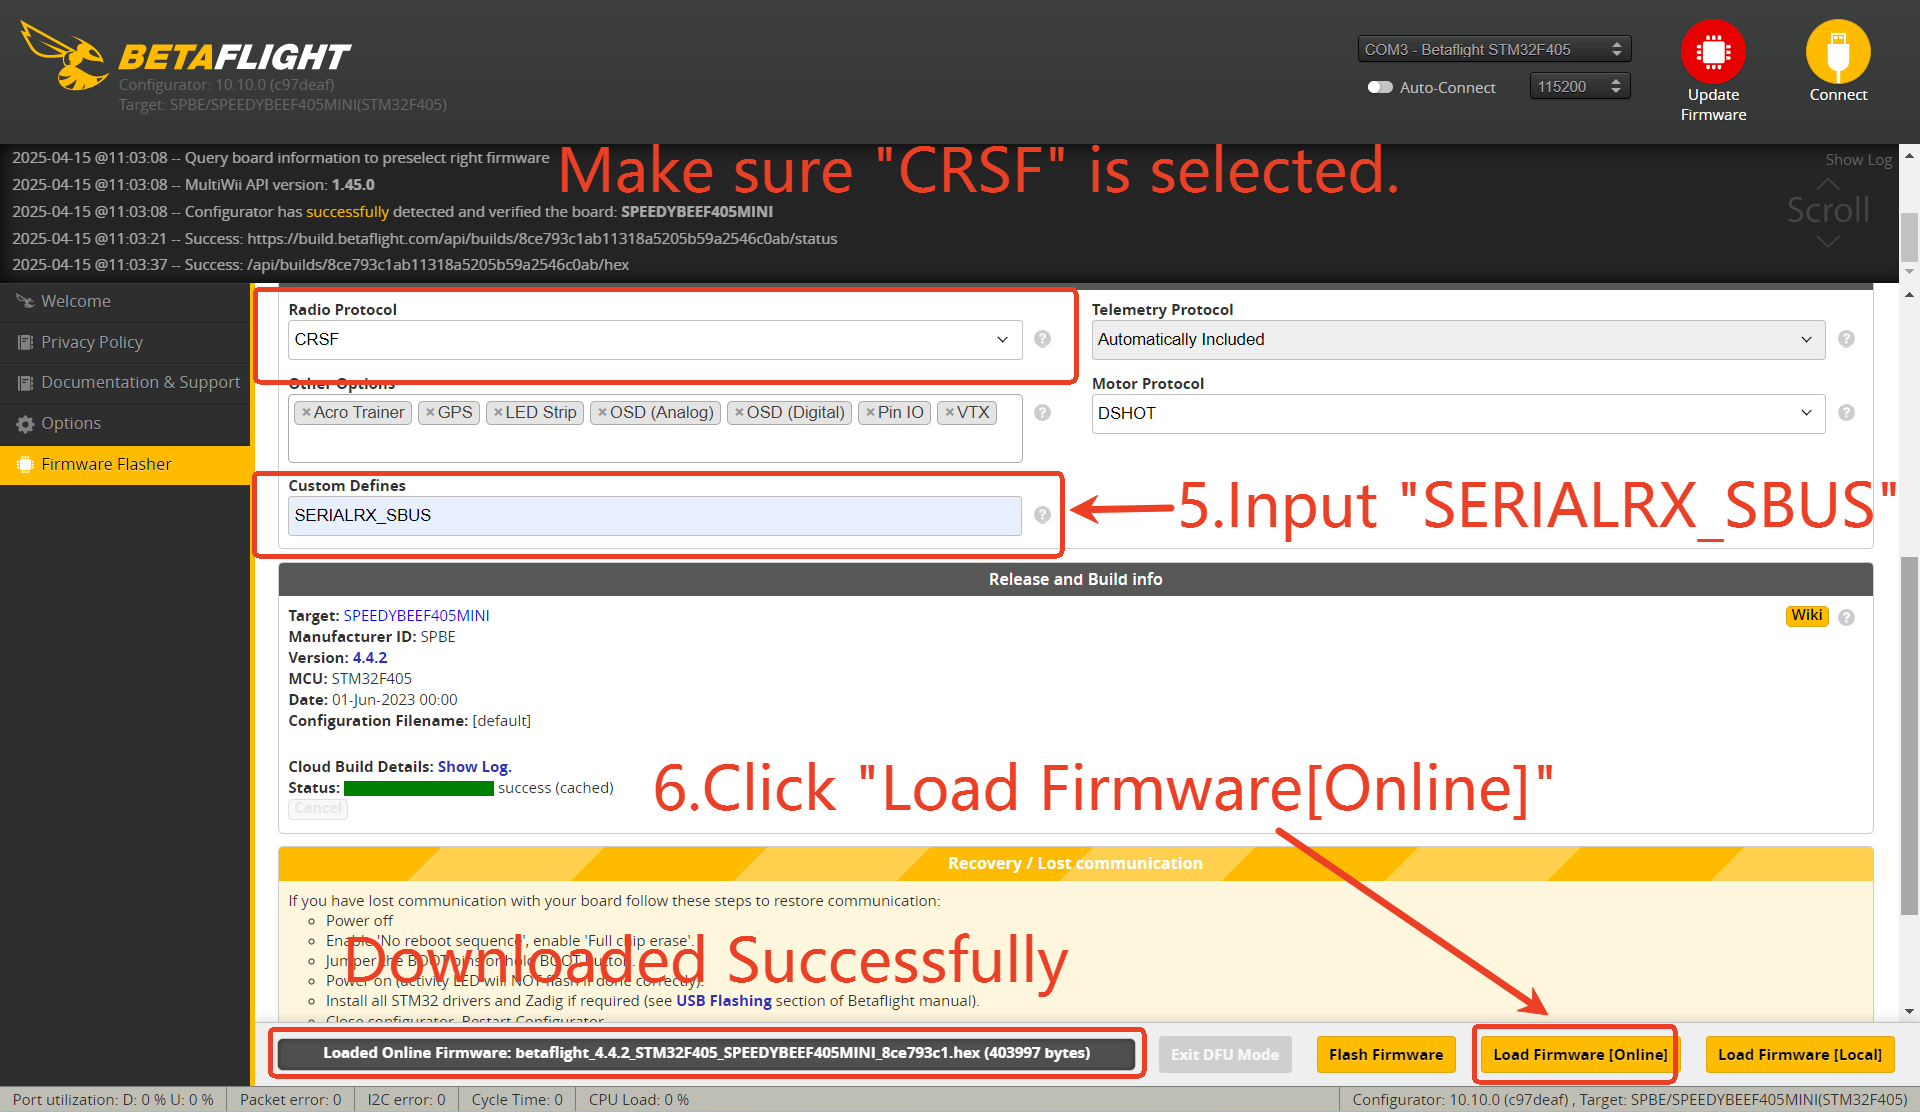
5.Locate the “Radio Protocol” option and make sure CRSF is selected. In the “Custom Defines” field, input SERIALRX_SBUS.(This command make the firmware support CRSF and SBUS Protocol )
6.Click “Load Firmware [Online]”. Once the loading is complete, the firmware details will be displayed.
IF YOU CANNOT DOWNLOAD THE FIRMWARE ONLINE,YOU COULD FLASH THE FIRMWARE [LOCAL]: https://docs.speedybee.cn/fpv/fpv-drones/bee35-drone/bee35-local-firmware-flashing-tutorial.html
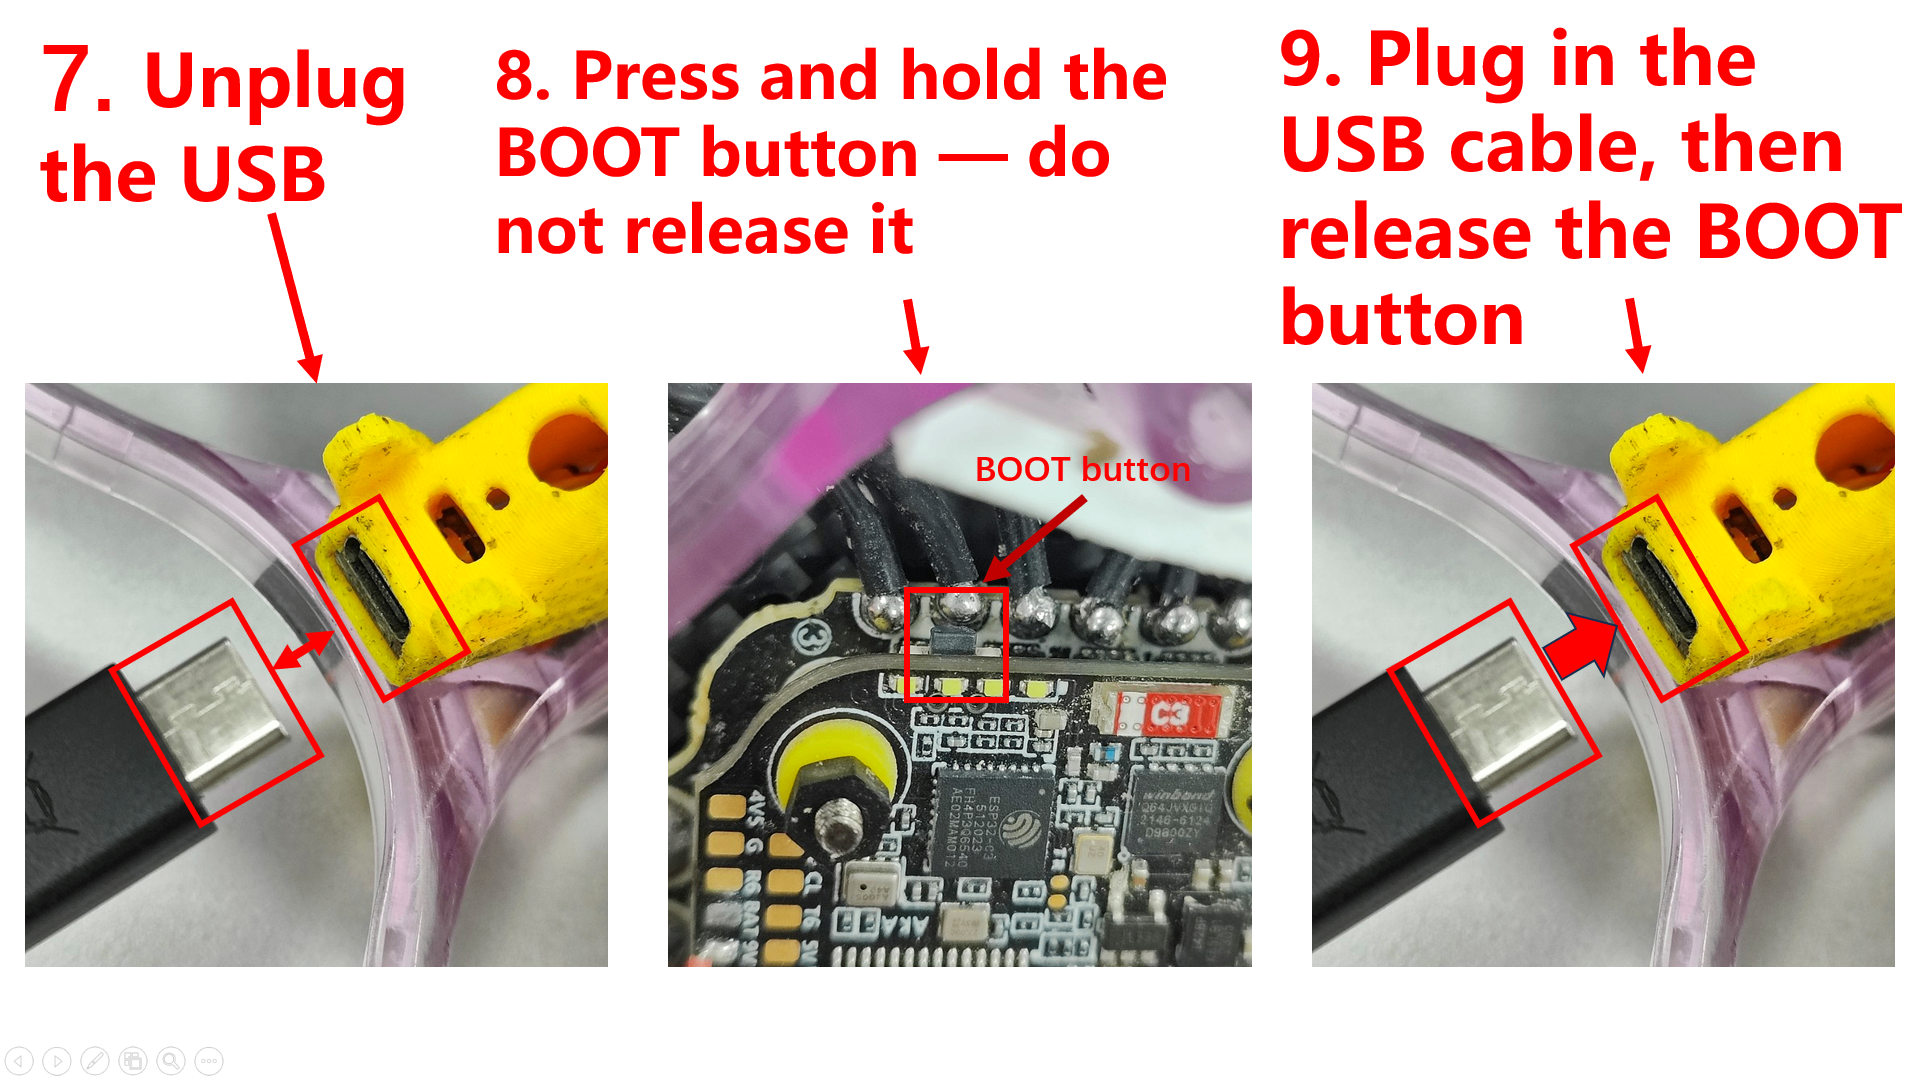
7.After the firmware is successfully loaded, unplug the USB to power off the drone.
8.Press and hold the BOOT button — do not release it.
9.While holding the BOOT button, plug in the USB cable, then release the BOOT button. (The flight controller should now enter DFU mode.)
10.Once in DFU mode, click “Flash Firmware.” After the flashing process is complete, a “Programming successful ” message will appear.
If the BF cannot recognize the DFU mode,please refer: https://docs.speedybee.cn/fpv/fc-flight-controller/flight-controller-faq/connection.html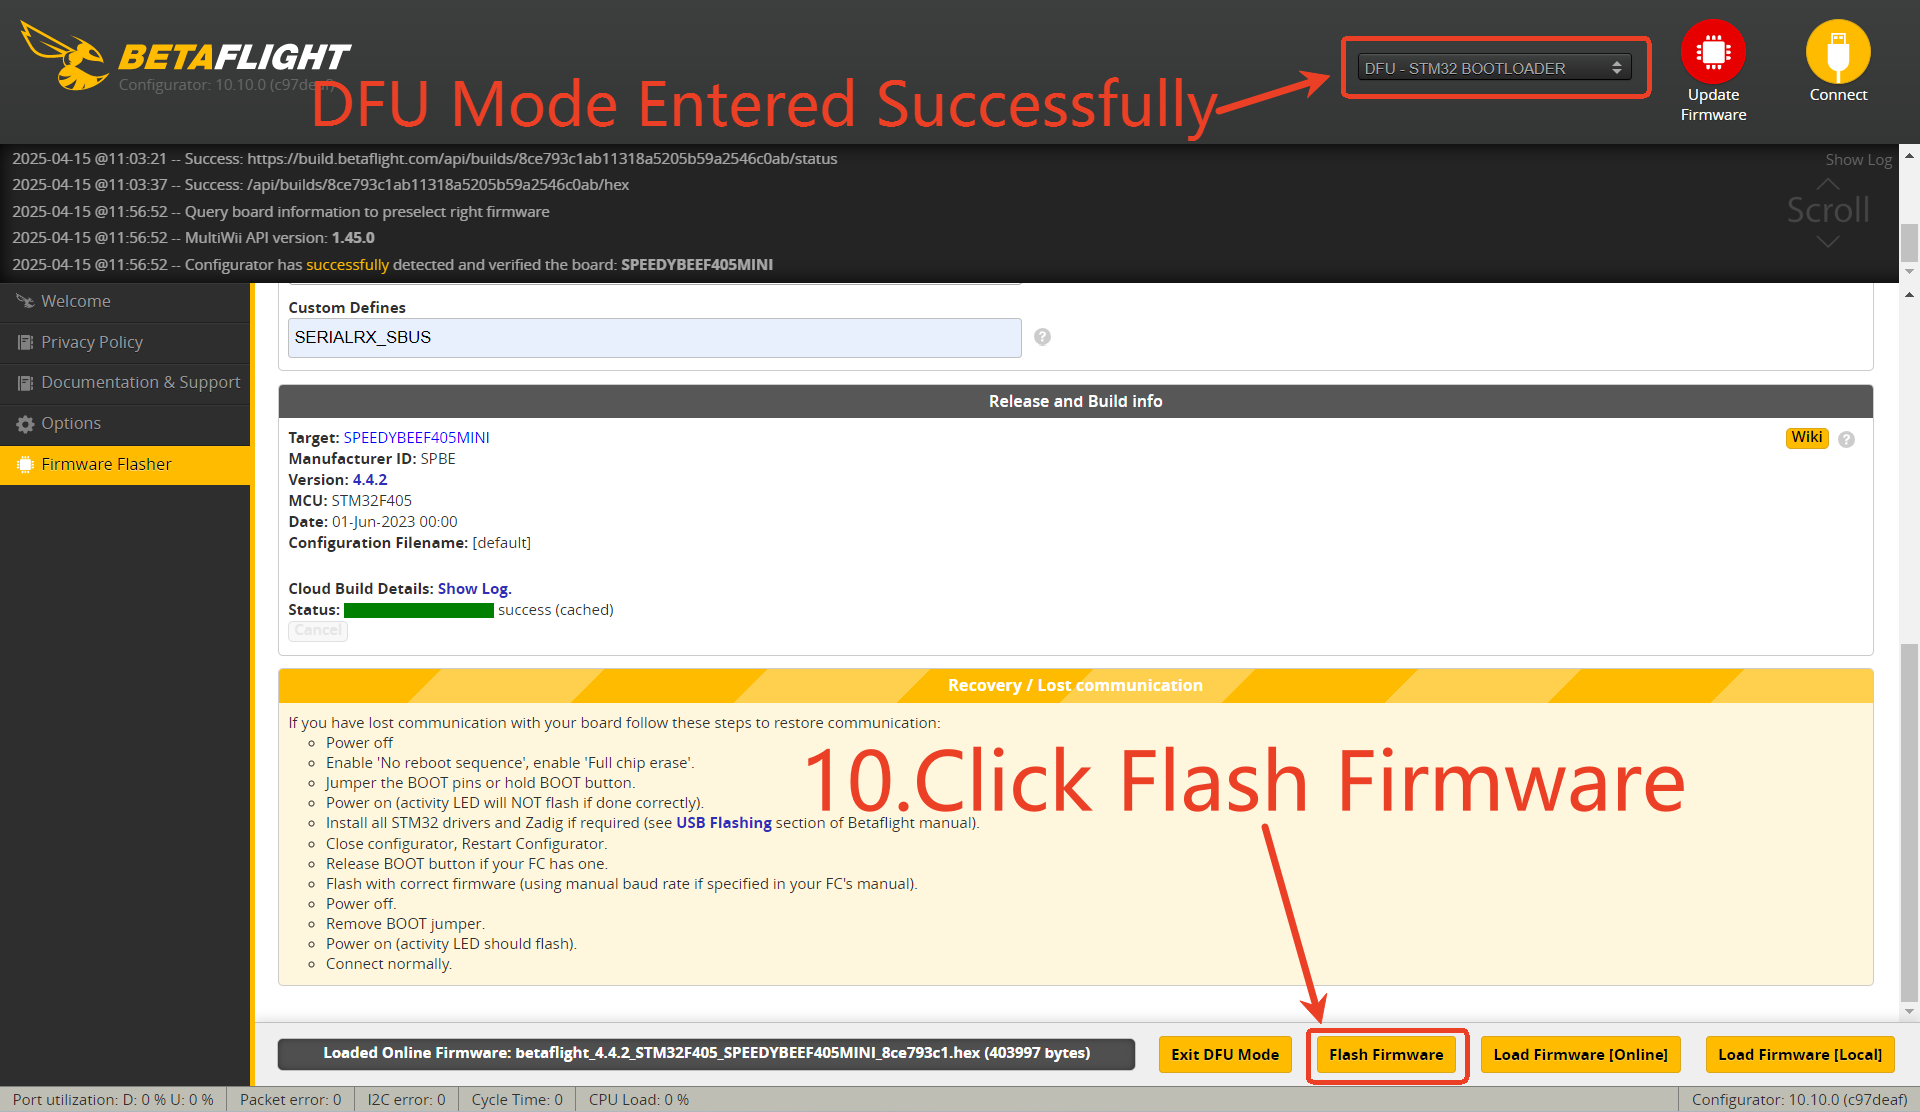

Importing Configuration File Using Betaflight (BF)
Preparation
Download the Configuration File Package:
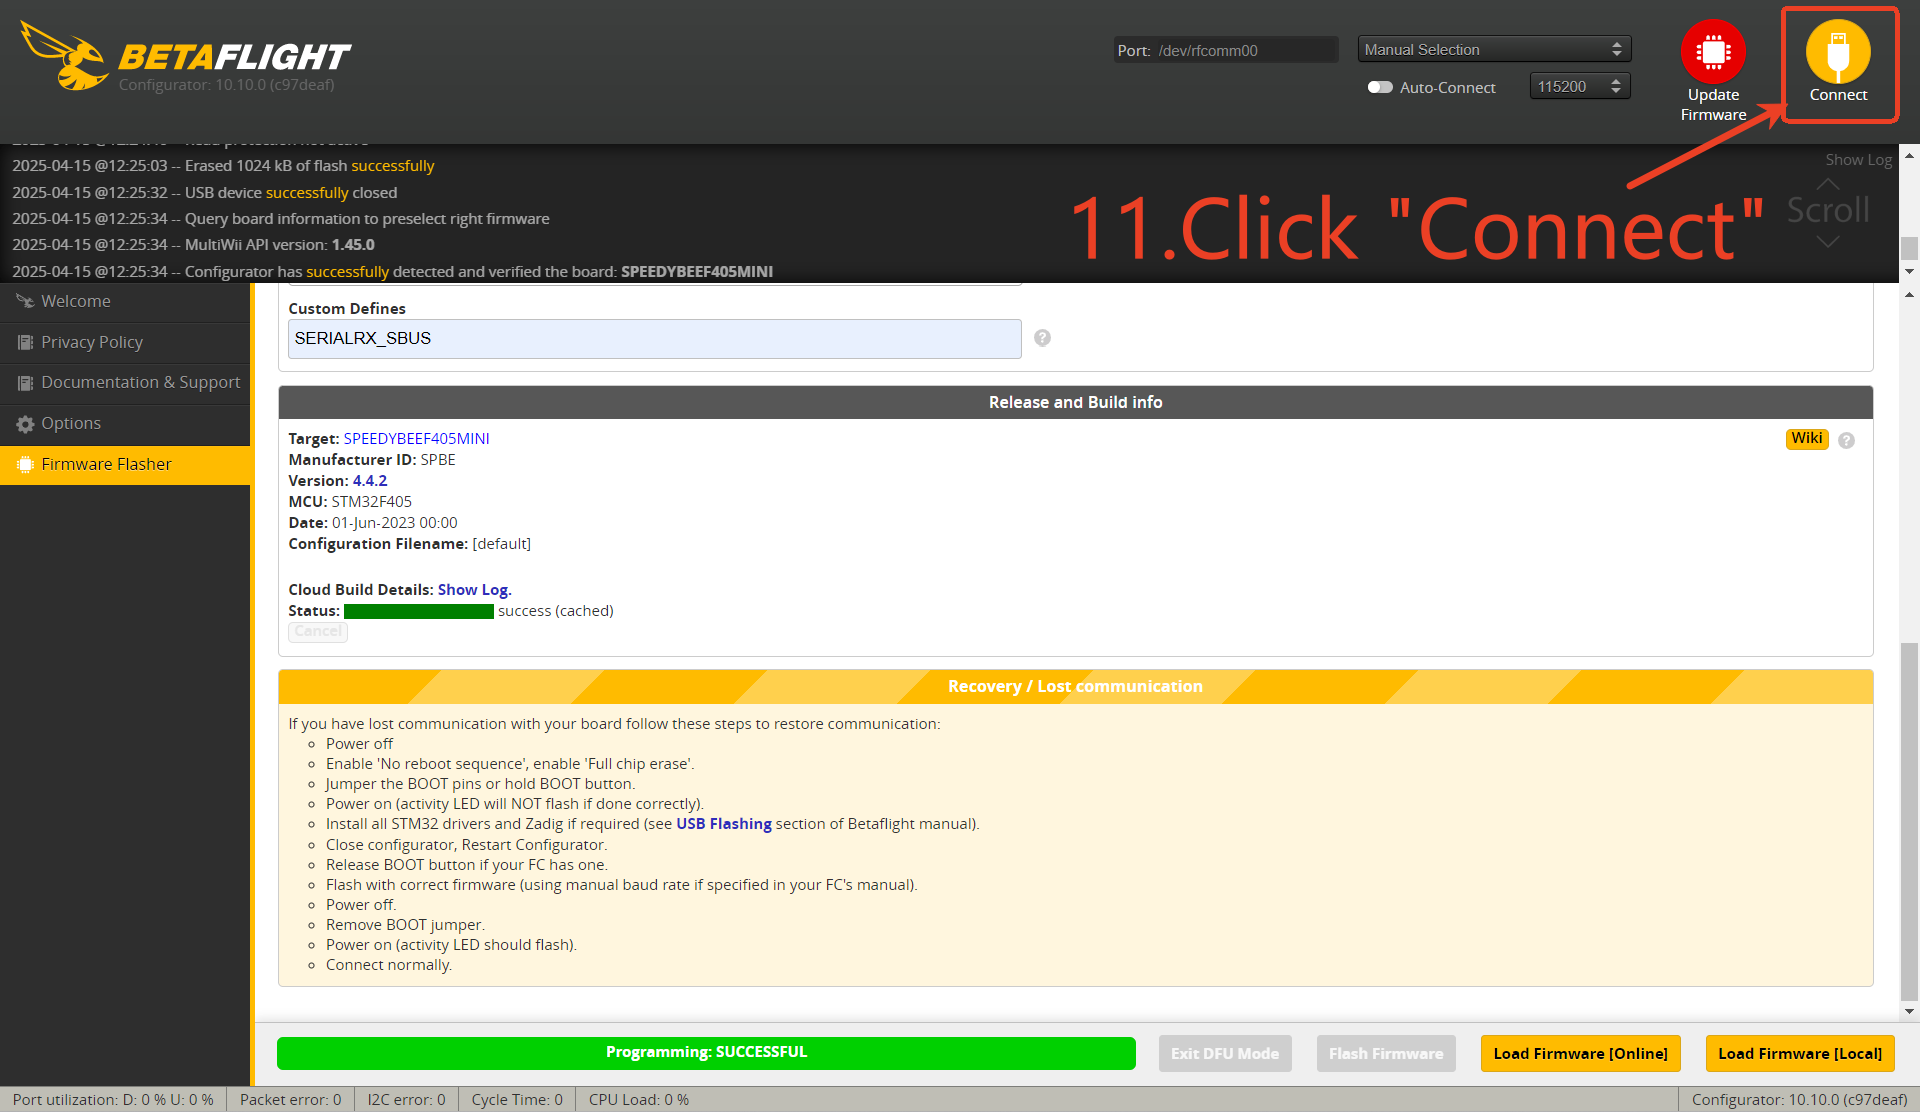
11.After the firmware is successfully flashed, click “Connect.”
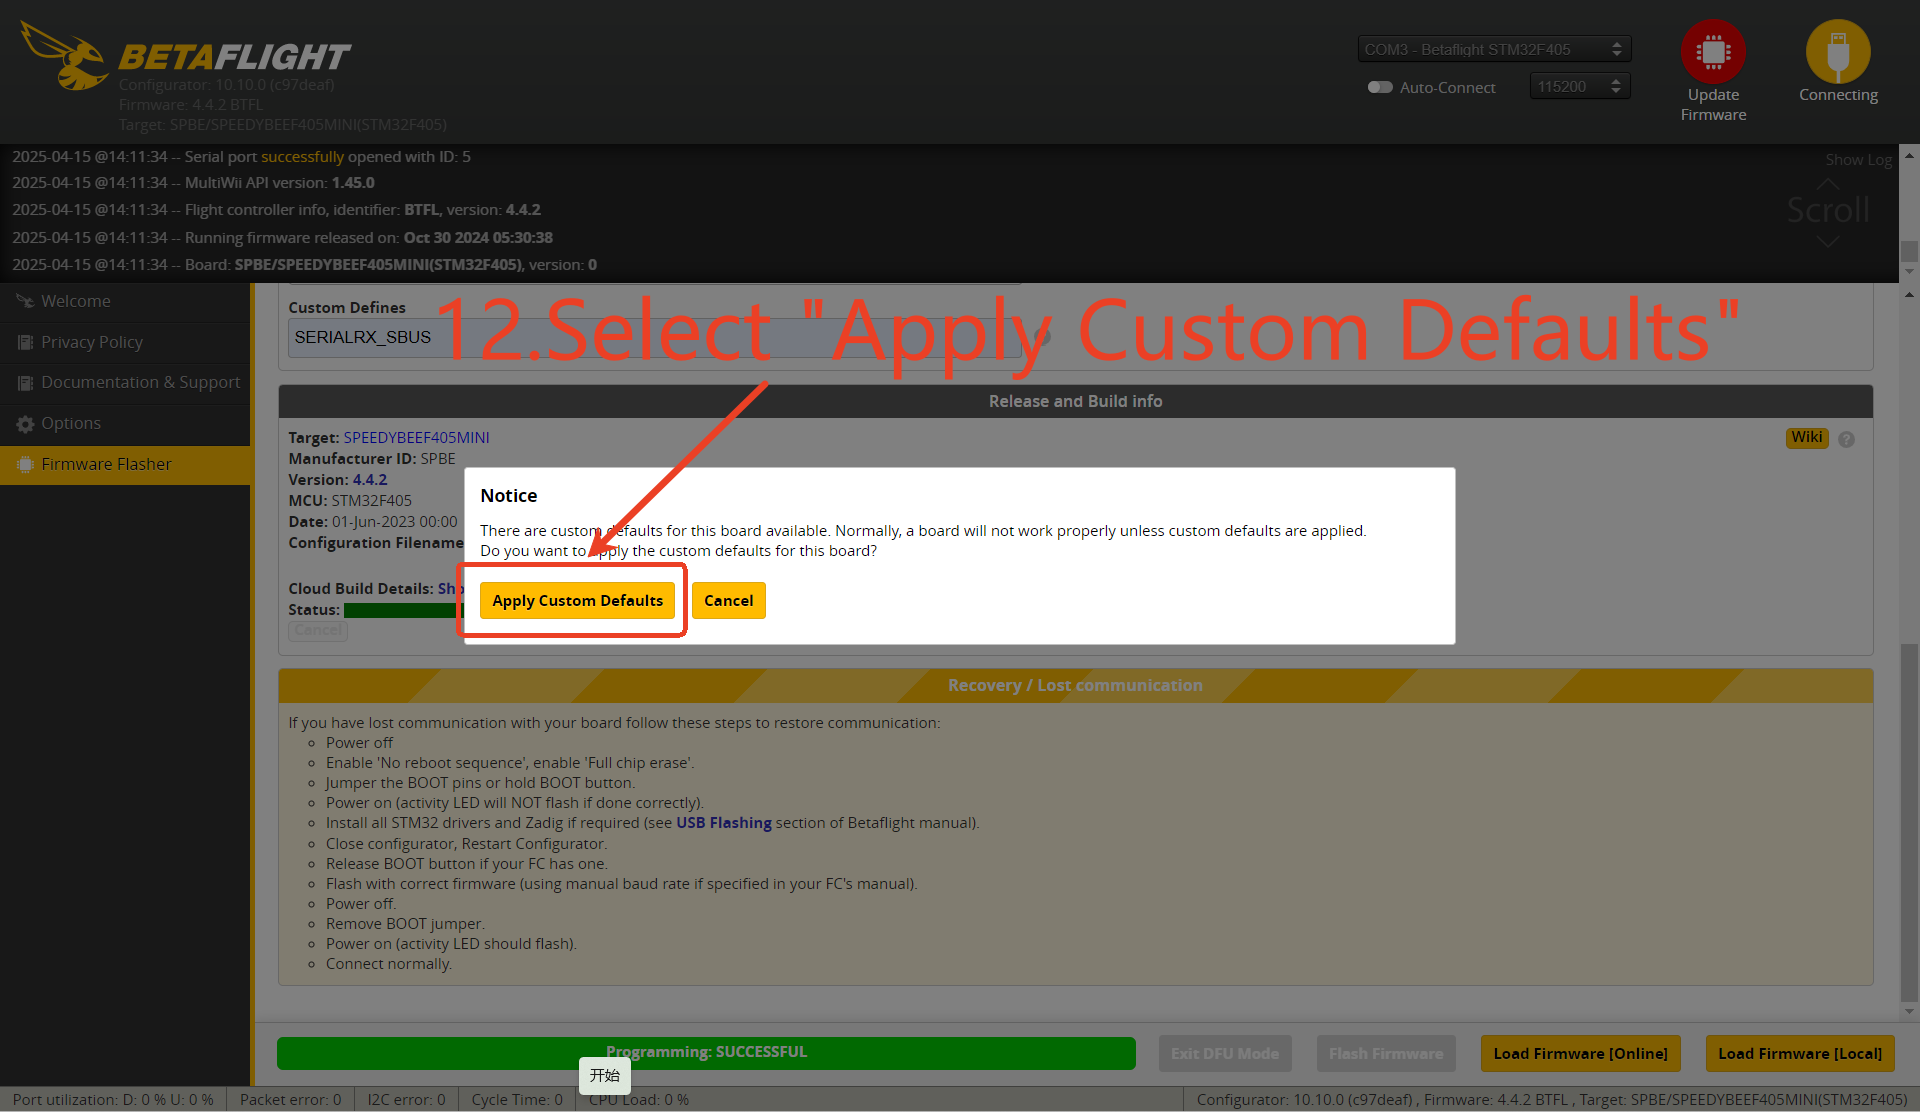
12.Click "APPLY Custom Defaults"
13.Click "Connect" again

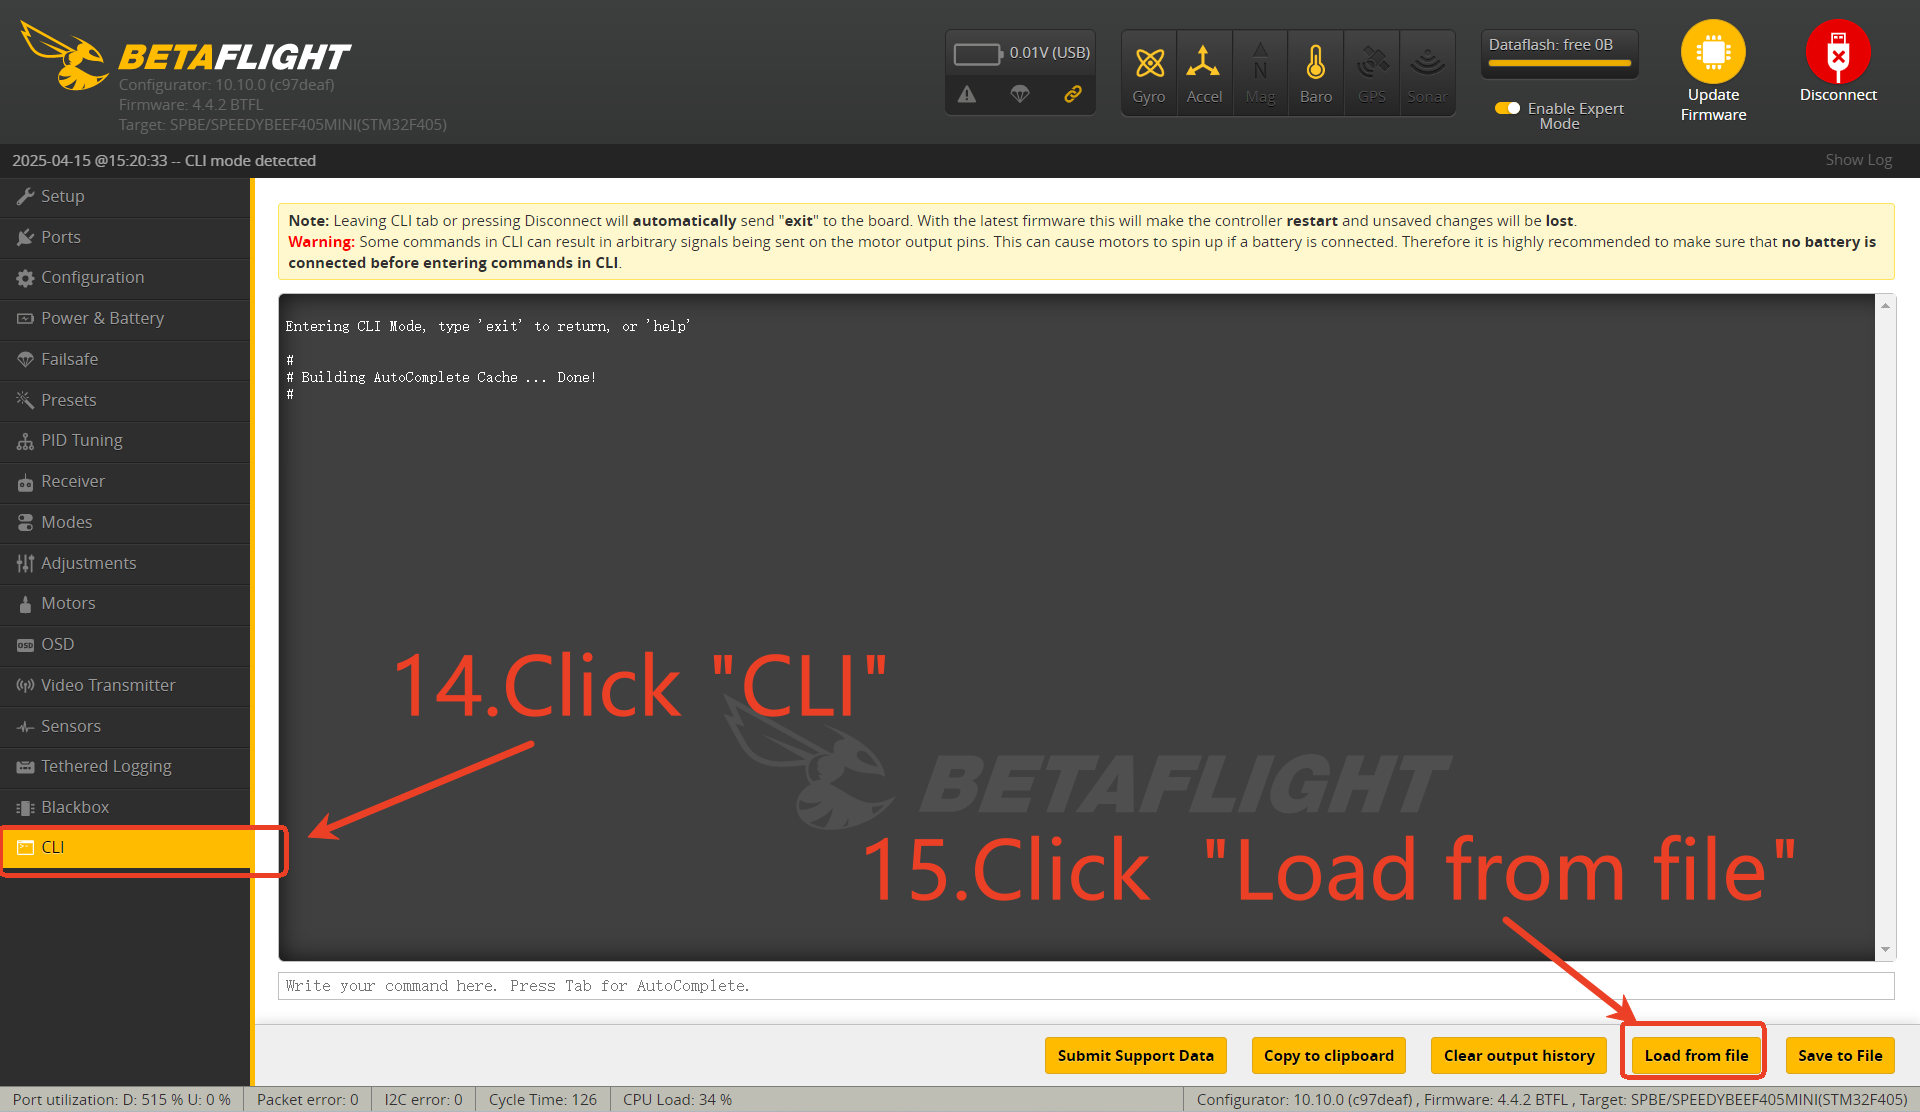
14.Click "CLI"
15.Click "Load from file"
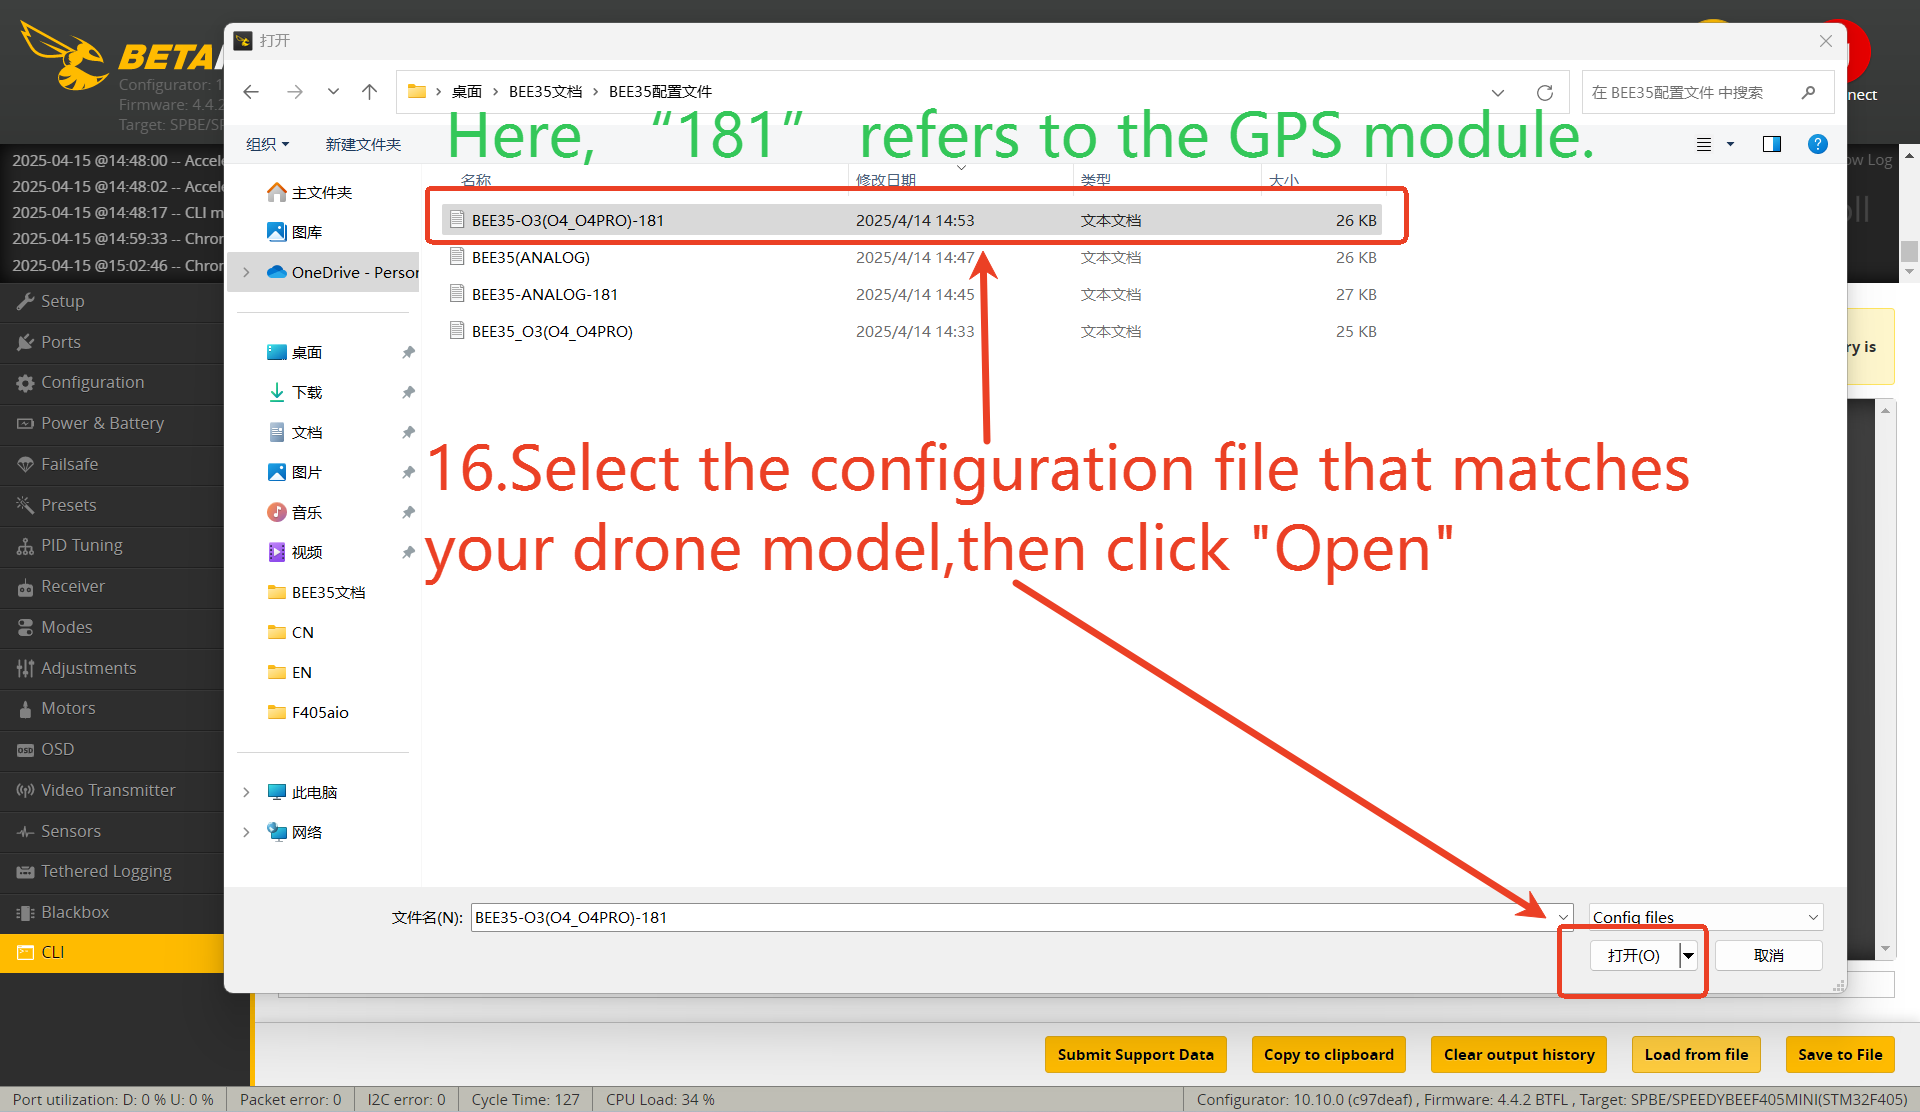
16. Locate the configuration file package downloaded earlier (before step 11), select the appropriate configuration file, and click “Open.”( Note: “ANALOG” refers to analog video. In this case, our drone is equipped with O4Pro + GPS.)
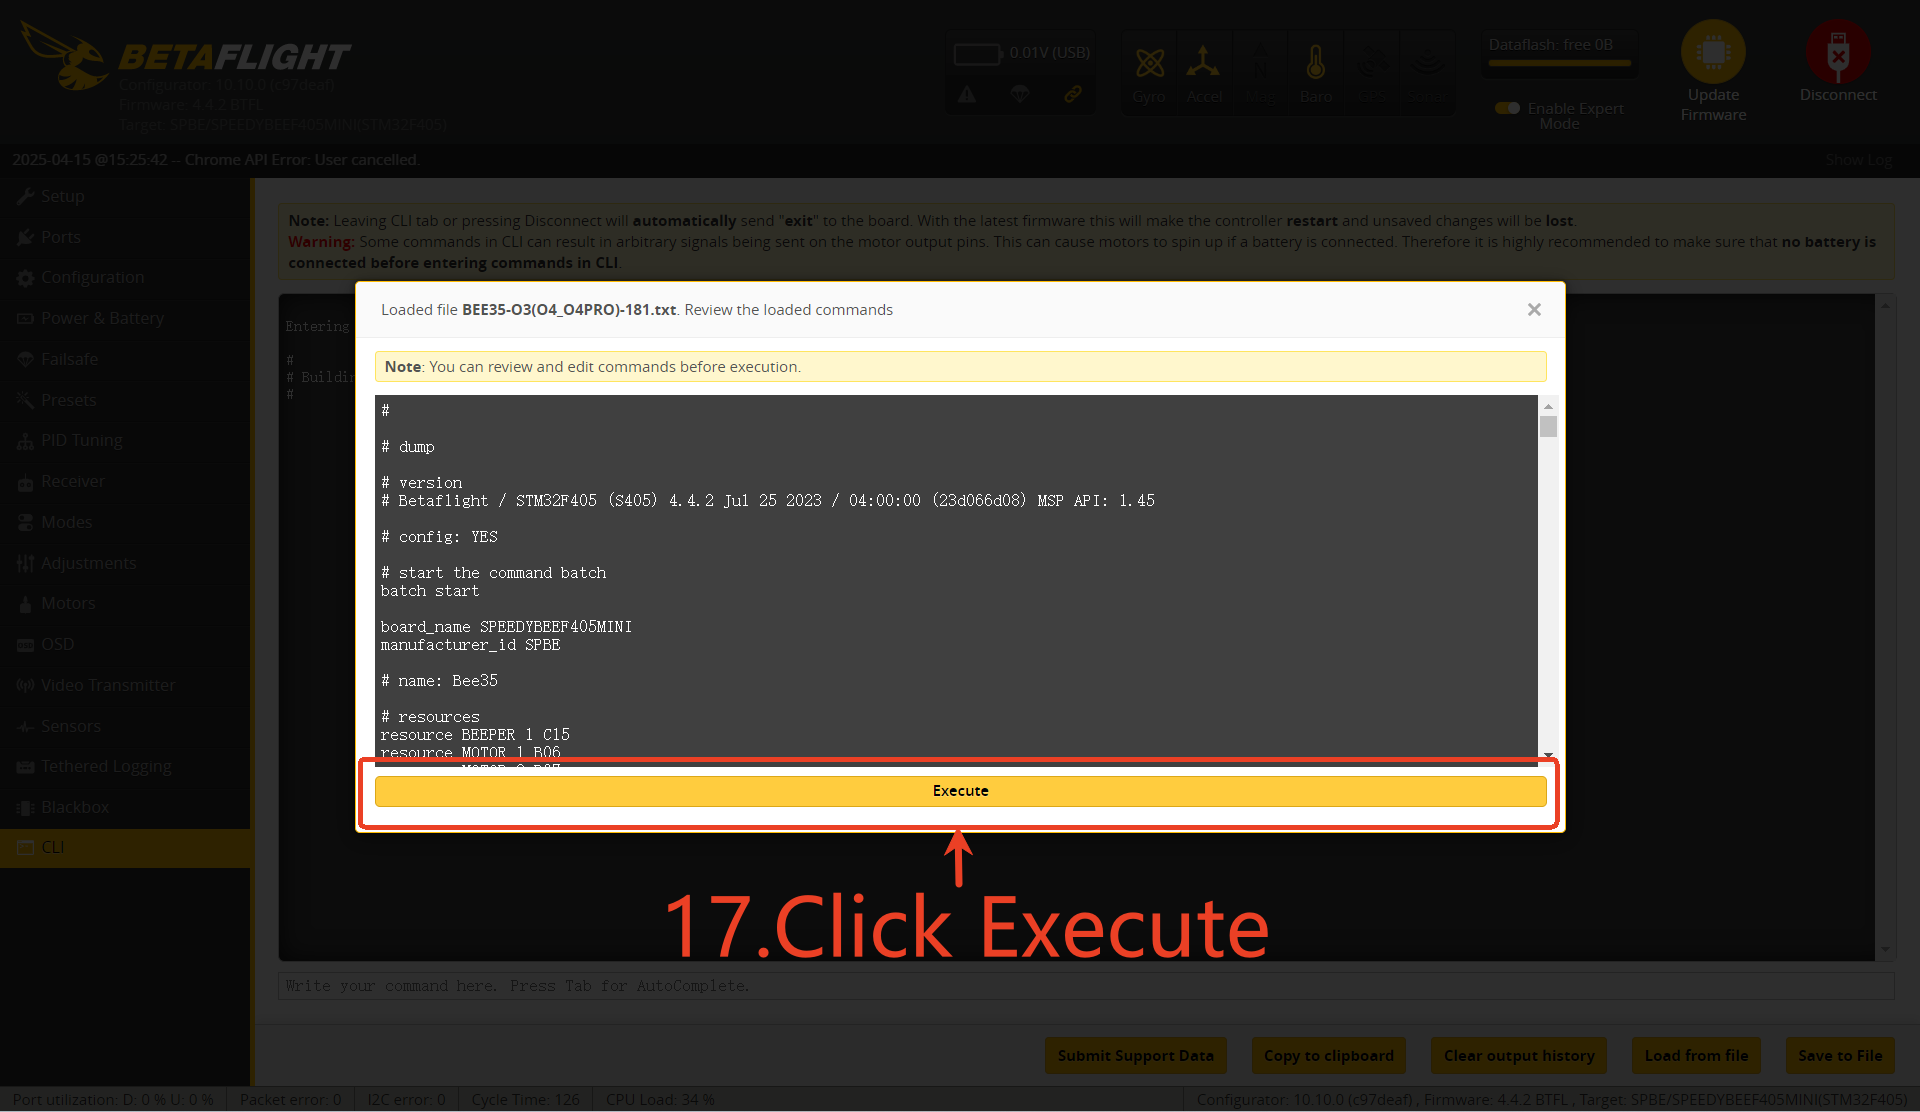
17. Click “Execute”
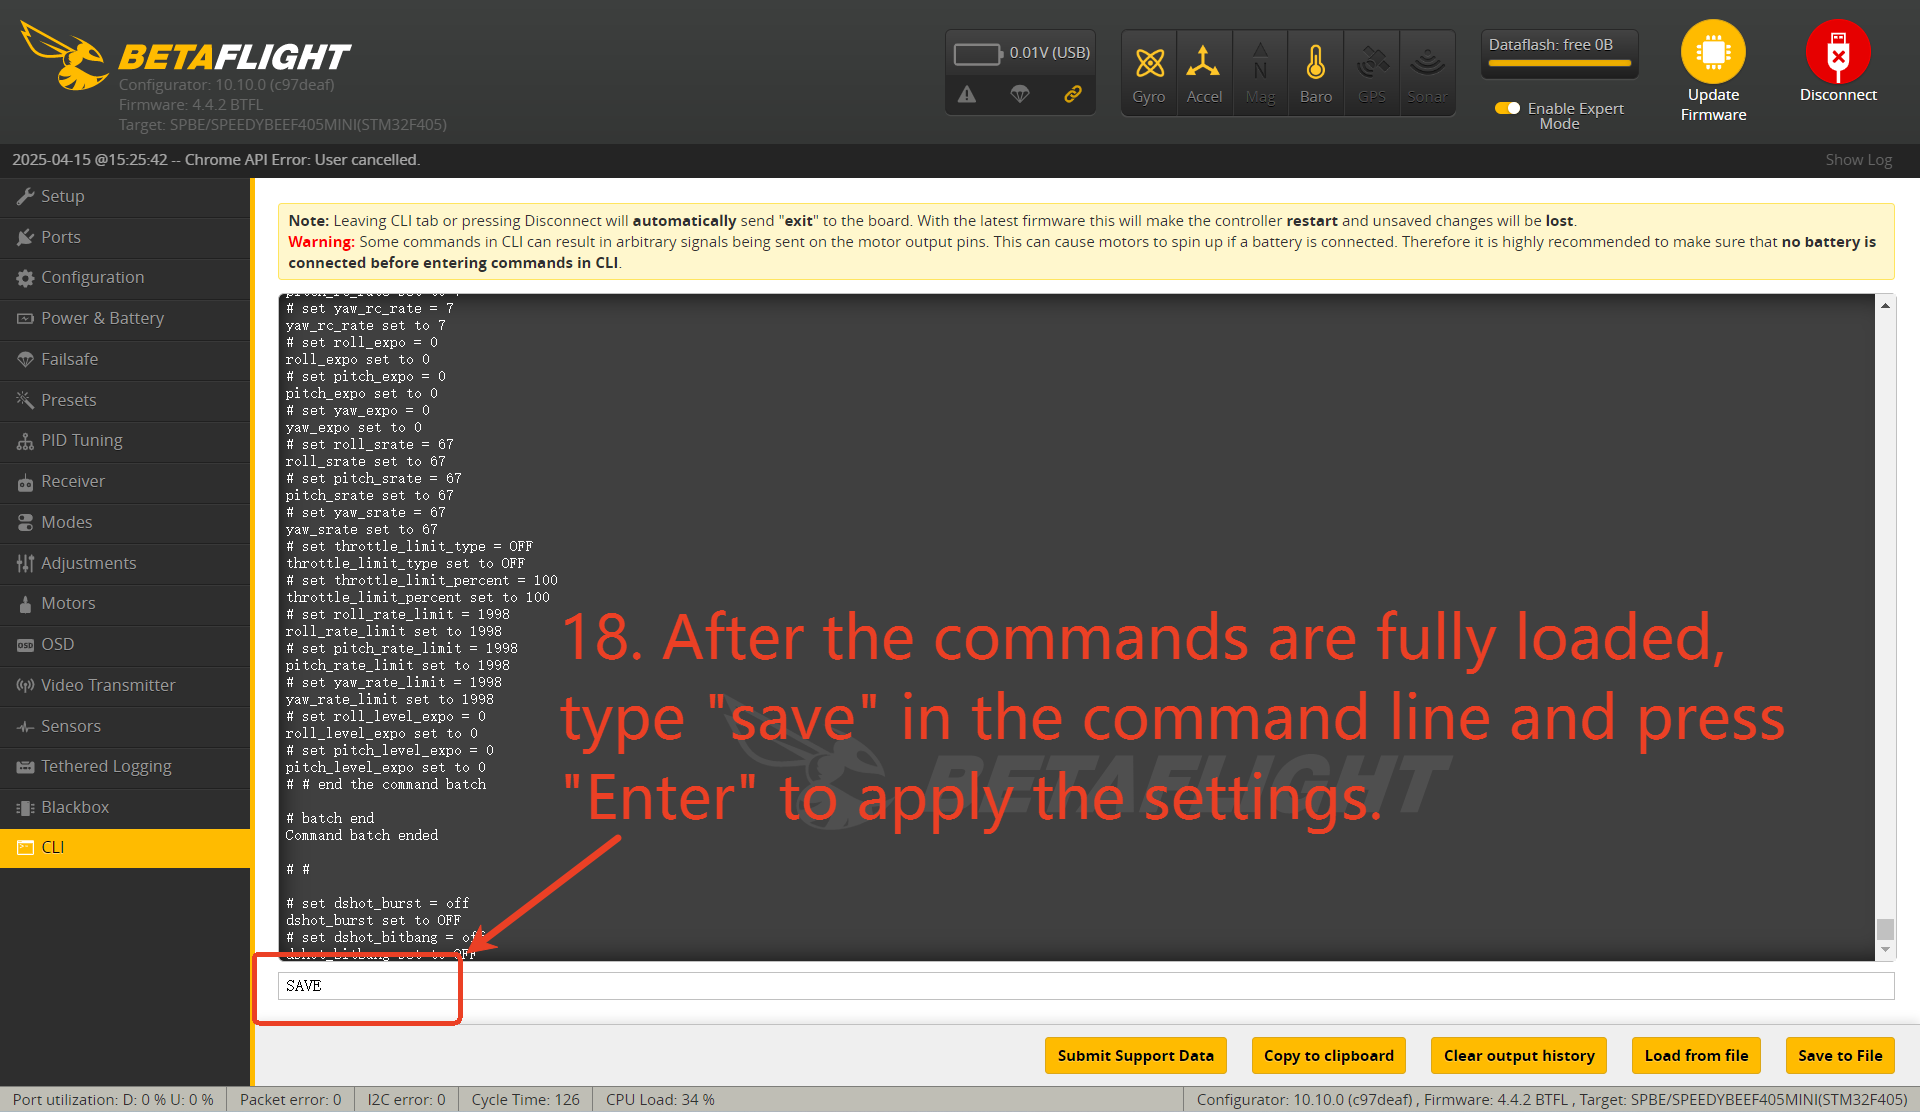
18. After the commands are fully loaded, type " save" in the command line and press " Enter" to apply the settings.