How to Calibrate the Current Sensor
If you are using a separate Speedybee flight controller or ESC, please refer to the current sensor calibration tutorial below.
🔧Current Sensor Settings for Speedybee Flight Stacks:
- Speedybee F7 Mini with SpeedyBee BLS 35A ESC → Scale = 250, Offset = -500
- Speedybee F405 Mini with SpeedyBee BLS 35A V2 ESC → Scale = 250, Offset = -500
- Speedybee F405 V3 with SpeedyBee BLS 50A ESC → Scale = 386, Offset = 0
- Speedybee F405 V4 with SpeedyBee BLS 55A ESC → Scale = 400, Offset = 0
- Speedybee F722 V3 with SpeedyBee BL32 50A ESC → Scale = 490, Offset = 0
- SpeedyBee F405 V5 current sensor settings when using SpeedyBee OX32 55A ESC (Scale = 27, Offset = -2644)
The article below comes from Oscar Liang:
https://oscarliang.com/current-sensor-calibration/
Betaflight uses a simple formula to allow users to tune and calibrate current sensor output:
y = ax + b
Here, “a” is the scale, and “b” is the offset. In most cases, the offset is usually zero, and you only need to adjust the scale.
There are several different methods to calibrate the current sensor.
Trial and Error (Recommended Method)
This is my preferred way to calibrate current sensors — not the fastest, but it’s safe and requires no extra equipment.
- Fly with a fully charged battery.
- After landing, note the mAh consumed shown on the OSD.
- Recharge the battery and record the mAh charged back in.
Use the following formula to calculate the new scale:
New_Scale = Old Scale × (OSD_mAh_Consumed / mAh_charged)Repeat this process several times to ensure good accuracy.
Note: In Betaflight, the current sensor scale works inversely —to lower the current reading, you actually need to increase the scale.
For example, if the OSD reading is 10% too high, increase the scale by 10%, which will reduce the displayed reading by 10%.
Yes,I konw that it’s counterintuitive
Example:
- Current scale = 400
- OSD shows 1100mAh used
- Charger shows 1000mAh recharged
- New scale = 400 × (1100 / 1000) = 440
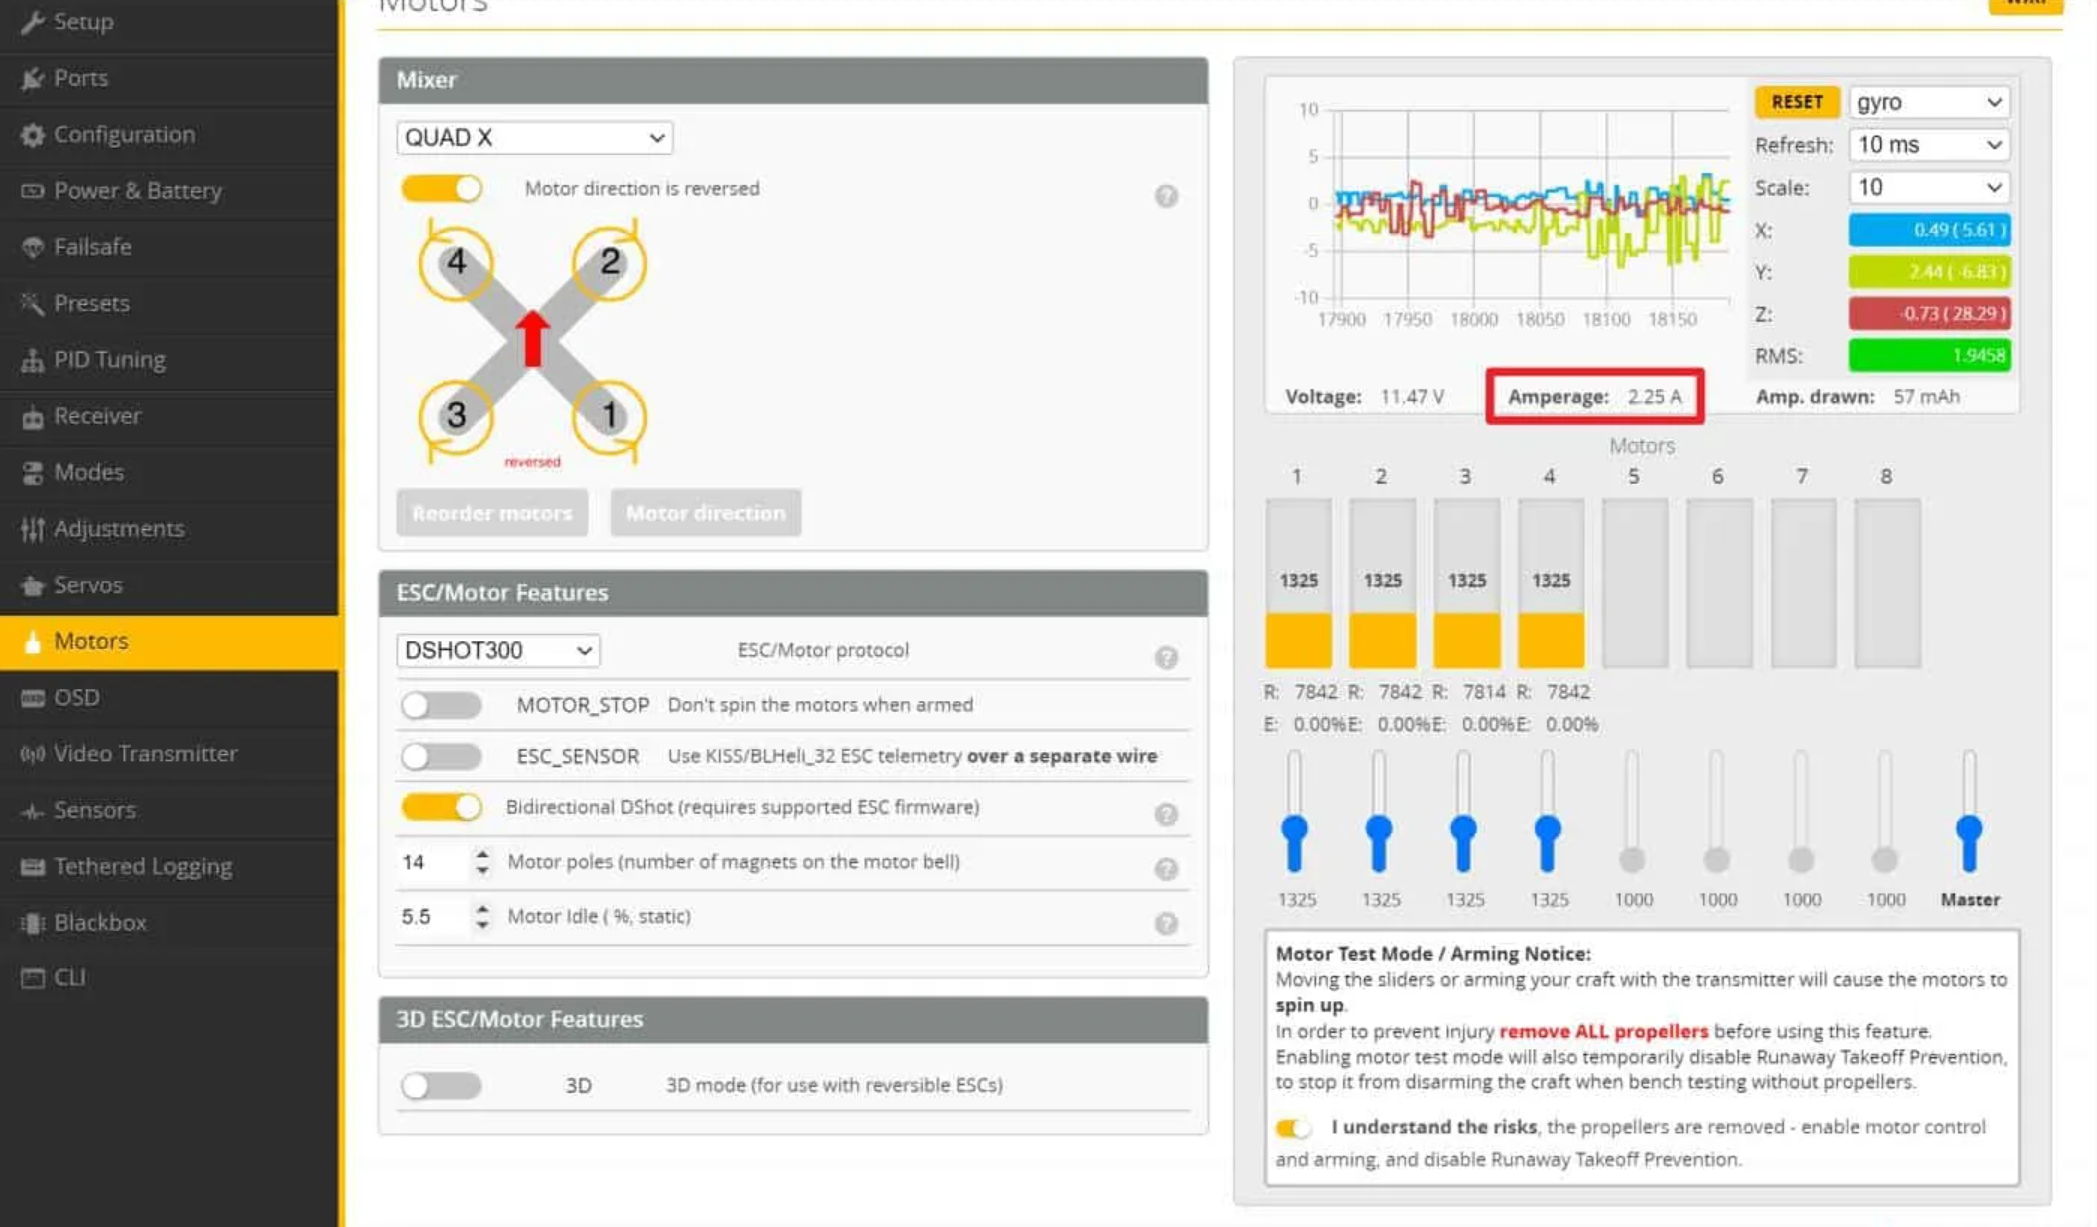
Using a Multimeter (Low Current Test)
You can also use Betaflight’s Motors tab (with props removed) to spin motors and get current readings from the flight controller.(It is the same as OSD)
You'll need to take 3–5 low-amp readings (under 5A),So it is safe actually.
Here's a spreadsheet to help calculate the scale and offset:
https://docs.google.com/spreadsheets/d/1lkL-X_FT9x2oqrwQEctDsEUhgdY19upNGc78M6FfJXY/edit#gid=0v

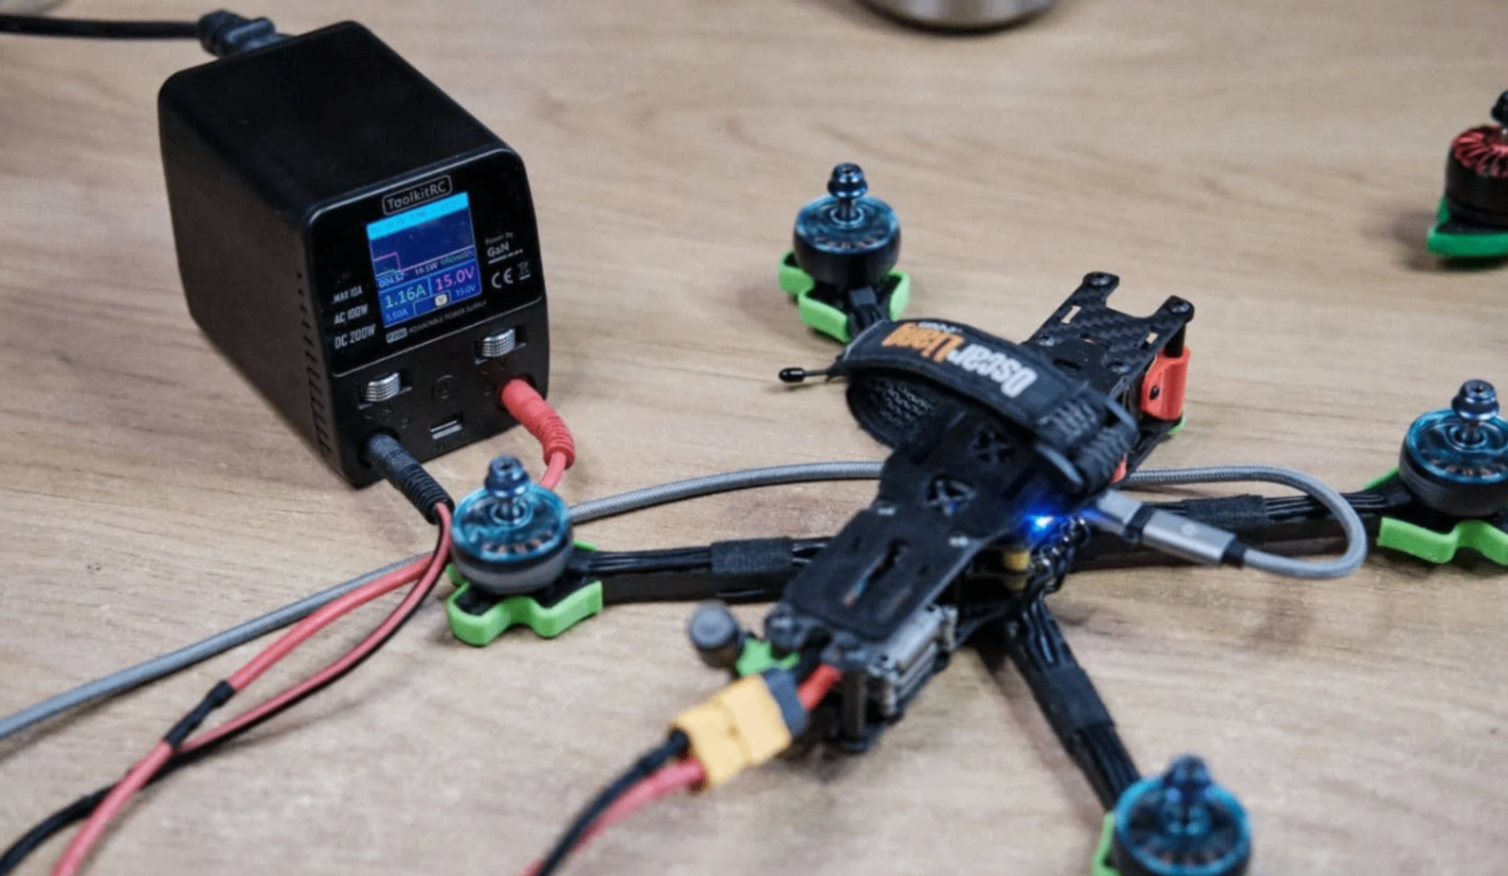
If you have an adjustable bench power supply like the ToolkitRC P200, it becomes much easier since it shows live current draw directly.
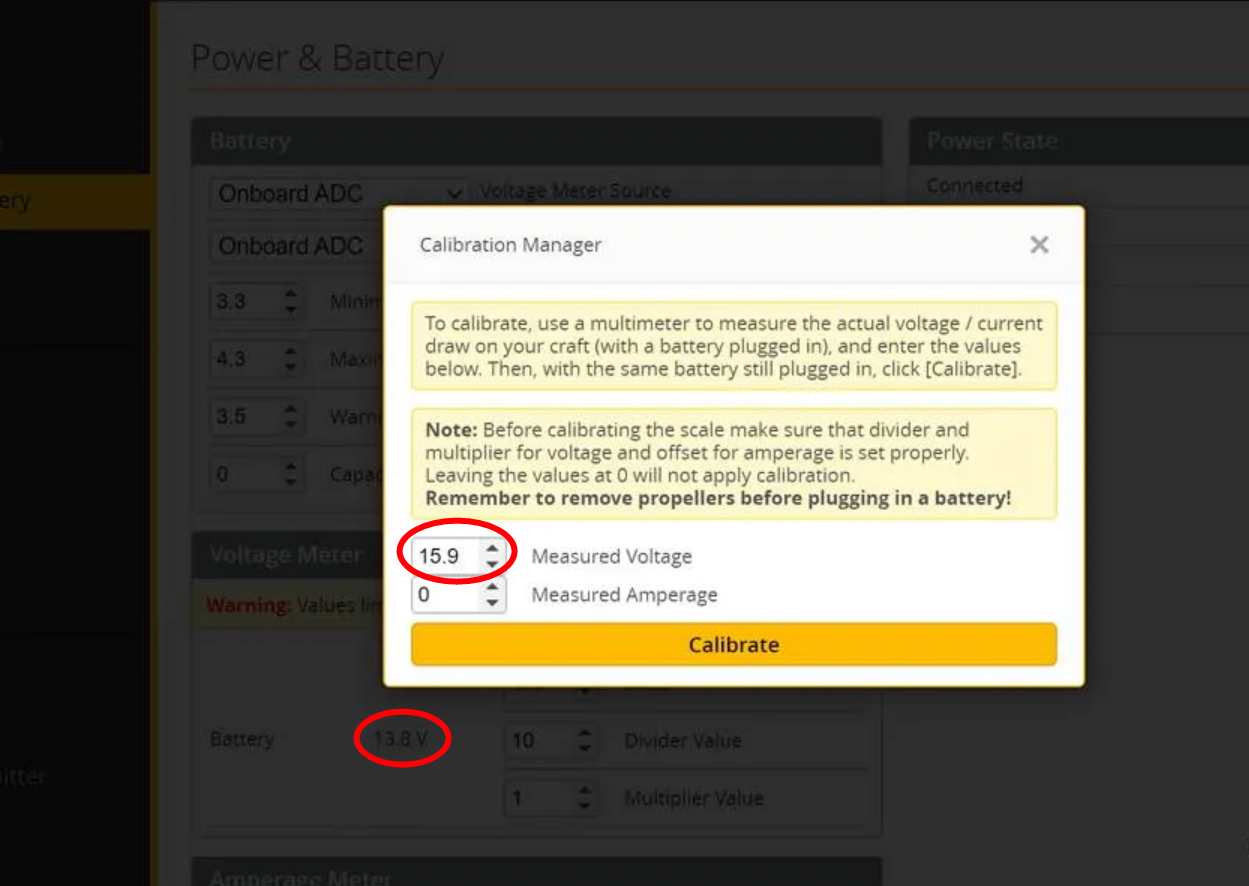
Voltage Sensor Calibration
Usually, voltage sensors don’t need calibration — they’re accurate out of the box.
To check:
Measure your battery voltage with a battery checker or multimeter,Plug the battery into your drone.
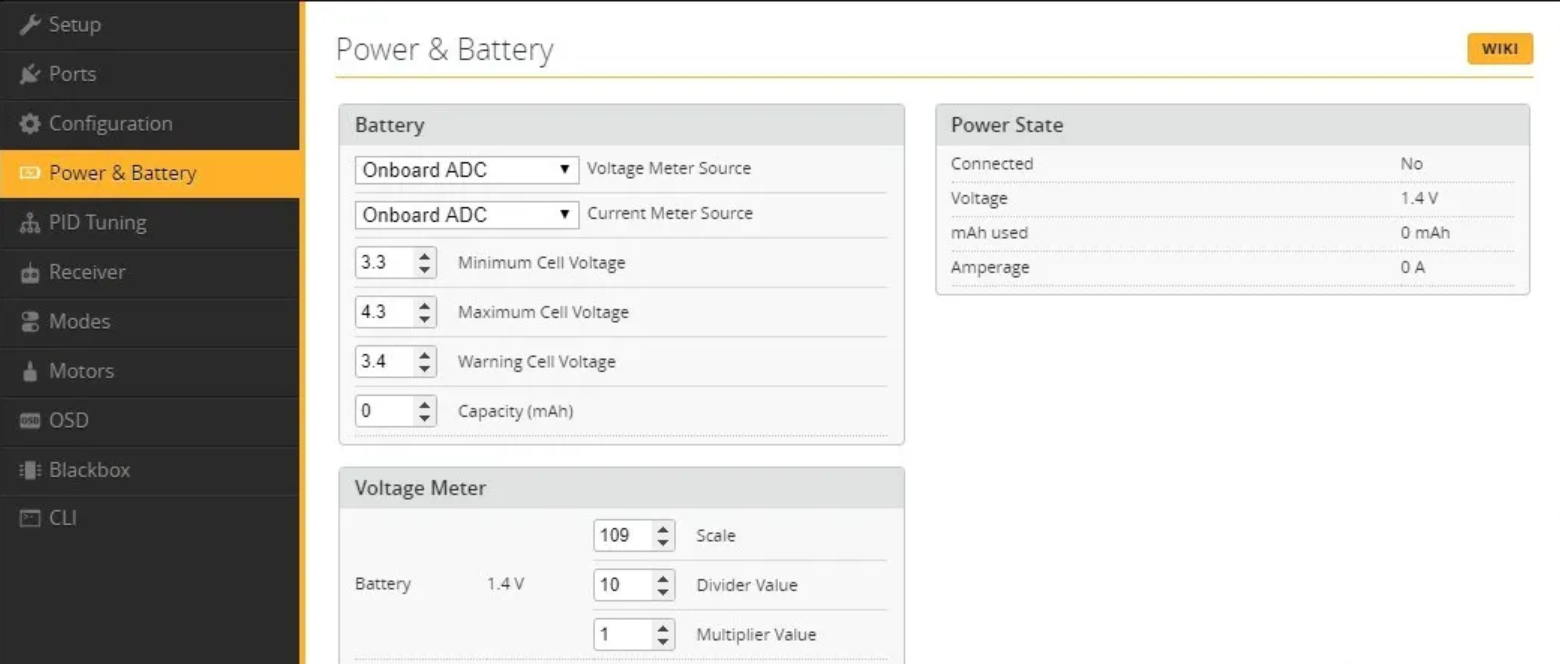
Compare the voltage shown in Betaflight Configurator with your measured voltage.
If there’s a big difference:
- Click Calibrate, enter the measured voltage, and apply.
- Done.