How to use a servo with F7V3 / F405V3 / V4 in Betaflight.
Note: Power supply supports 5V 9g servos. For other larger 5V servos, an external BEC is required.
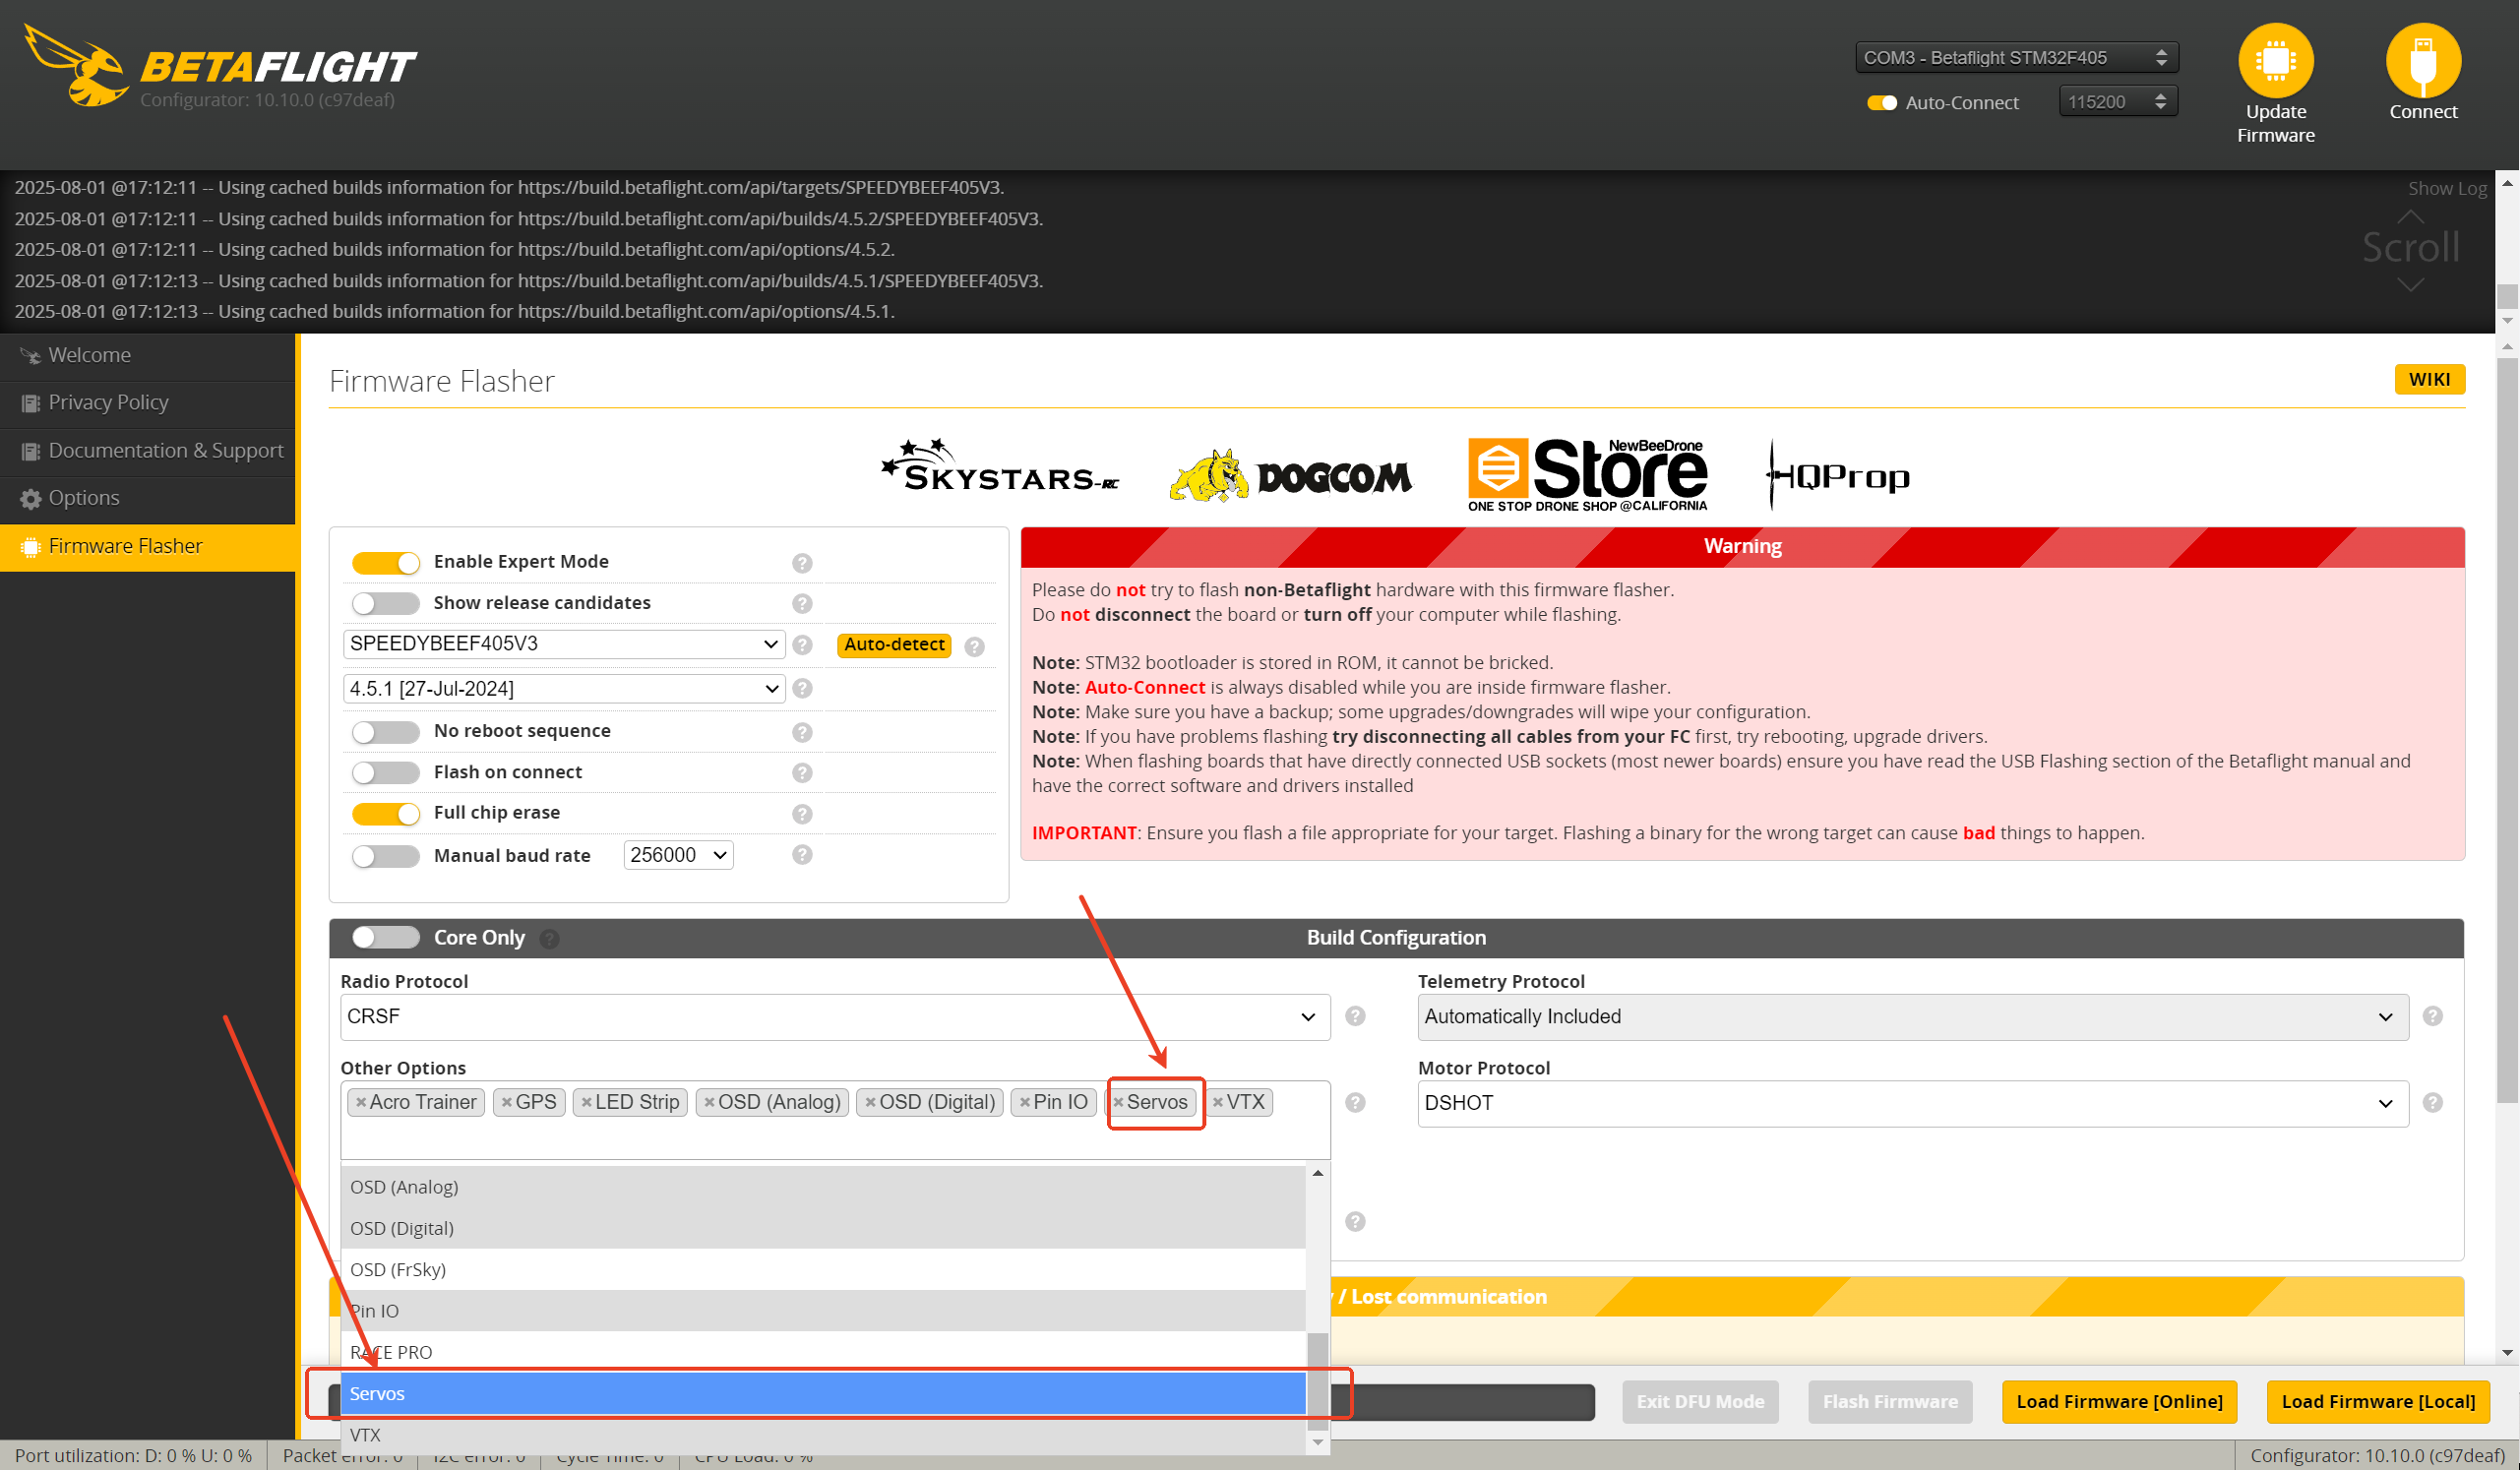
1,For Betaflight firmware version 4.4.0 and above, you need to enable the servo feature when flashing the firmware.
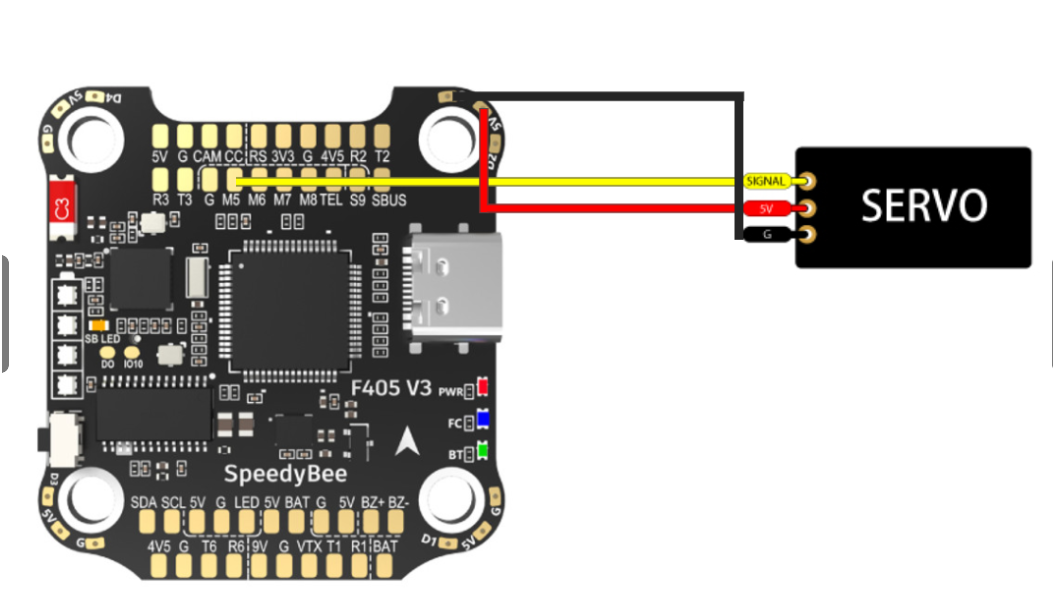
2,Wiring.
3,Enter the corresponding code for your flight controller in the CLI command line.

(1)For the F7V3, if you need to use one or more servos, you can connect them to the M5–M8 pads on the flight controller and map them accordingly.
For example, if you need to use two servos and their signal wires are connected to M5 and M6, please enter the following commands in the CLI:
resource MOTOR 5 none
resource MOTOR 6 none
resource SERVO 1 B07
resource SERVO 2 B05
save
(2)If you need to use one or more servos with the F405V3, you can connect them to the flight controller’s M5–M8 pads for mapping.
For example, if you need to use two servos and their signal wires are connected to M5 and M6, please enter the following commands in the CLI:
resource MOTOR 5 none
resource MOTOR 6 none
resource SERVO 1 B00
resource SERVO 2 B01
save
(3)If you need to use one or more servos with the F405V4, you can connect them to the flight controller’s M5–M8 pads for mapping.
For example, if you need to use two servos and their signal wires are connected to M5 and M6, please enter the following commands in the CLI:
resource MOTOR 5 none
resource MOTOR 6 none
resource servo 1 C08
resource servo 2 C09
save
4,Servo setup
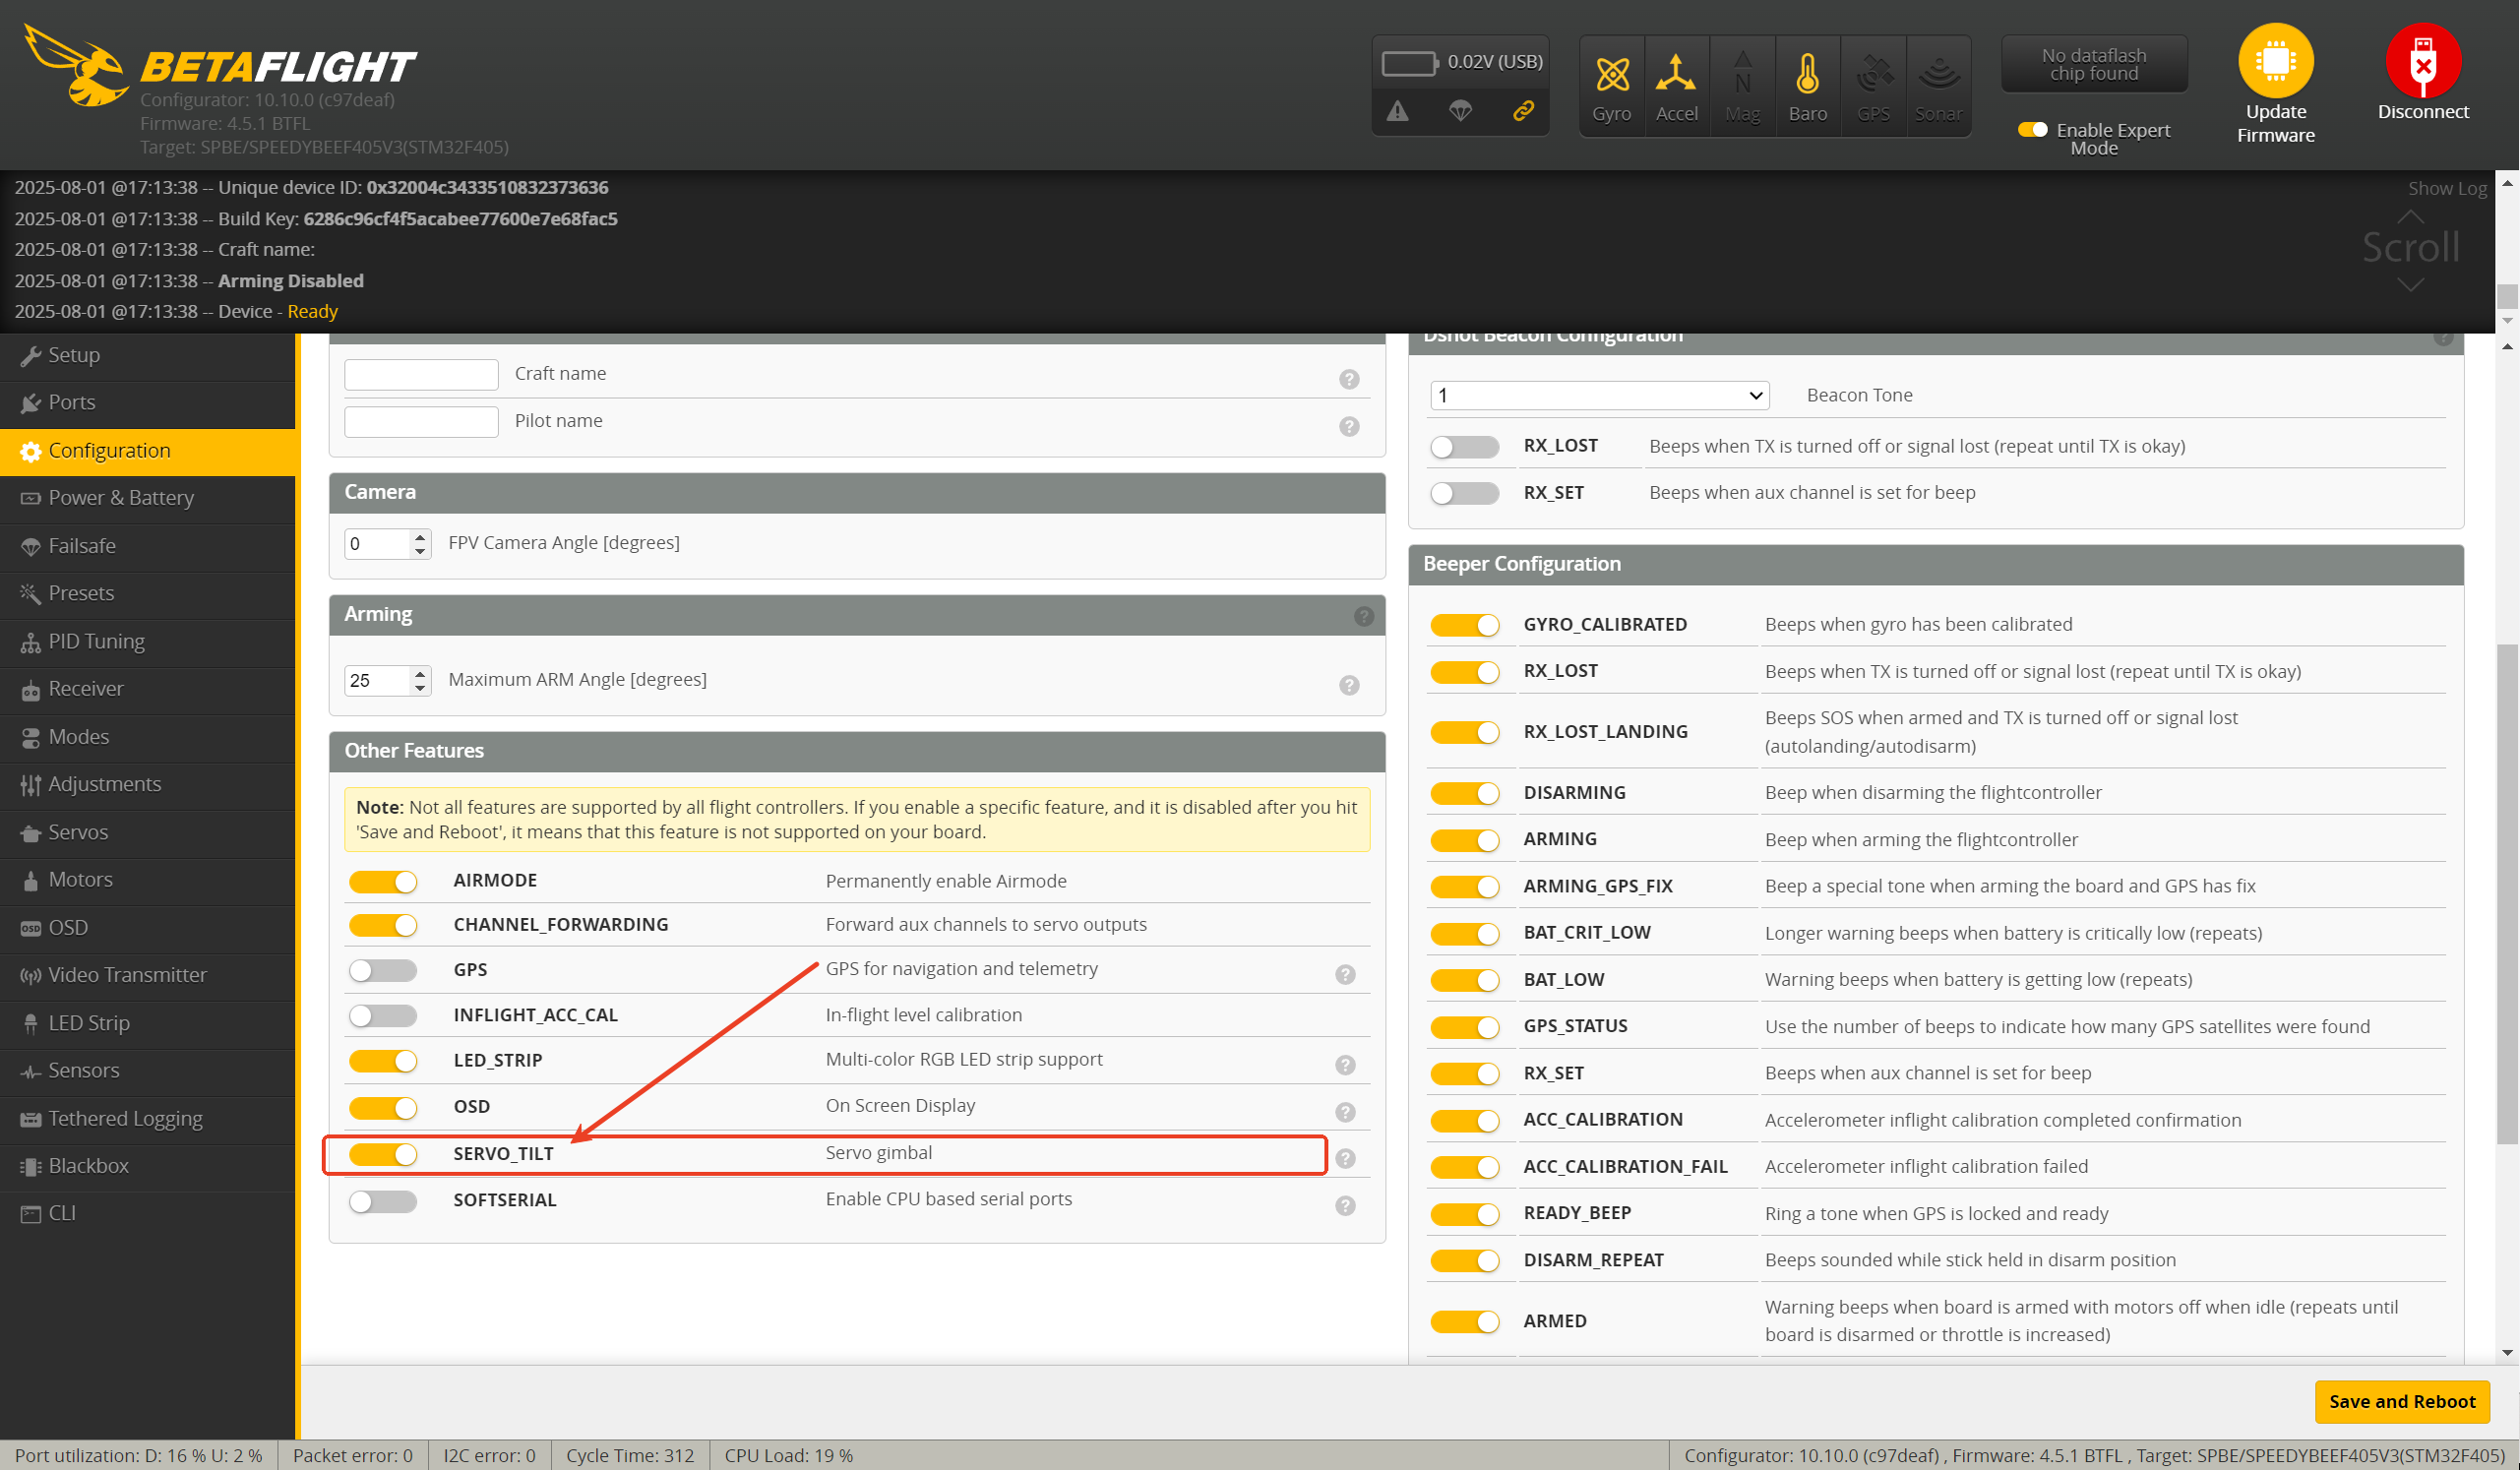
(1)Please enable "Servo Gimbal" on the Configuration page in Betaflight Configurator.
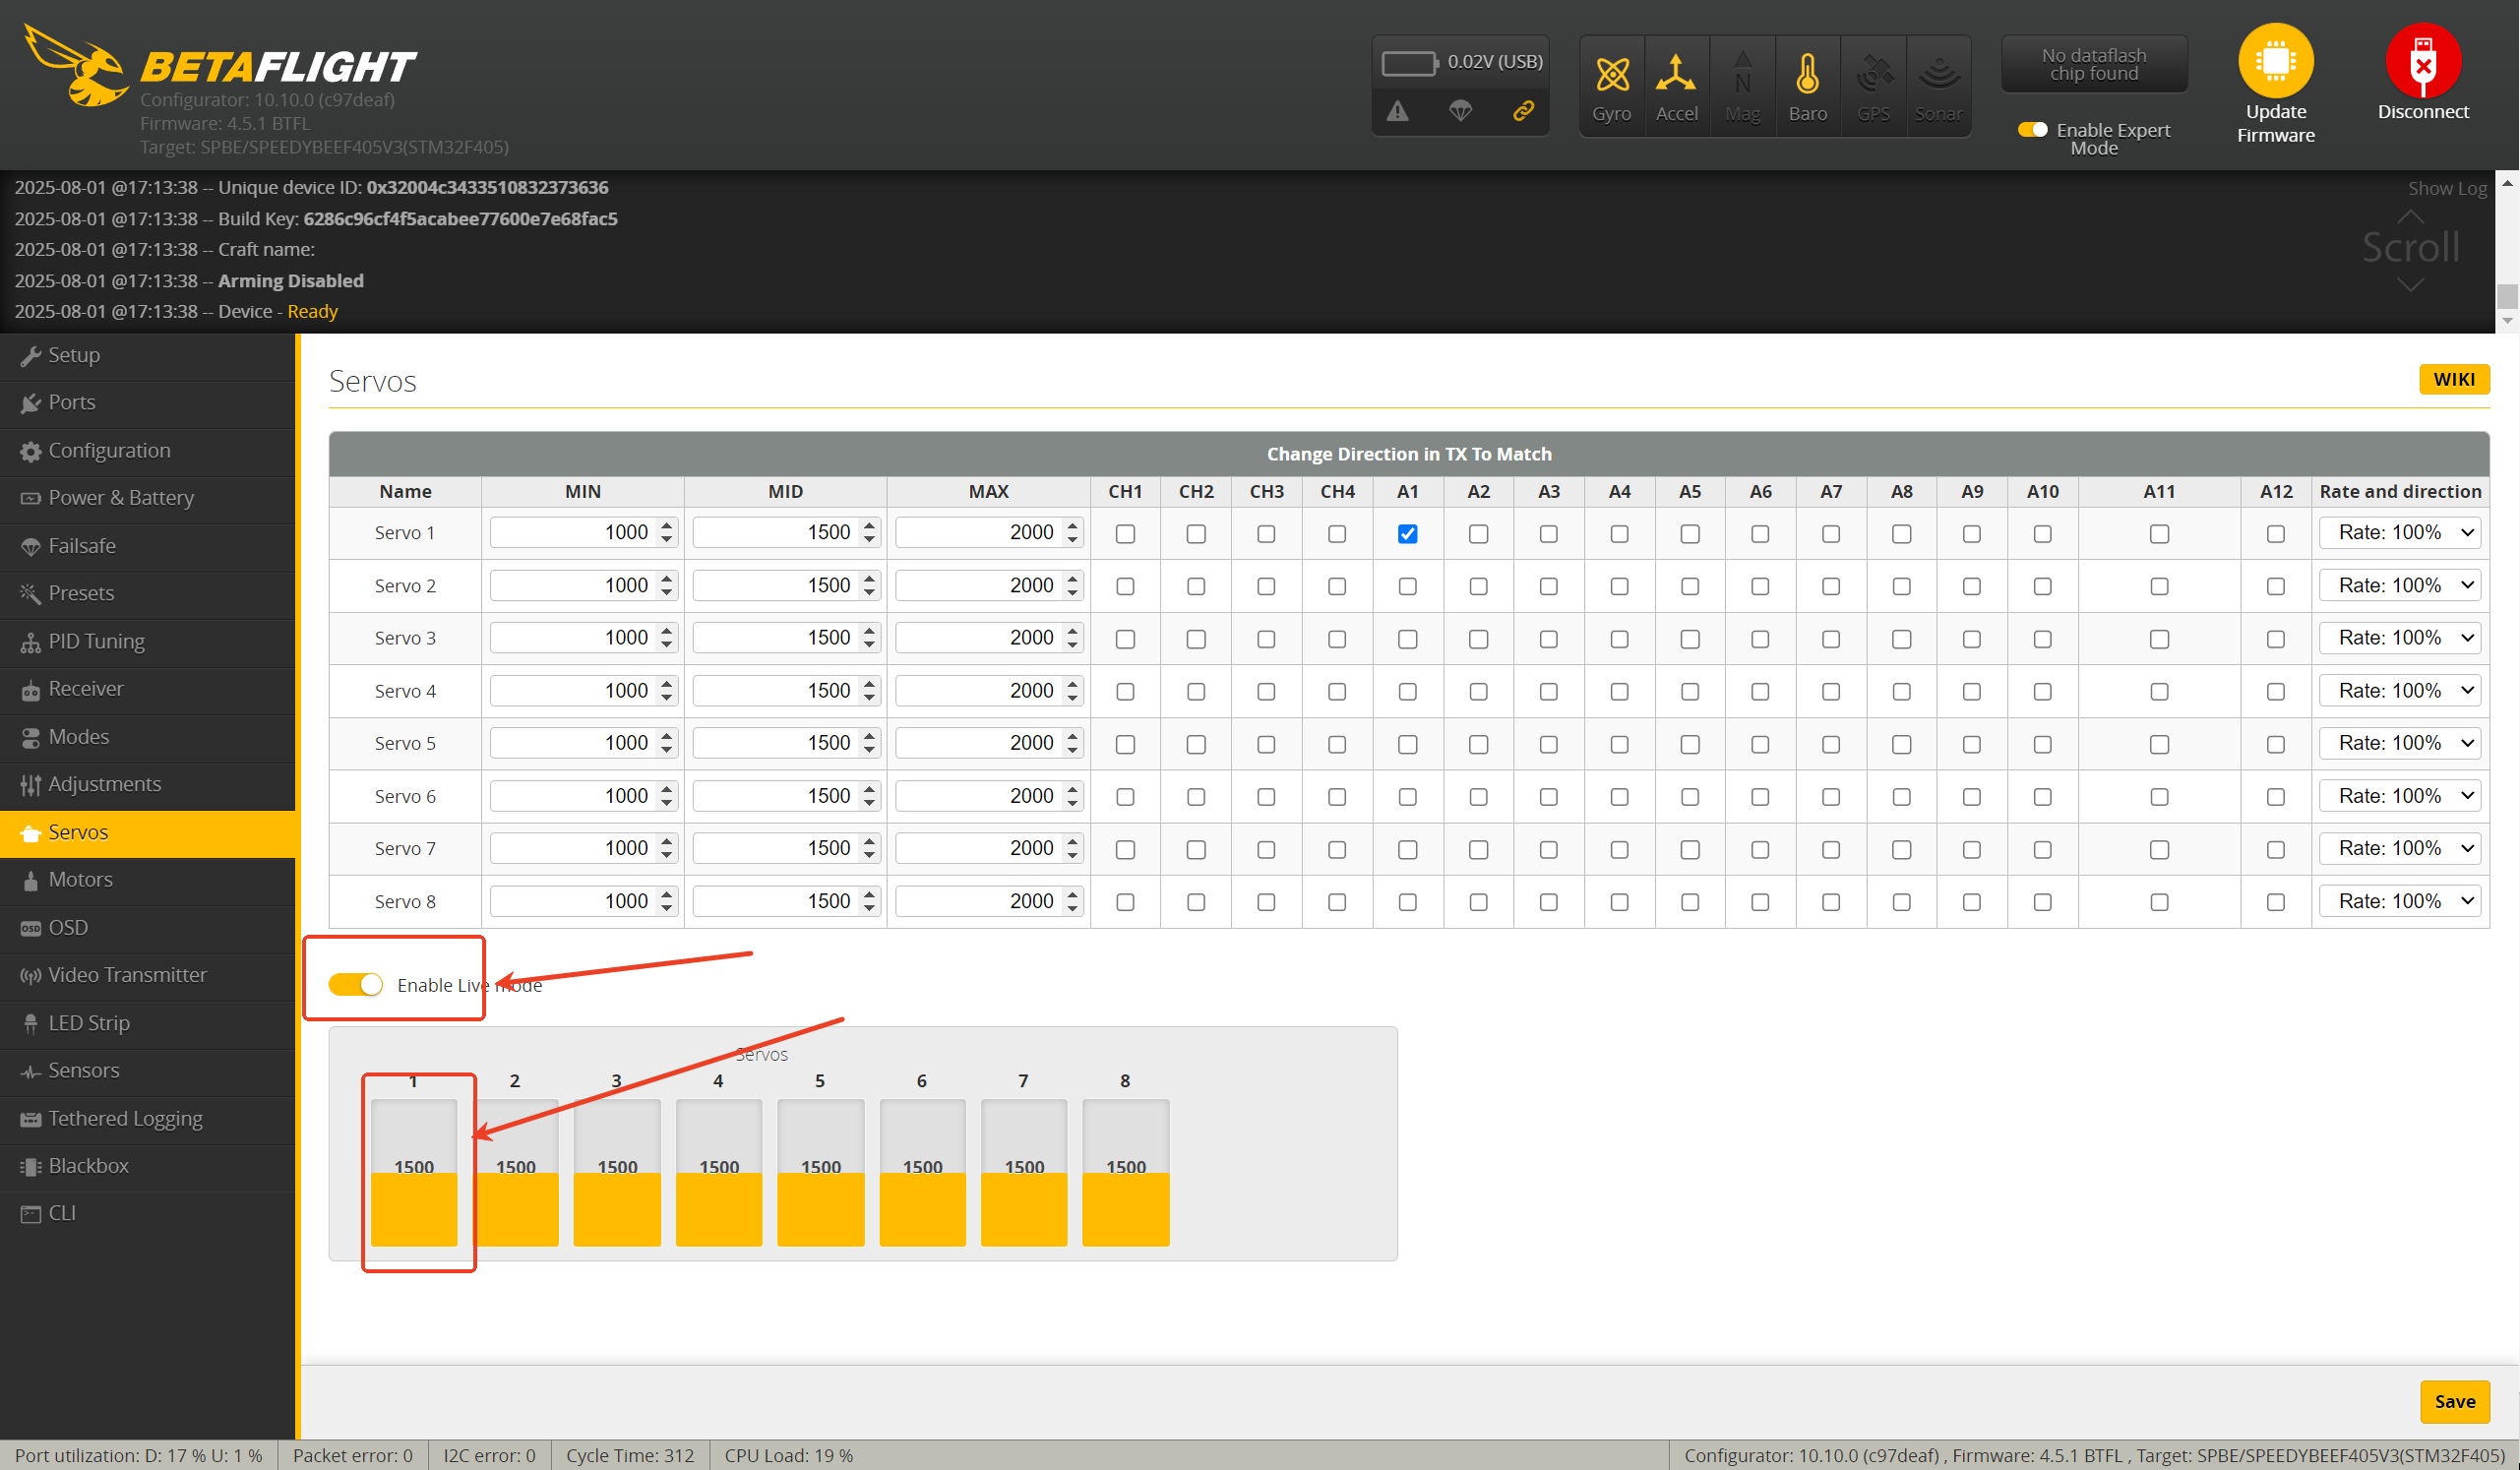
(2)Set the corresponding RC channels on the Servo tab.
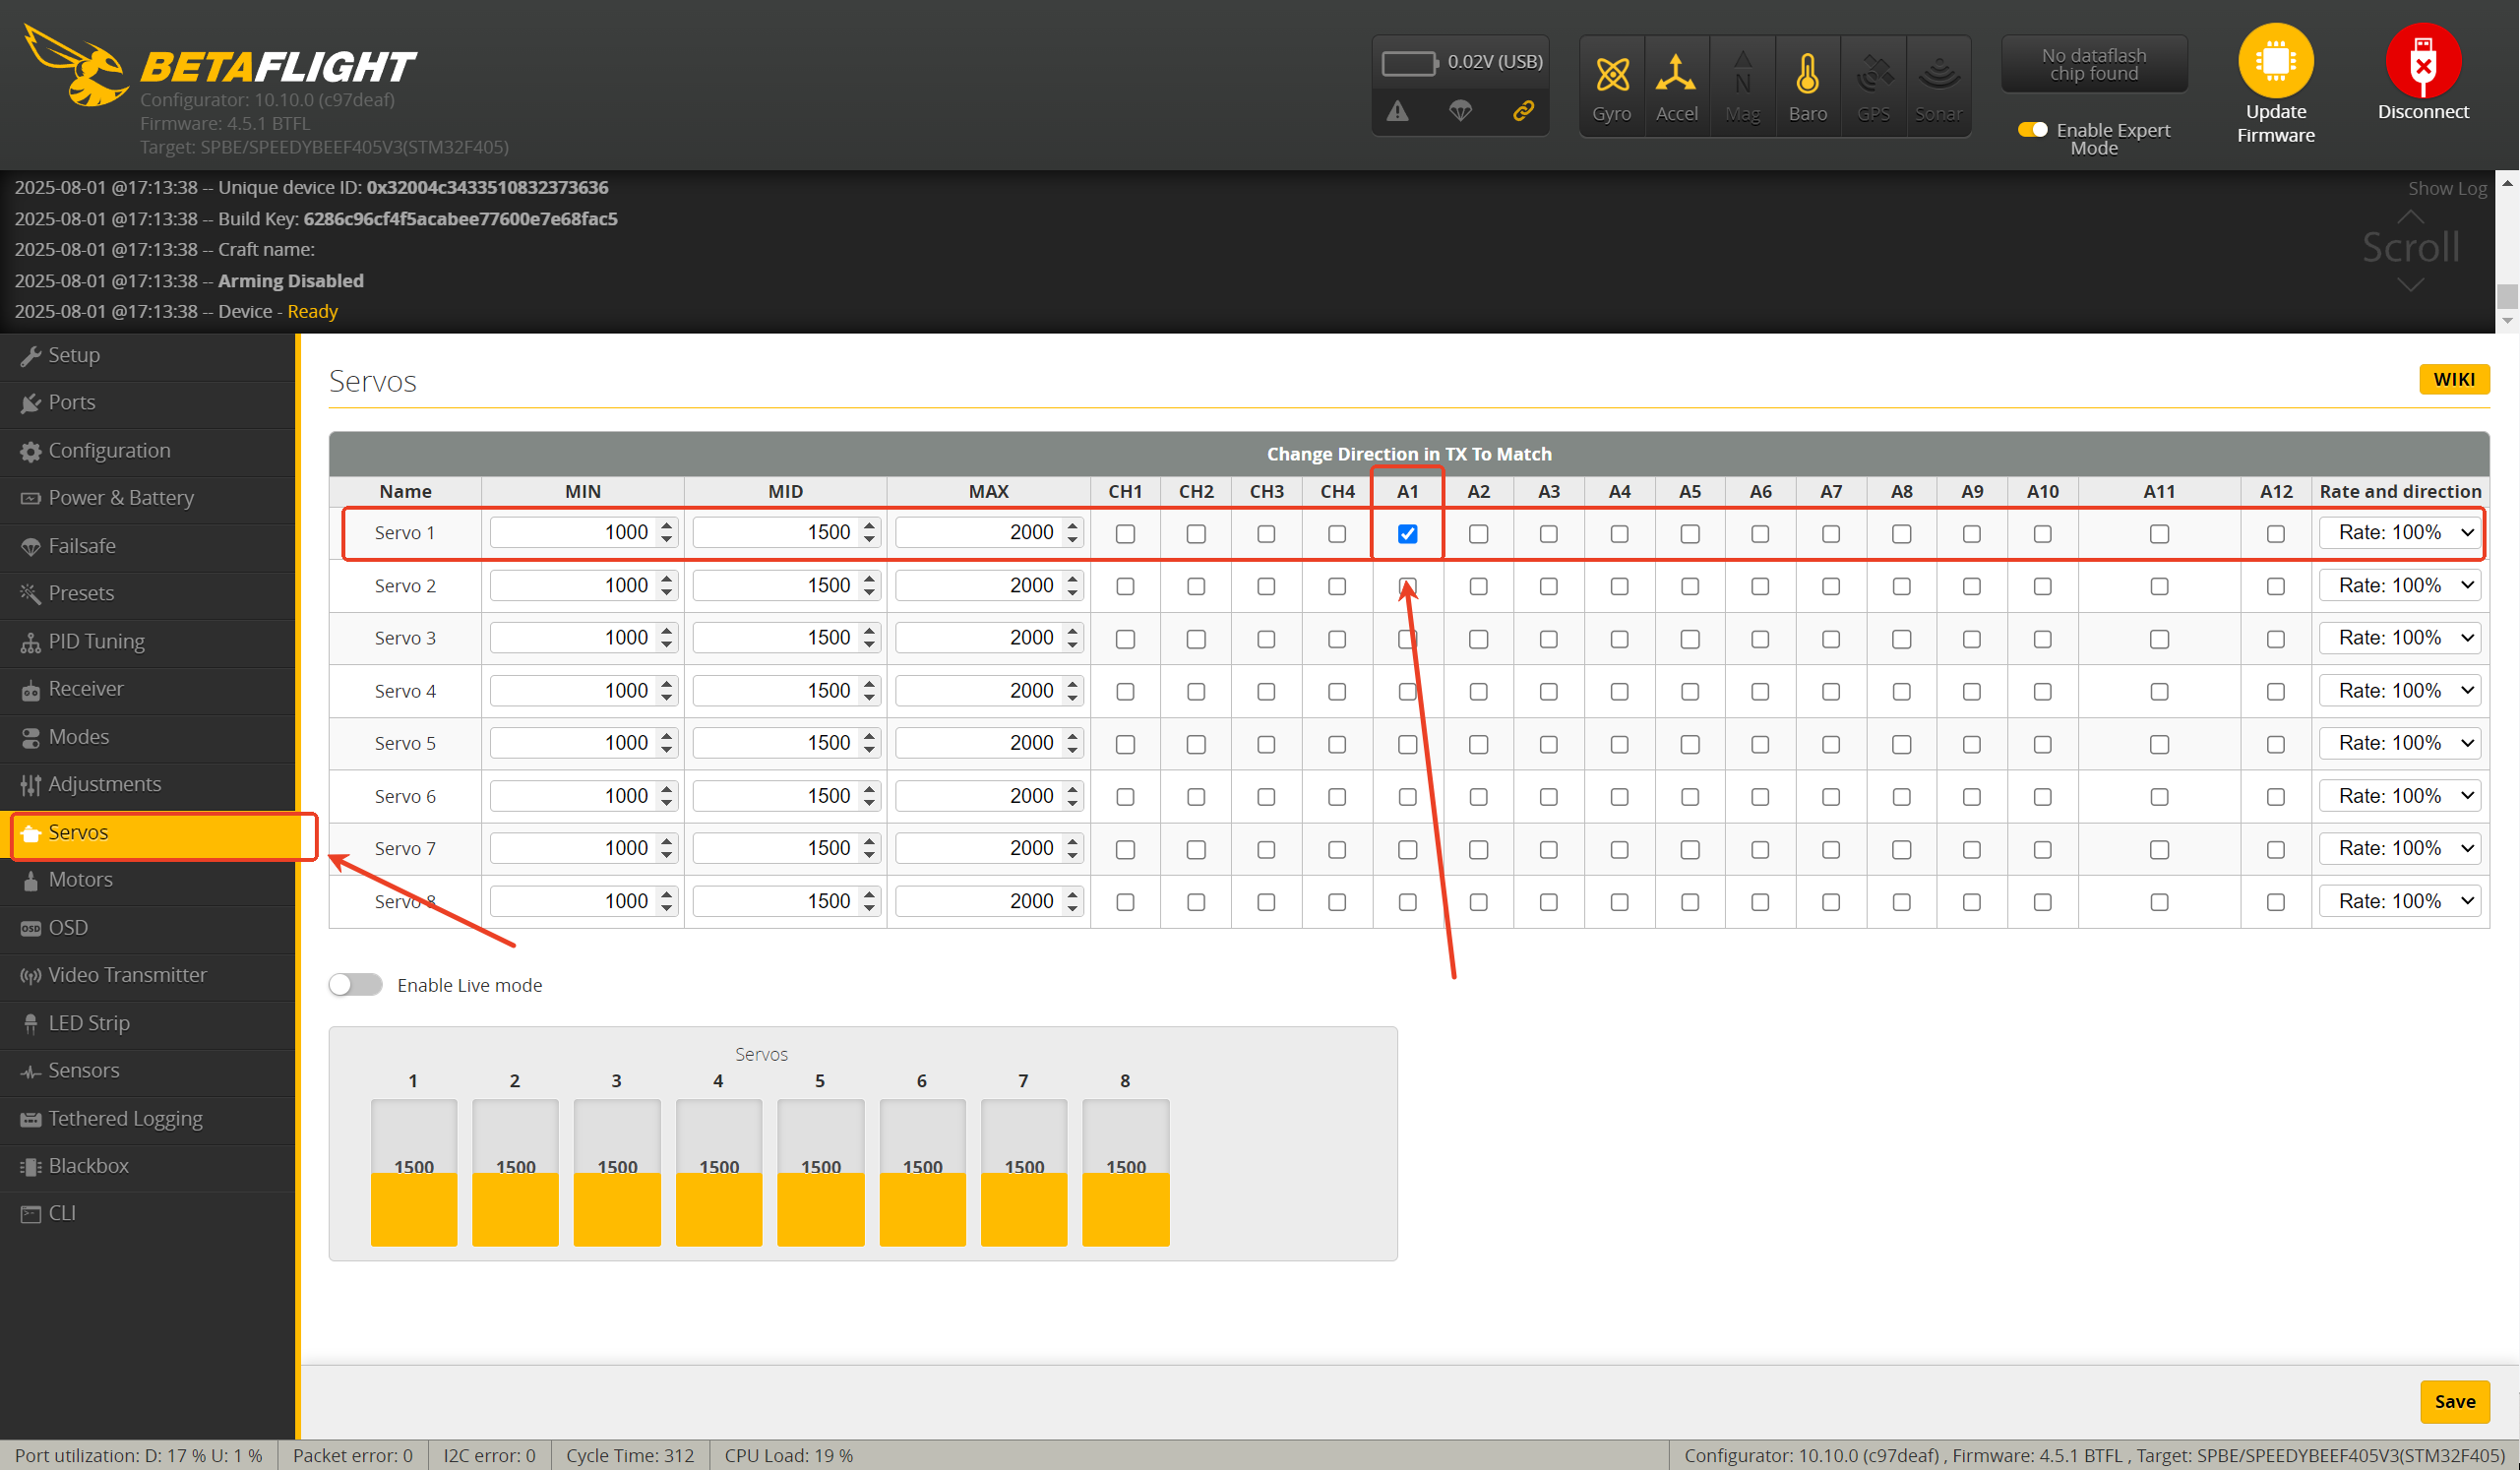
(3)After completing the settings, select "Enable Live Mode" to check if the servo responds correctly to the remote control.