How to Configure the Receiver in Betaflight
How to Configure the Receiver on the Flight Controller
Step 1: Check Wiring Between Receiver and Flight Controller
Refer to the wiring diagram of your flight controller. For example, on the SpeedyBee F4V4:

- For SBUS receivers, connect the SBUS signal wire to a free RX pad on the flight controller (not TX).
- For TBS Crossfire / ELRS receivers, connect the receiver RX to a Sbus pad on the flight controller, and receiver TX to a RX pad (cross wiring).
Step 2: Ensure Receiver Is Bound to the Transmitter
Make sure your receiver is successfully bound to your transmitter according to their manuals.
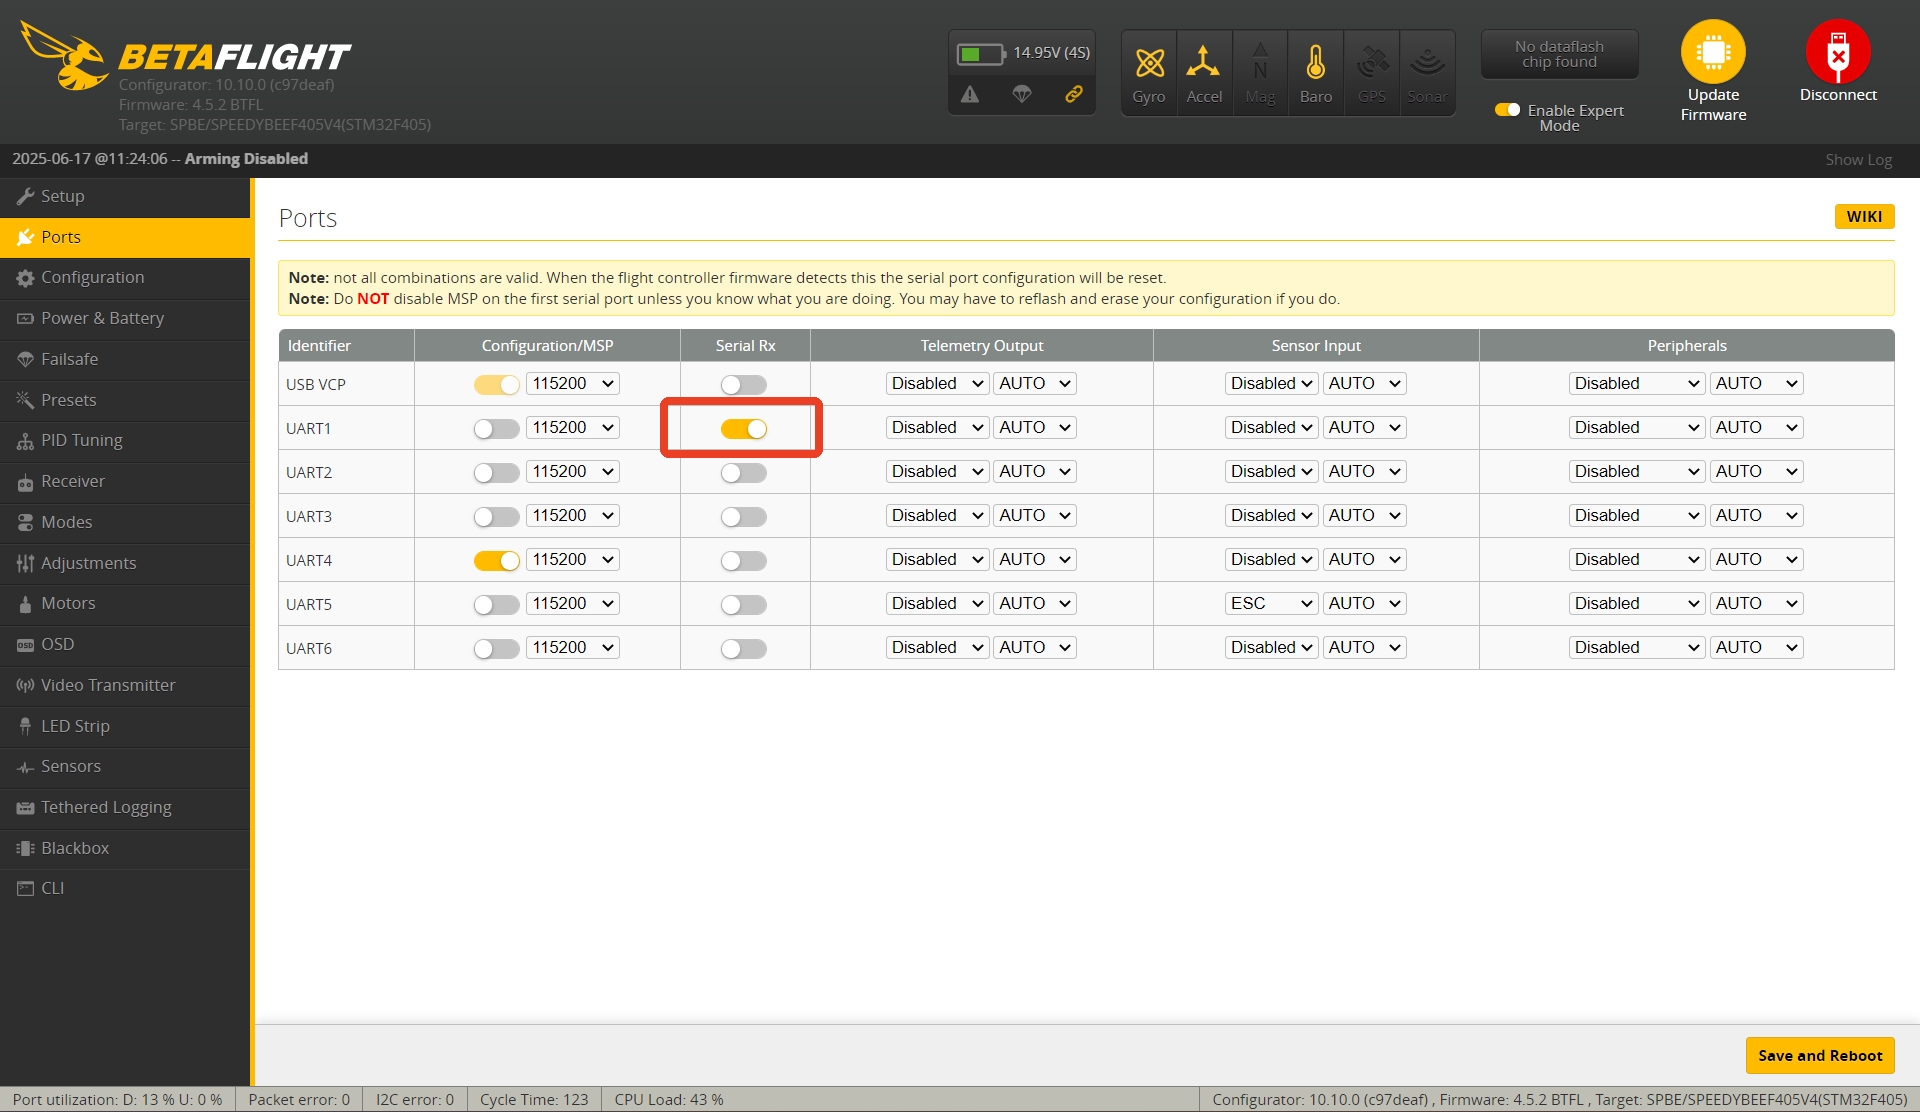
Step 3: Enable "Serial Rx" on the Correct UART
In Betaflight Configurator, go to the Ports tab and enable "Serial Rx" on the UART your receiver is connected to.
Note: Only one function can be enabled per UART. If Serial Rx is enabled on a UART, you cannot enable MSP, sensors, or other peripherals on the same UART.
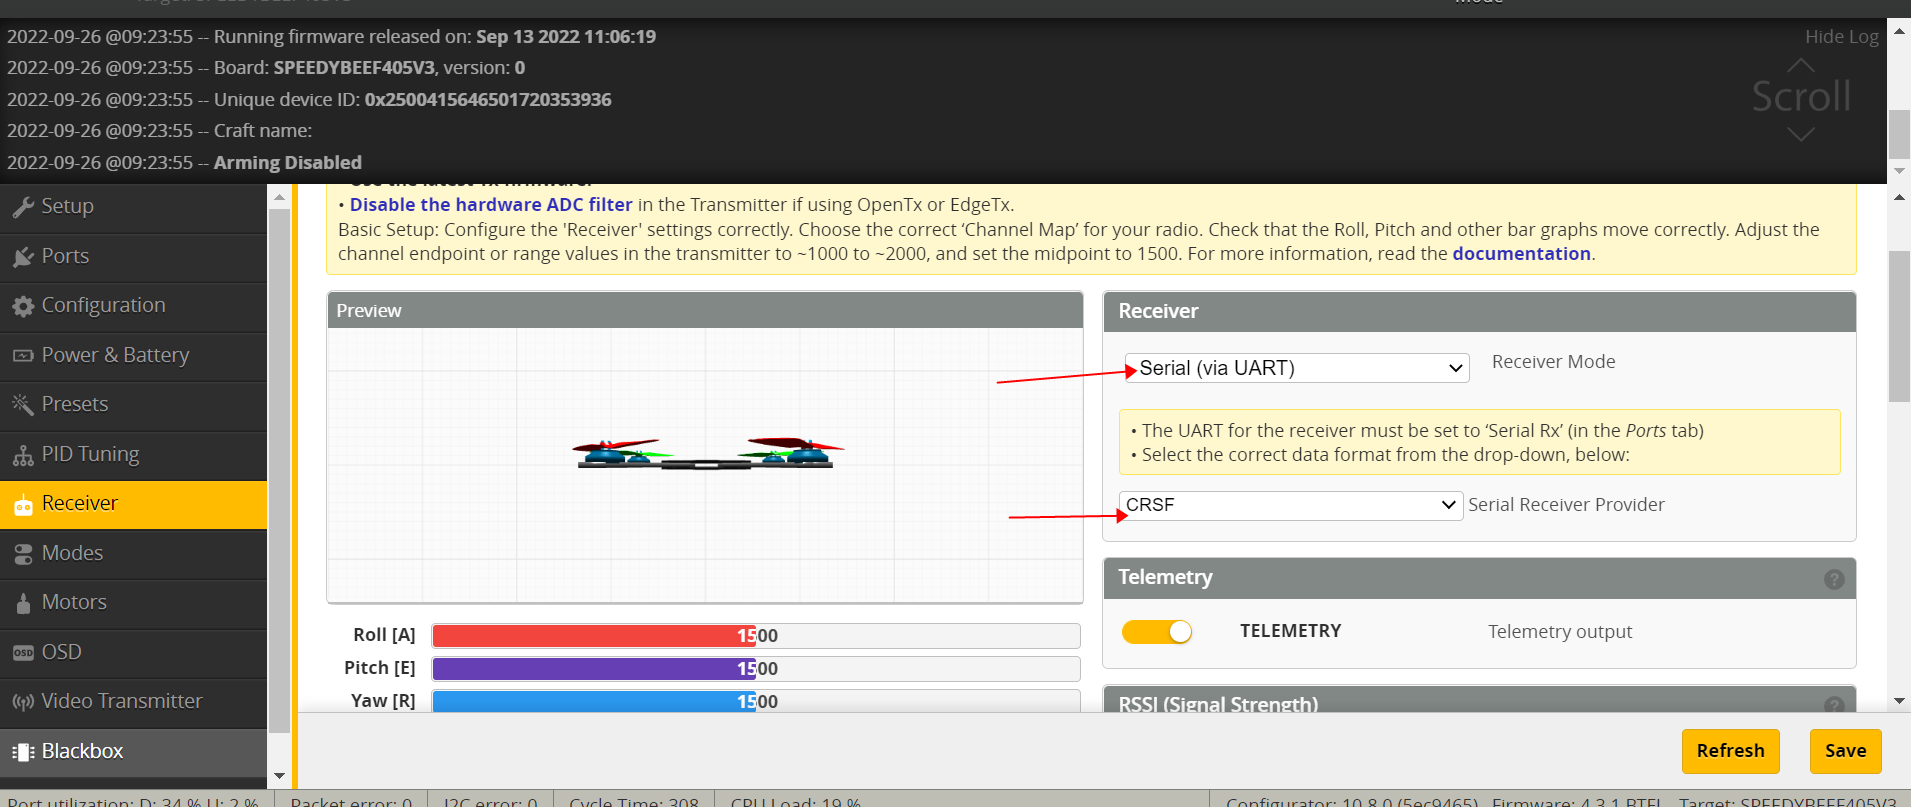
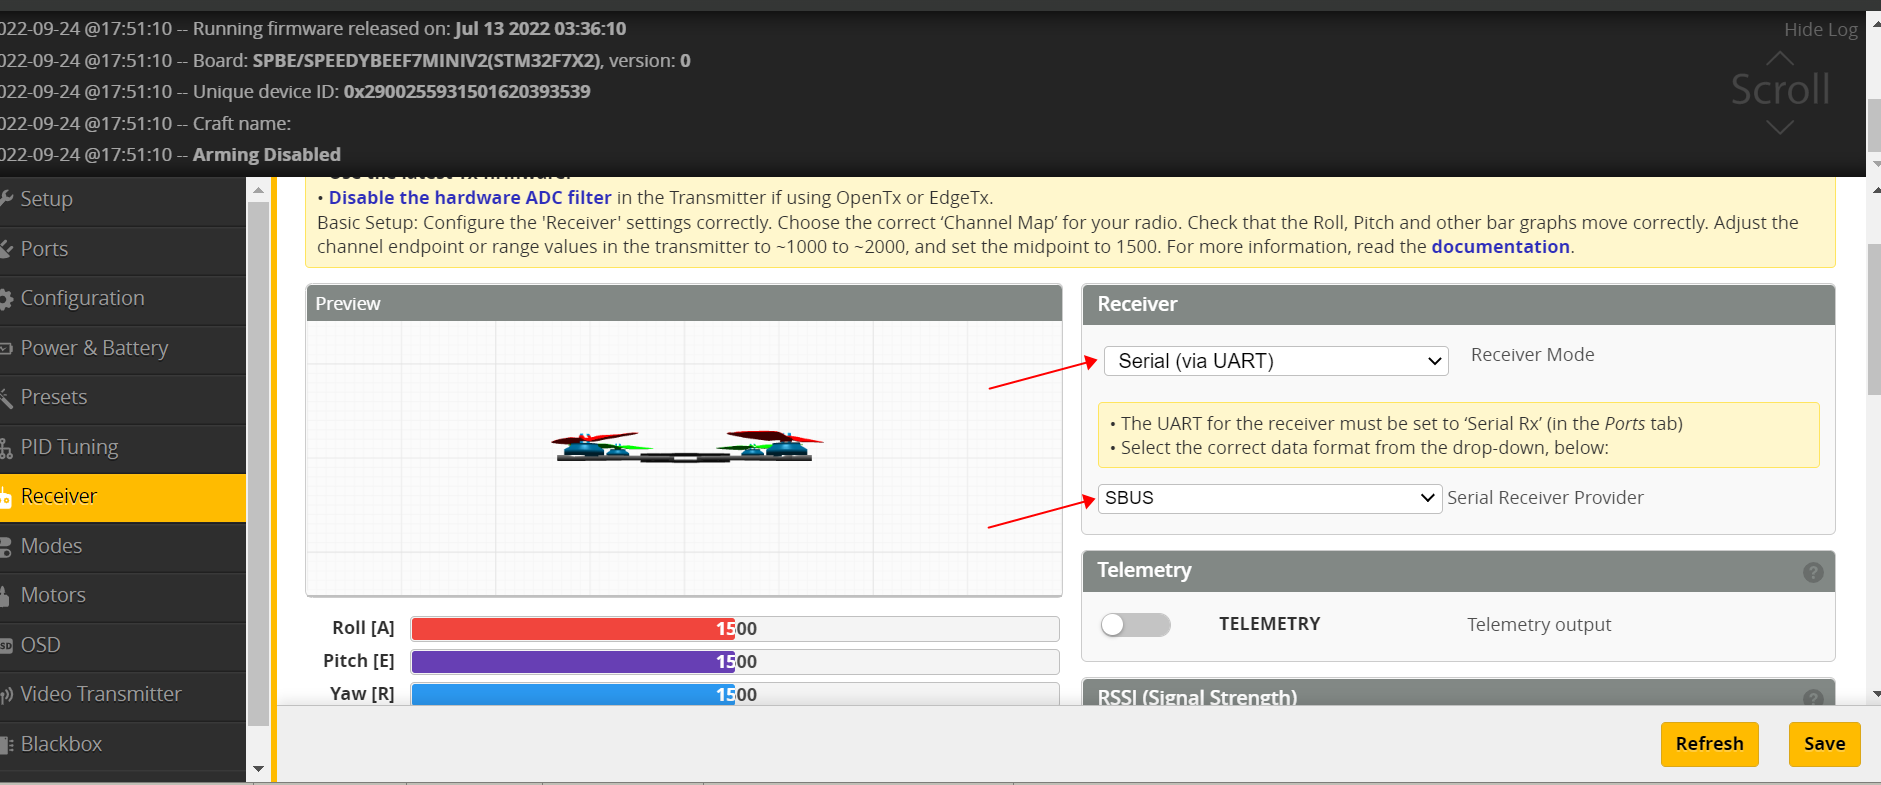
Step 4: Set Receiver Mode and Protocol
Go to the Configuration tab in Betaflight Configurator and choose:
- Receiver Mode: “Serial-based receiver (SPEKTRUM, SBUS, SUMD)”
- Protocol based on your receiver type:
| Receiver Type | Protocol to Select |
|---|---|
| TBS Crossfire / ELRS | CRSF |
| FrSky RX | SBUS |
| Futaba RX | SBUS |
| FlySky / Turnigy RX | IBUS |
| Spektrum DSM2 | SPEKTRUM1024 or SRXL2 |
| Spektrum DSMX | SPEKTRUM2048 or SRXL2 |
If your receiver is TBS Crossfire or ELRS, please select "CRSF".
Select "Serial (via UART)" and "SBUS" for FrSky receivers.
Select PPM or IBUS for FlySky receivers.
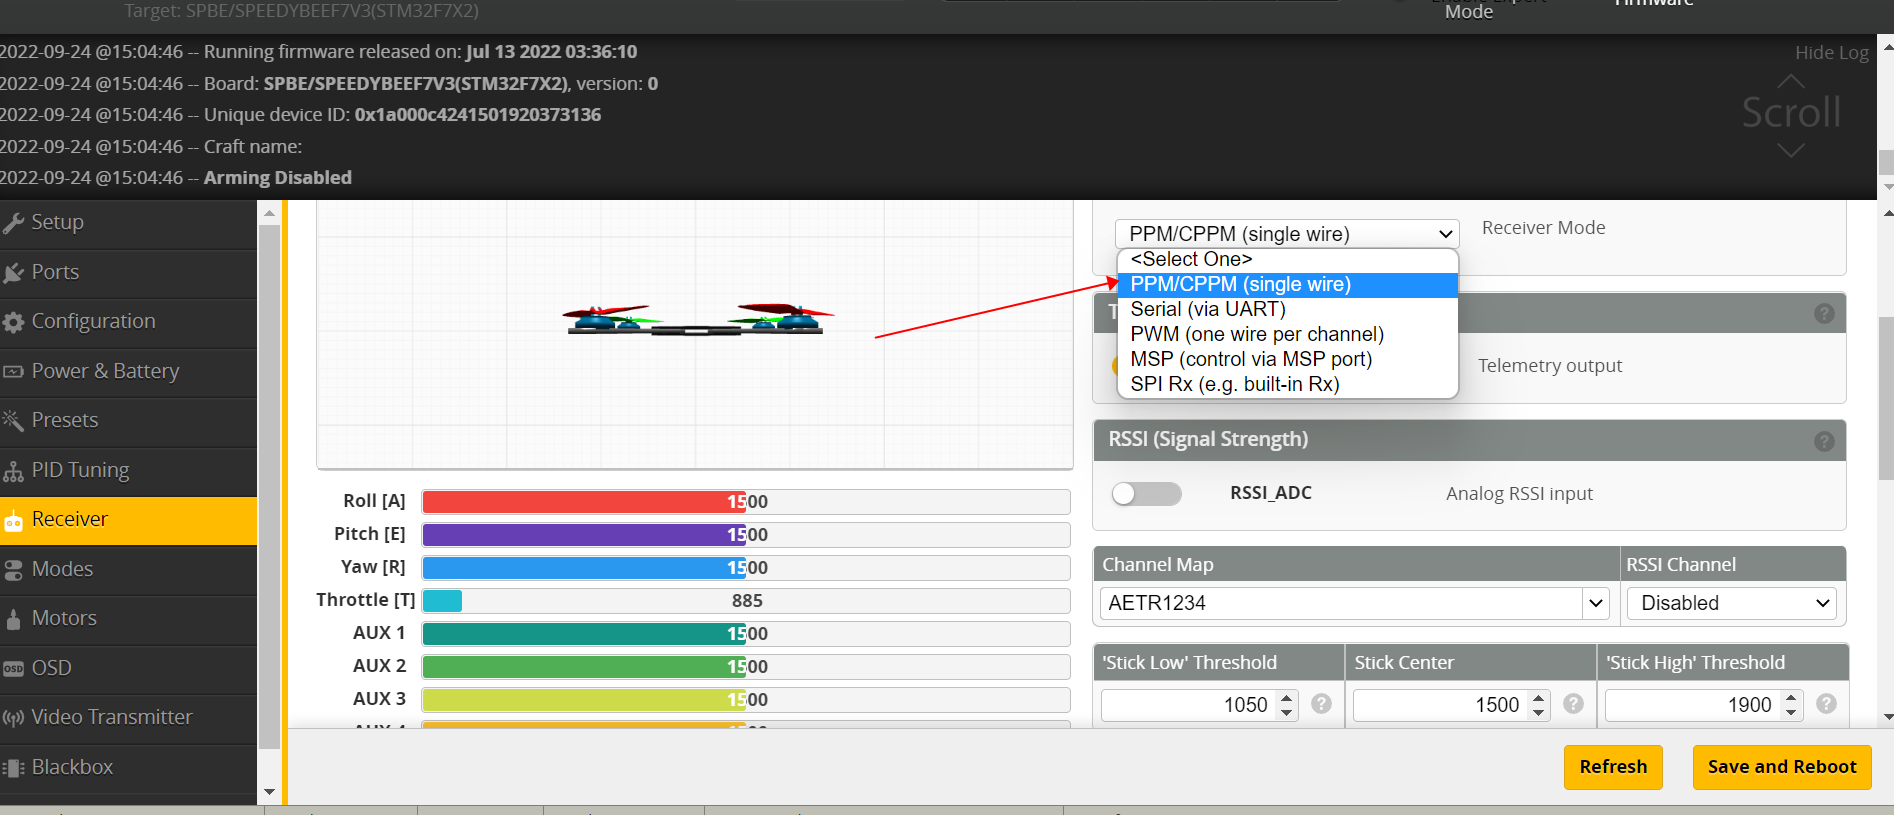
Step 5: Verify Inputs in the Receiver Tab
Connect the FC to Betaflight Configurator.Go to the Receiver tab.Move the sticks and switches on your transmitter.The channel bars should respond. If they don't, check wiring, UART settings, and binding status.
Tip: For some receivers, stay at least 0.5 meters away from the drone to avoid signal loss.