What to Do If the Flight Controller Fails to Start Normally
Troubleshooting Method for Flight Controller Failing to Start (Example: F405 V3)
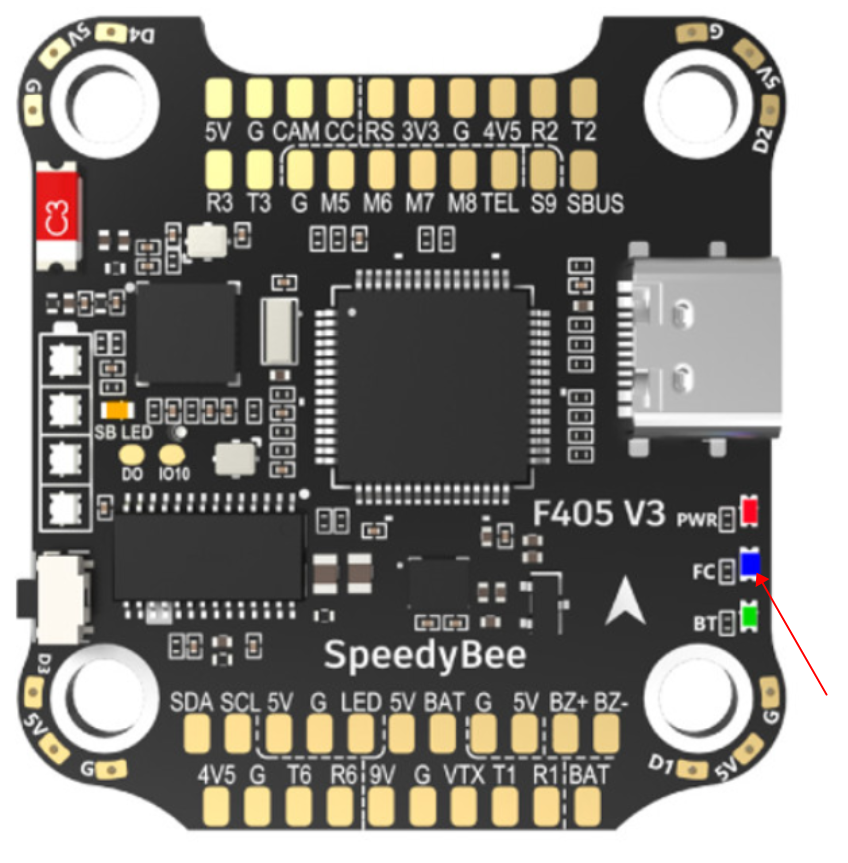
If you connect the battery to your drone but the SpeedyBee F405 V3 flight controller only shows a red LED—or no LED at all—please follow the steps below to troubleshoot the issue.
Note:
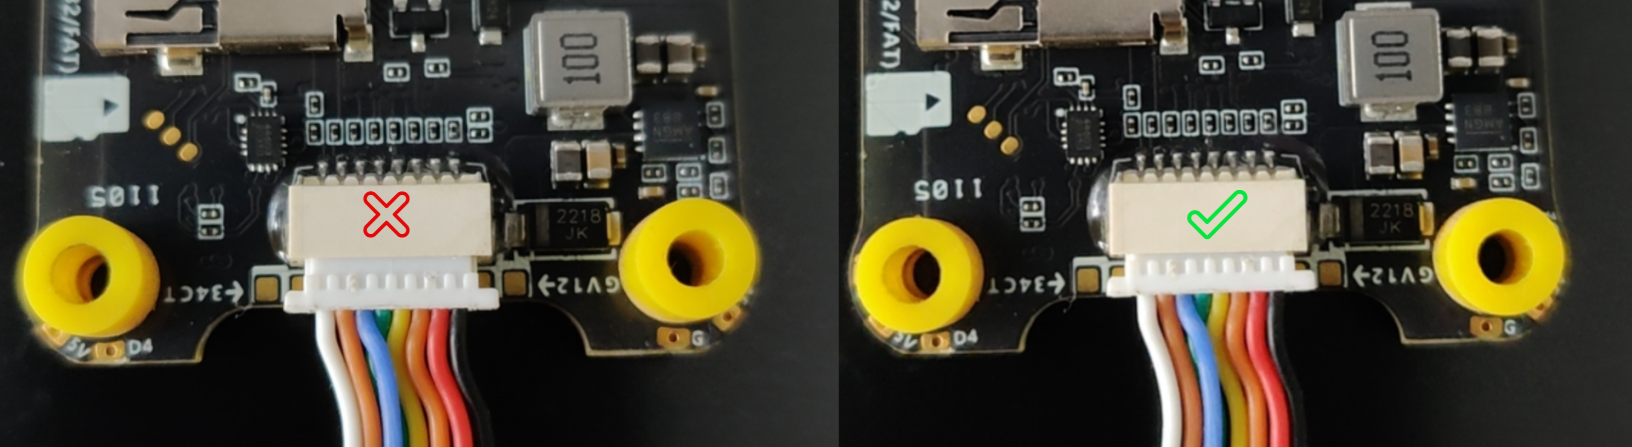
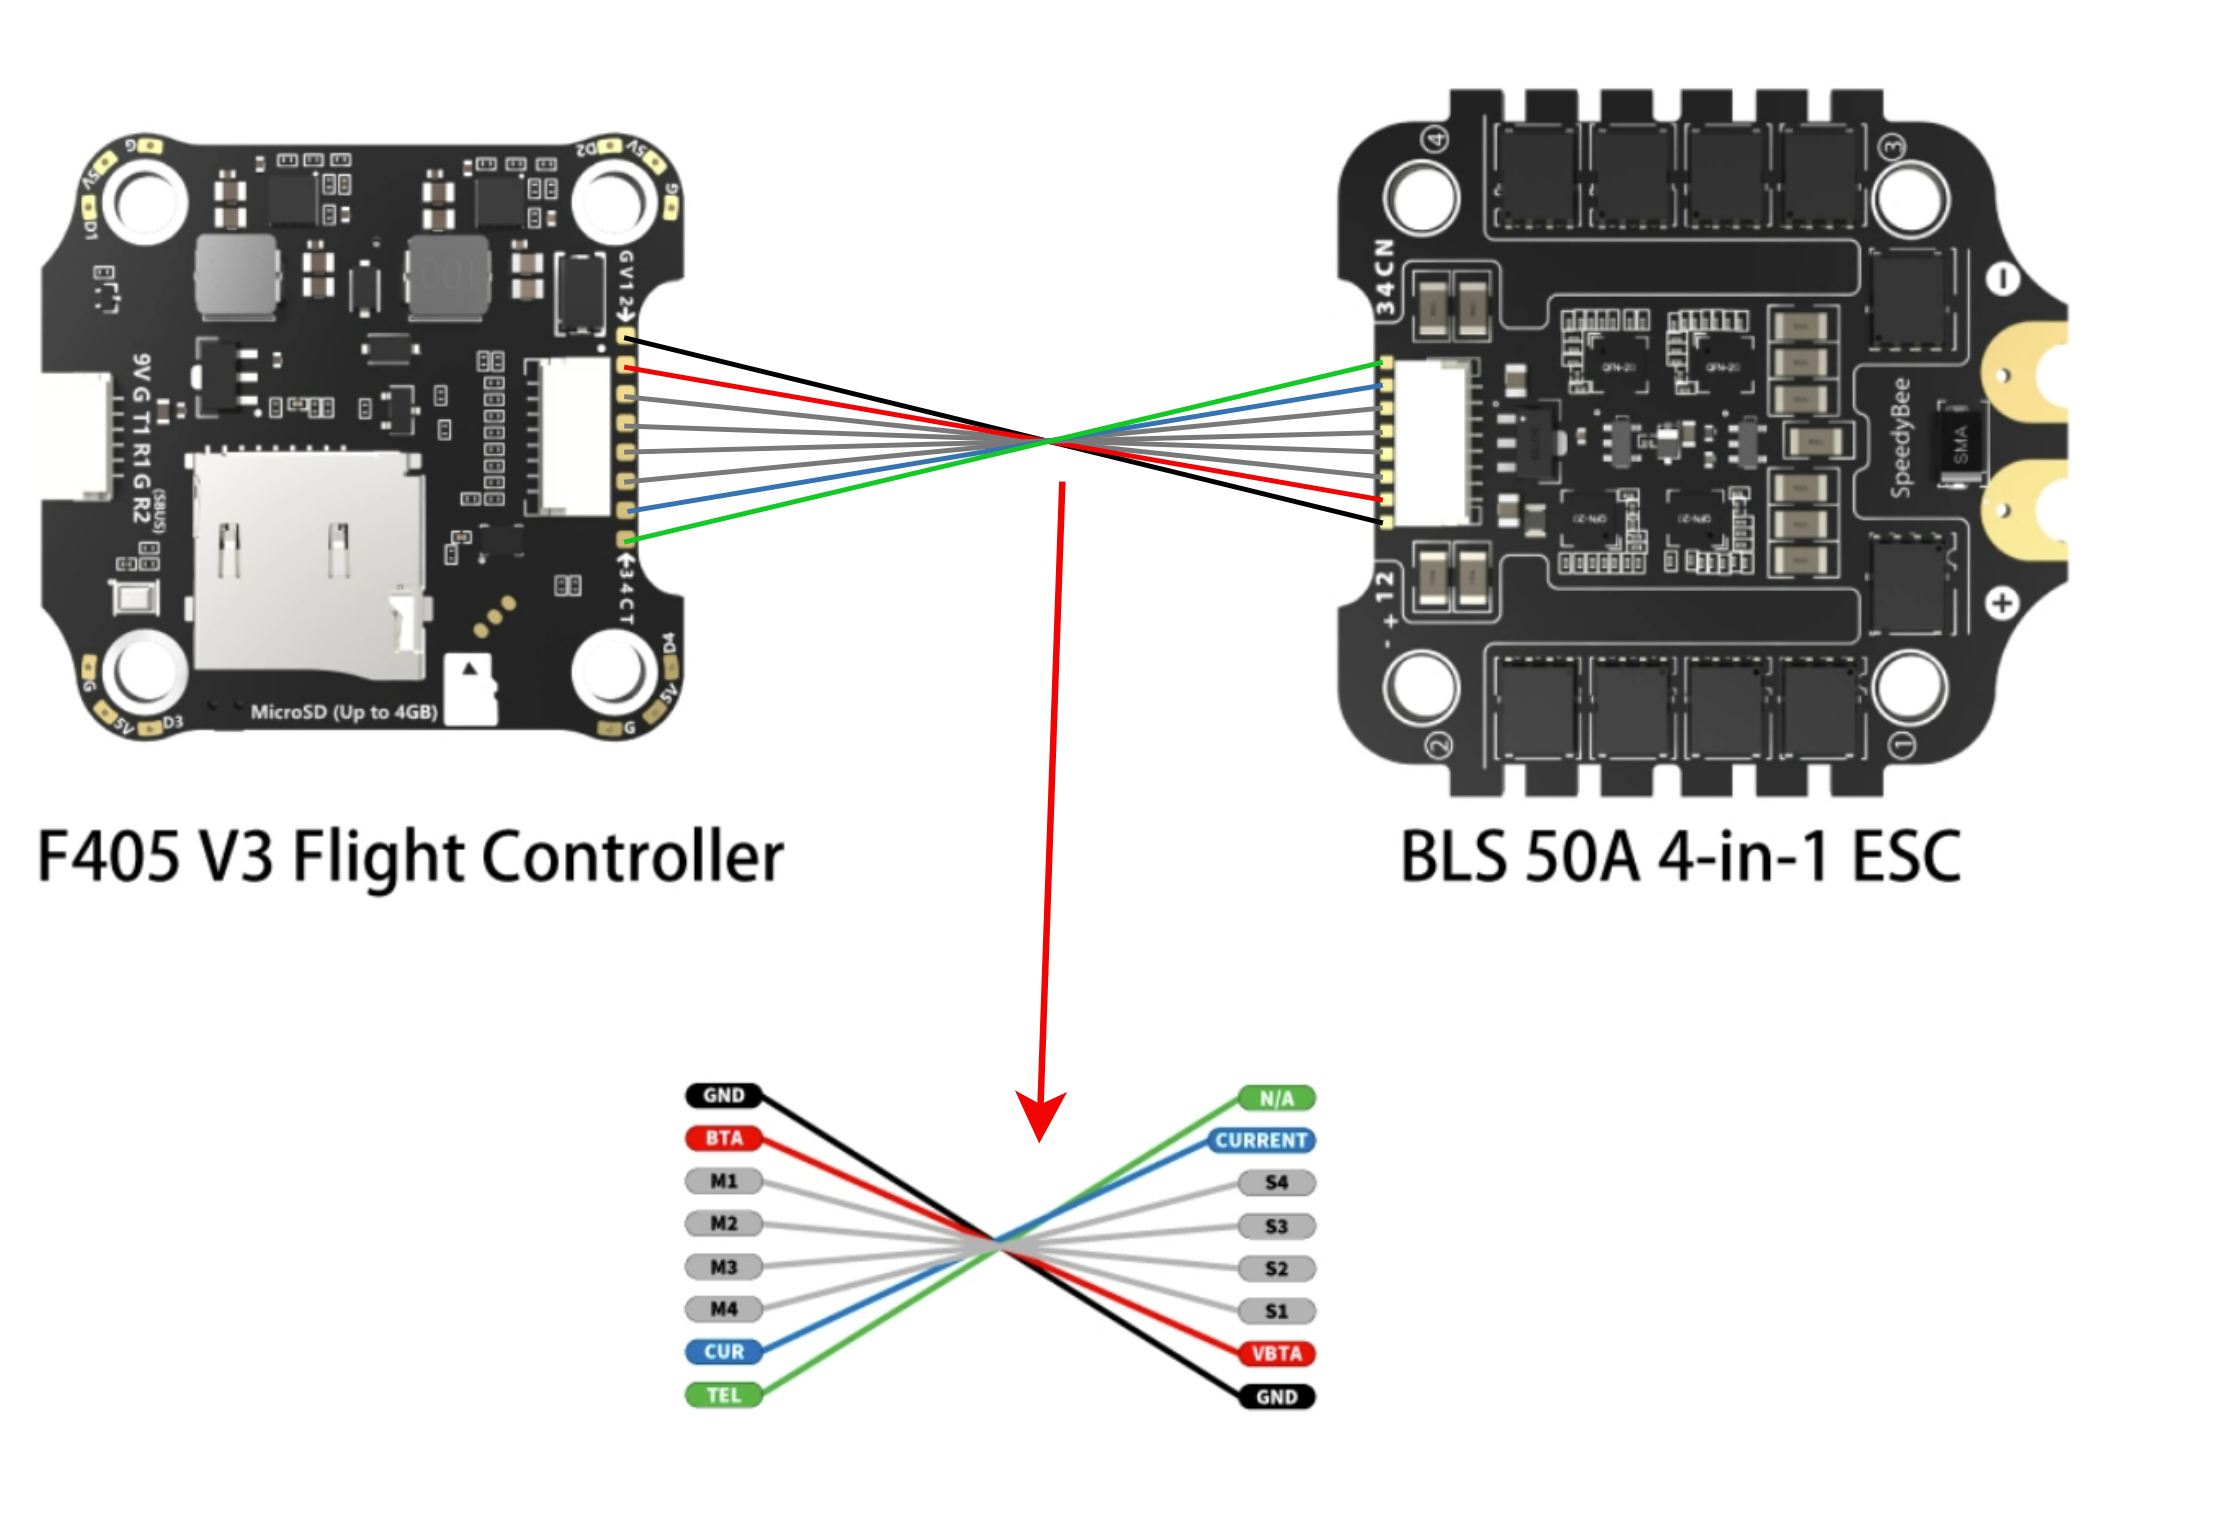
Ensure that the 8-pin cable between the flight controller and ESC is fully seated. The connector is divided into two sections—if not pushed in firmly, it may only be inserted into the first section. The second section requires a bit more force to fully connect.
Step 1: Check if the Flight Controller Is Bricked
If you power the flight controller using a USB-C cable but it still only shows a red LED:
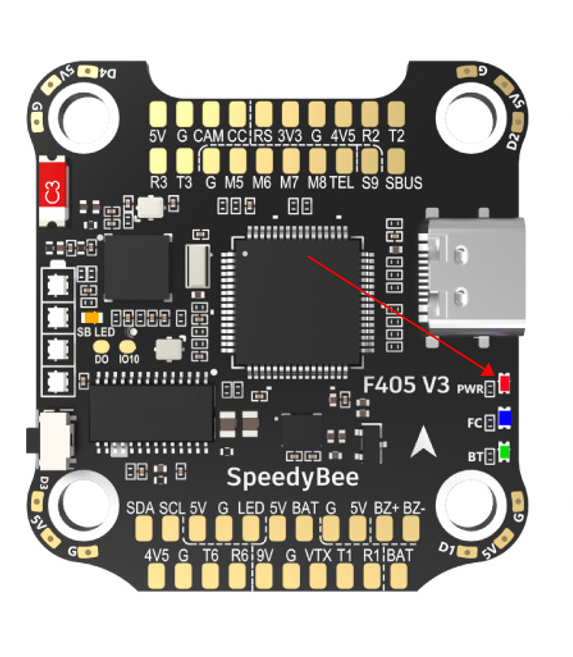
It may be bricked. You can refer to this article to restore it to DFU mode:
How to Flash Firmware on a Bricked Flight Controller?
However, if you power the flight controller using a USB-C cable and it starts normally (green LED flashes once, blue LED flashes several times) and connects to SpeedyBee without any issues, this may indicate a poor connection between the ESC and flight controller, or a damaged flight controller power chip. In this case, proceed to Step 2.
Step 2: Check the Connection Between the ESC and Flight Controller
After connecting the flight controller and ESC with the 8-pin cable, power on the drone. Use a multimeter to measure the voltage between the BAT pad and G pad as shown below (it should equal the battery voltage):
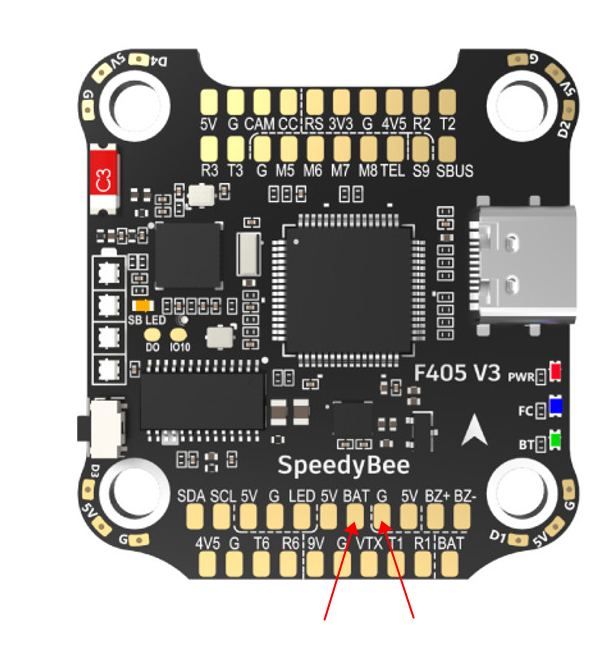
If the voltage reads the battery voltage, proceed to Step 3. If it reads 0V, this indicates that the 8-pin cable, the FC 8-pin connector, or the ESC 8-pin connector is damaged. Please disconnect the 8-pin cable between the ESC and flight controller and instead solder two individual wires:
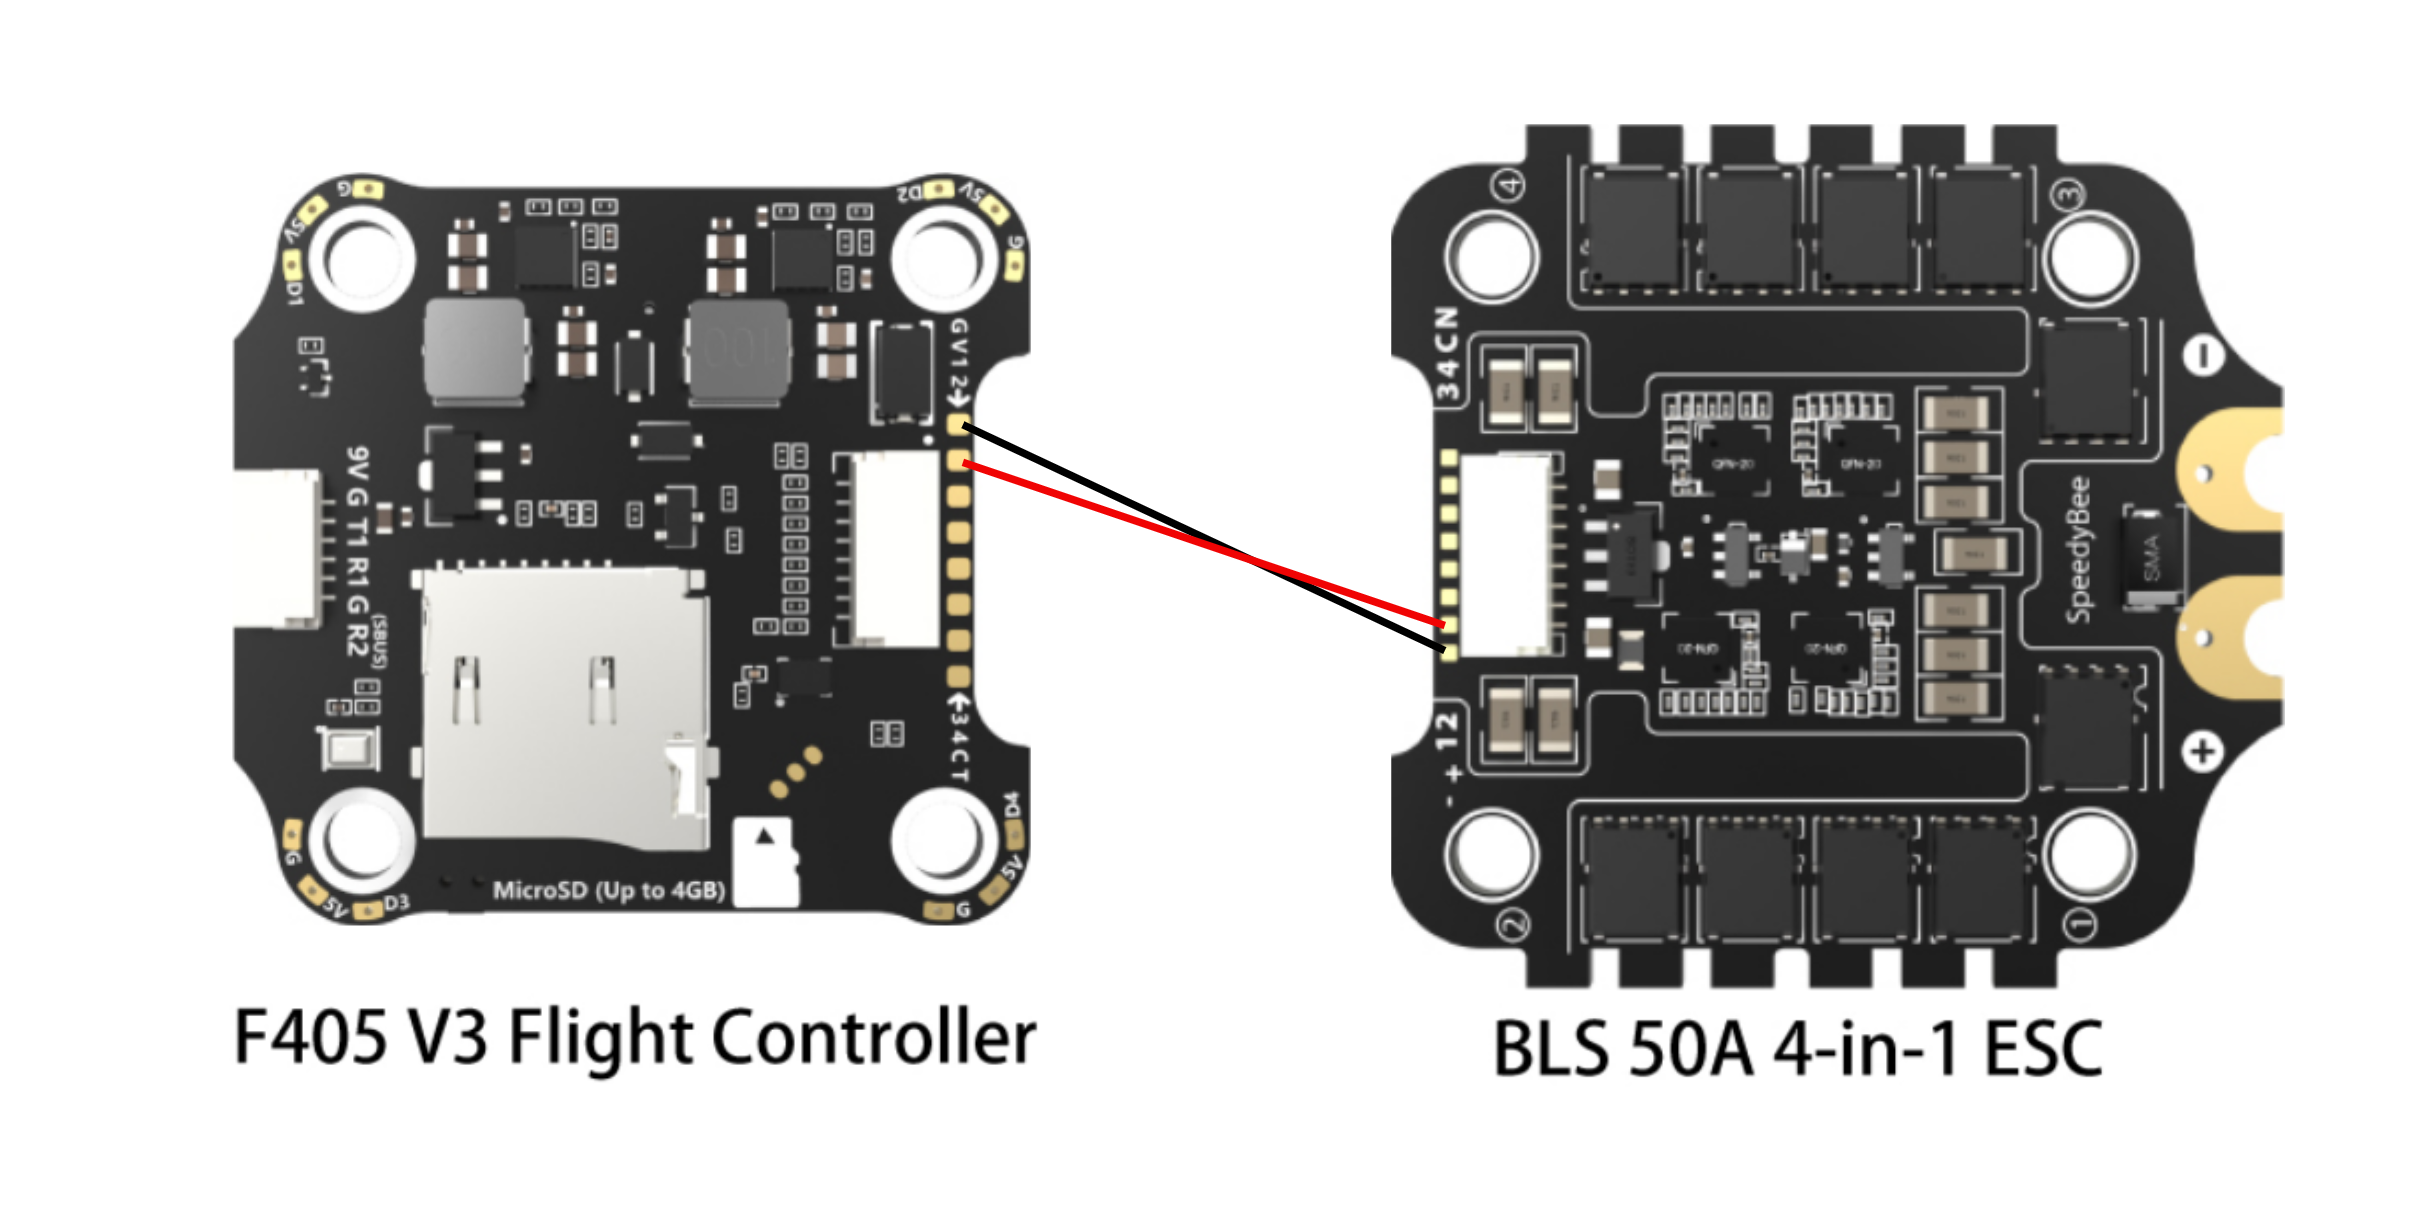
Then power the ESC using the battery. If the flight controller can start normally through the ESC (green LED flashes once, blue LED flashes several times), this indicates that the poor contact is with the ESC 8-pin connector or the FC 8-pin connector.
Please connect by soldering the wires directly instead of using the 8-pin cable (connection method shown below):
Step 3: Check Whether a Peripheral Is Causing a BEC Short Circuit
Desolder all peripherals from the flight controller (e.g., camera, receiver, VTX, GPS, etc.) and clean the pads. Keep only the connections between the flight controller and ESC, and between the ESC and motor. Then power on the ESC and check if the flight controller can start normally. Under normal conditions, the blue LED (BF) should flash during power-up, and the flight controller should connect to the app without issues.
Step 4: The Flight Controller May Be Damaged
After connecting the flight controller and ESC with the 8-pin cable, power on the drone. Use a multimeter to measure the voltage between the BAT pad and the G pad as shown below:

If the voltage reads as the battery voltage, it likely indicates that the flight controller’s power chip is damaged. This is usually caused by a voltage surge (over 30V). Please send us close-up and focused photos of both sides of the flight controller. Additionally, provide a screenshot of your purchase showing the purchase date, order number, and the store.