How to Enable GPS in the Betaflight Configurator
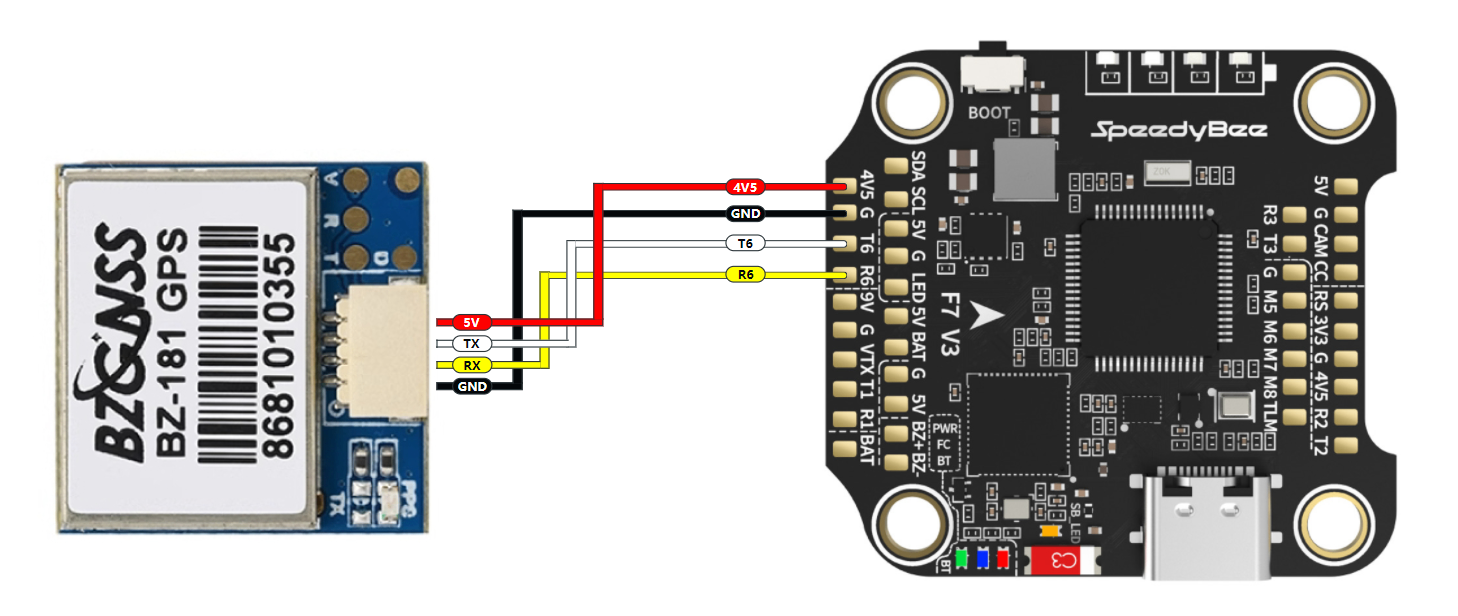
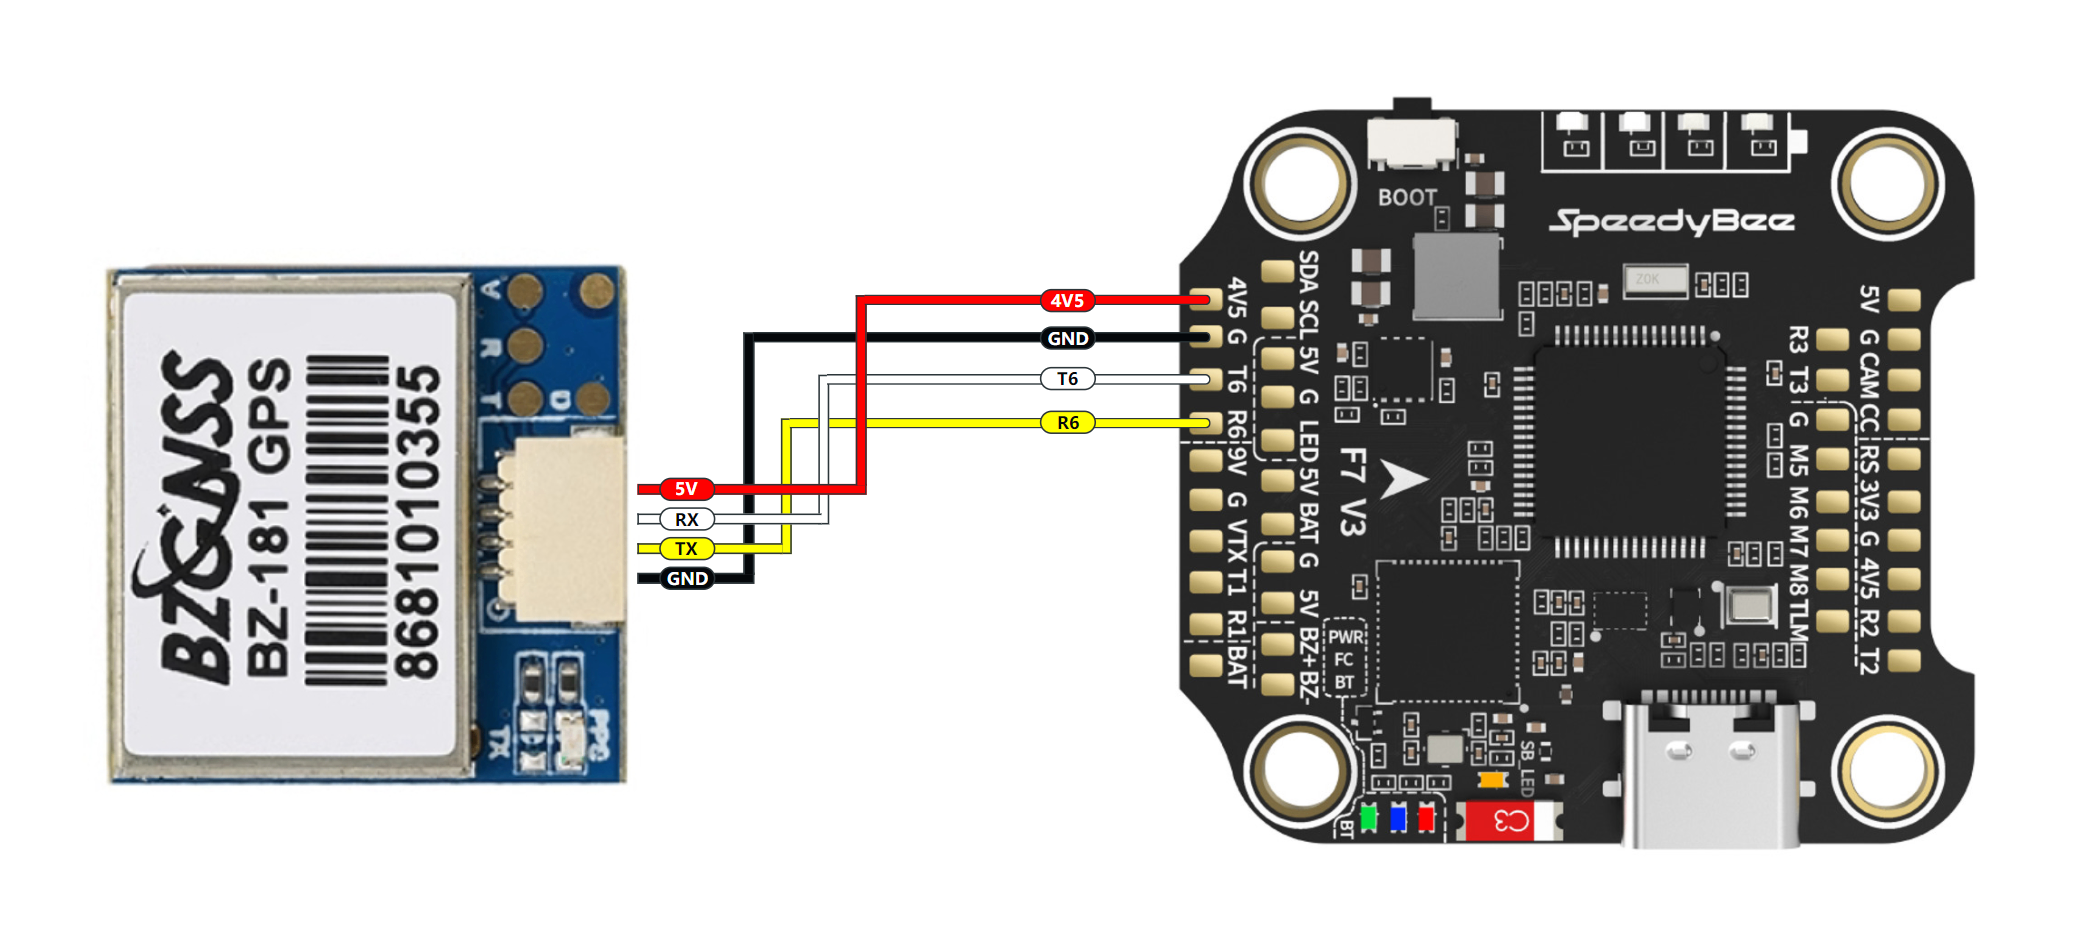
First, ensure the GPS wiring is correct
Note: The numbers following "T" and "R" are just port identifiers. As long as the corresponding port is enabled in the configurator, they represent the GPS function.
Additionally, SDA and SCL are for the compass. The compass does not function in Betaflight (BF), so these can be left unconnected.
- GPS TX → FC R6
- GPS RX → FC T6
- GPS 5V → FC 5V
- GPS GND → FC GND
If the GPS module has a built-in compass (SDA & SCL):
- GPS SDA → FC SDA
- GPS SCL → FC SCL

Using BZ121 / BZ181 / BZ251 GPS modules as an example:
Solder to the T6 and R6 pads.
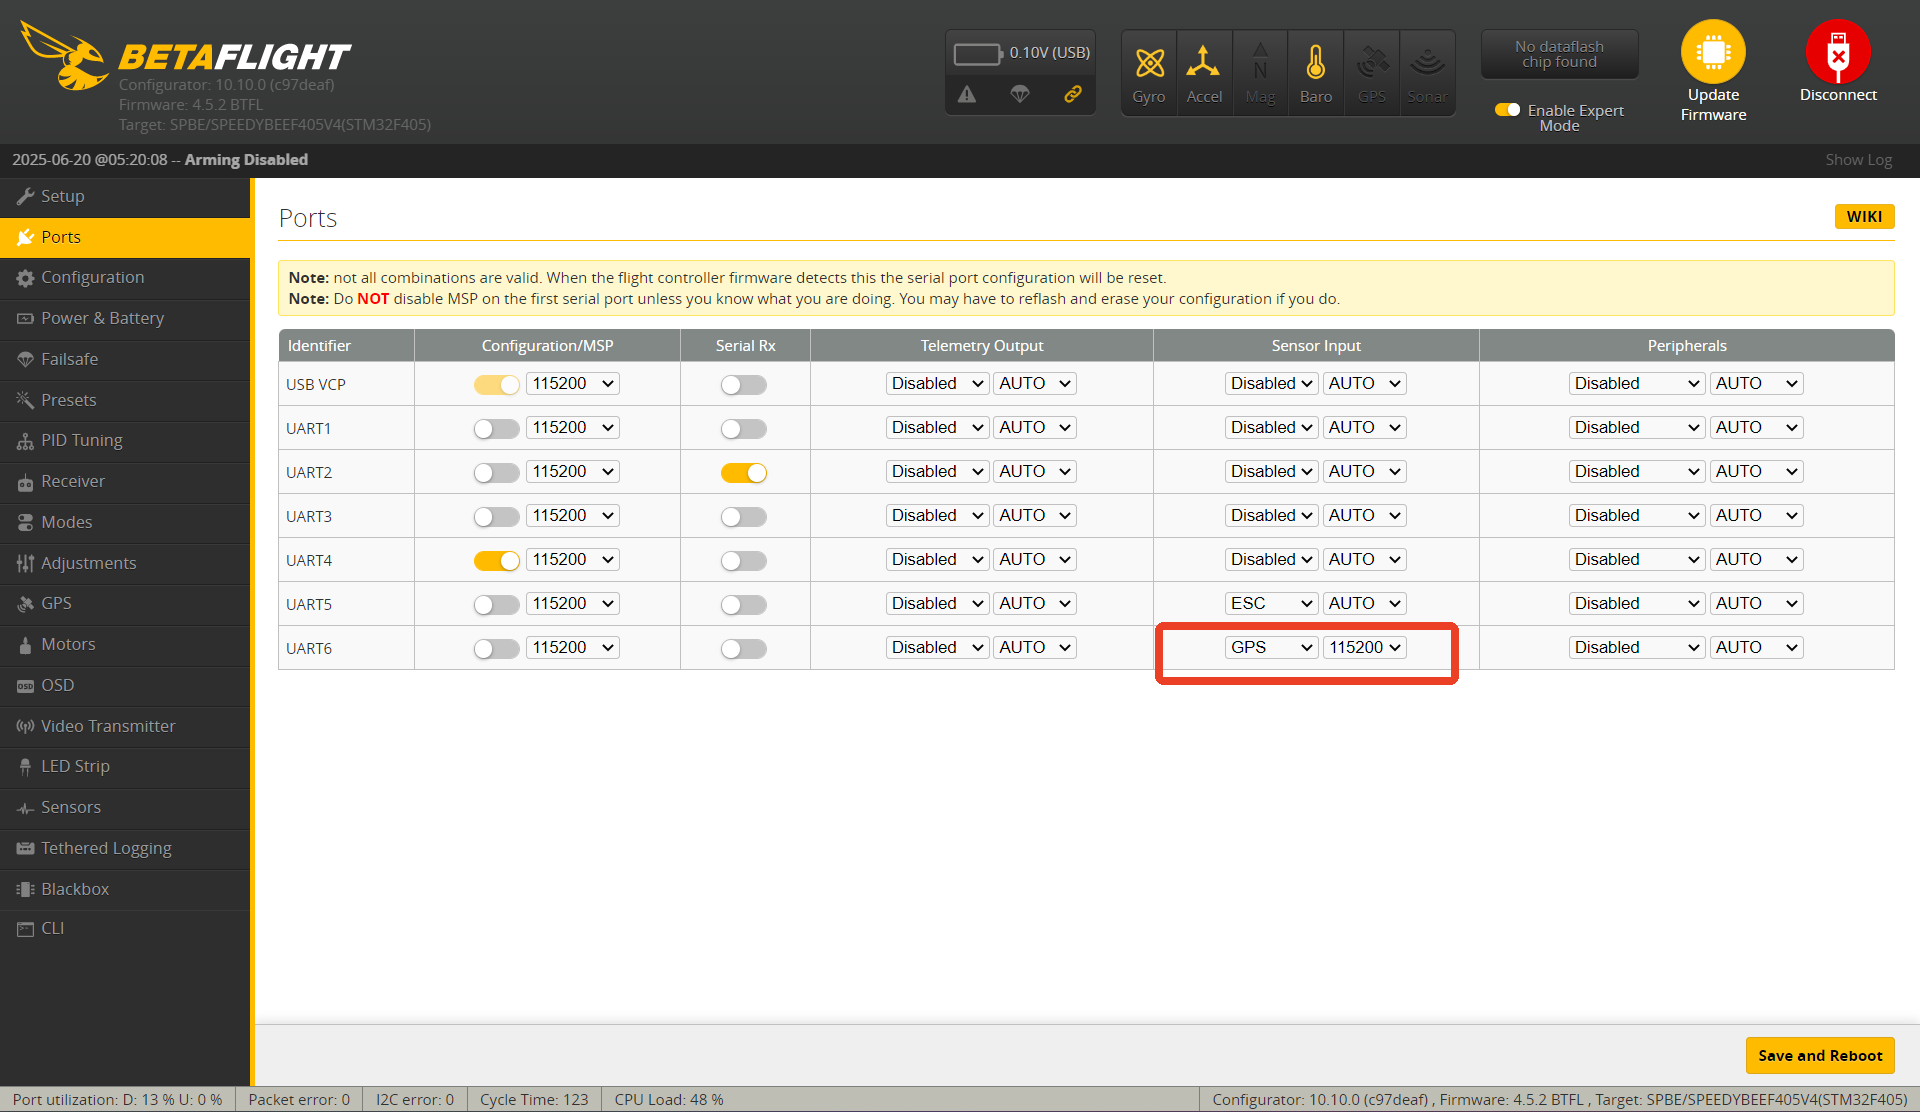
In the Ports tab of the configurator, enable the GPS option under Sensor Input for UART6.
The 9600 next to it is the baud rate.
You can search for relevant GPS modules on Taobao, where you’ll find wiring instructions, baud rate, and supported GPS protocols in the product description.
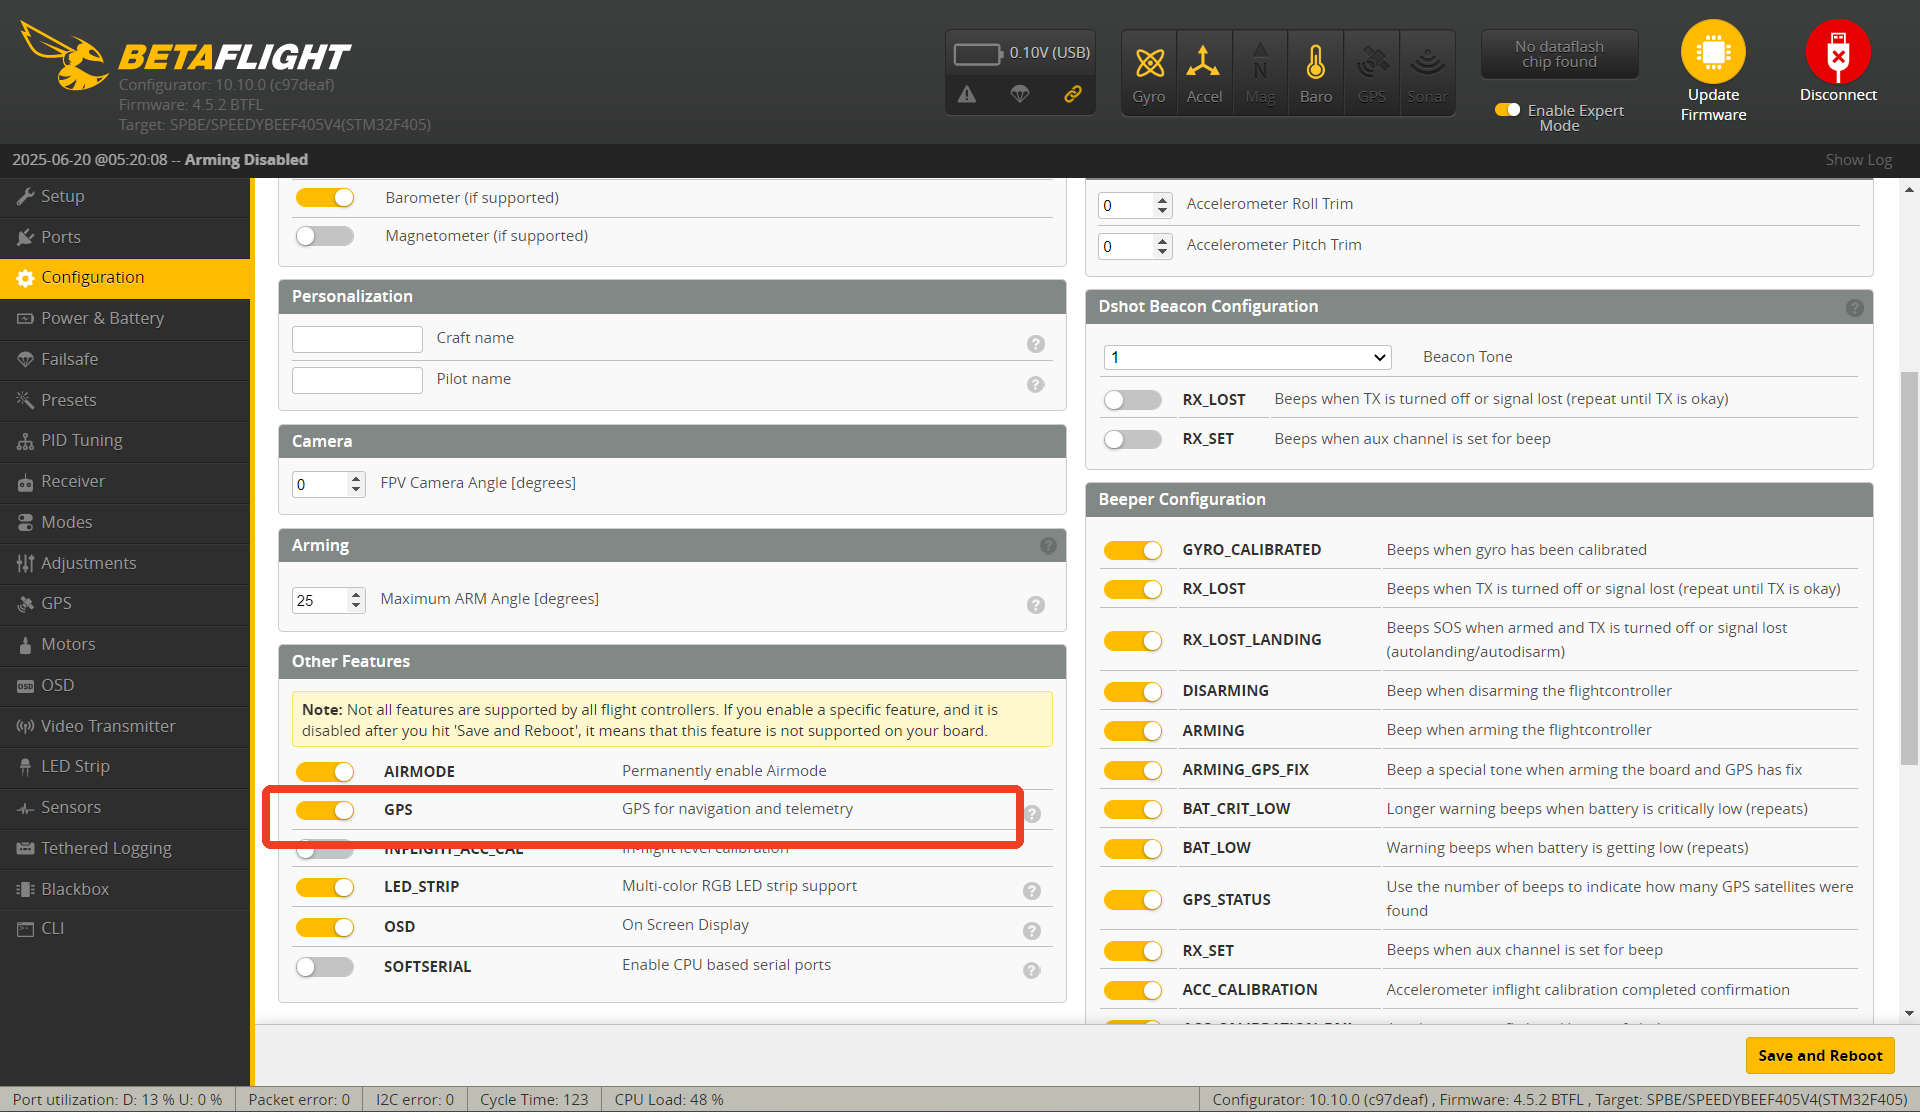
Next steps in Betaflight:
- Enable GPS (default is OFF)
- Select the GPS protocol (most GPS modules use UBLOX)
- Click Save and Reboot
When the GPS LED turns on, it indicates the setup was successful.
Tip: Make sure to also enable Auto Baud and Auto Config.
Note:
When flying at a new location for the first time, the GPS will perform a cold start, which takes longer to acquire satellites (1–2 minutes).
After the first acquisition, subsequent power-ups will be hot starts, reducing satellite lock time to around 1–10 seconds.
This process only enables the GPS — it does not activate GPS Return-to-Home (RTH) functionality yet.